How to Recover CHK Files Using CMD: Definitive Guide
Data corruption is one of the most frustrating experiences for any computer user. You plug in your USB drive or external hard drive only to find your files have disappeared, replaced by a mysterious folder named “FOUND.000” containing files with the .chk extension. These are fragments of corrupted data created by CHKDSK (Check Disk), the built-in Windows utility that intercepts file system errors. While these files may appear as useless gibberish, they often contain the vital data you lost—be it family photos, work documents, or videos. The most direct and efficient way to handle this without downloading bloated software is through the Windows Command Prompt. In this guide, we will provide a comprehensive walkthrough on how to recover chk files using cmd, explain the logic behind the process, and introduce easier alternatives for those who prefer a modern interface.
Key Takeaways
- CHK Files Explained: These are “orphaned” data clusters saved by CHKDSK in hidden
FOUND.000folders. They contain actual data but lack the correct file extensions. - The “Ren” Command: The fastest way to restore these files is by using the
ren *.chk *.extensioncommand in CMD to bulk-restore their original format (e.g.,.jpg,.mp4). - Essential Prep:
- Backup First: Copy the
FOUND.000folder to a healthy drive before starting. - Visibility: Enable “Hidden items” in File Explorer to see the recovery folders.
- Backup First: Copy the
- Attribute Reset: If CMD denies access, run
attrib -r -s -h /s /d *.*to unlock the files’ system and hidden attributes. - CMD Limitations: Manual renaming is a “guessing game” if you have mixed file types (e.g., photos and docs in the same folder).
- Modern Alternative: For automated recovery that identifies file signatures without manual typing, WinfrGUI is the recommended free graphical tool.
What are CHK Files and Why Do They Exist?
Before we dive into the technical execution, it is critical for data integrity to understand what you are working with. When Windows detects a file system discrepancy—often caused by an unexpected power failure, a system crash, or removing a drive without “Safely Ejecting”—it runs a disk check at the next boot.
During this scan, CHKDSK finds “orphaned” data clusters. These are pieces of data that exist on the drive but are no longer linked to a specific filename in the File Allocation Table (FAT) or NTFS index. Windows bundles these fragments into .chk files and hides them in folders like FOUND.000 or FOUND.001.
The files remain inaccessible because their “headers”—the initial bytes of data that tell your computer if a file is a JPEG, a PDF, or an MP3—are disconnected from the operating system’s recognition. By learning how to recover chk files using cmd, you are essentially manually re-indexing these files so Windows can read them again.
Preparing for Recovery: Safety First
When dealing with corrupted data, the first rule of professional recovery is: Never work on the original source.
- Create a Backup: Copy the entire
FOUND.000folder to a healthy drive (like your Desktop or a secondary SSD). - Enable Hidden Items: Open File Explorer, go to the View tab, and check the box for Hidden items. Without this, you won’t be able to see the folders containing your CHK files.
- Check Permissions: Ensure you are logged in as an Administrator. Modifying file system attributes requires elevated privileges.
How to Recover CHK Files Using CMD
The Command Prompt (CMD) is a powerful tool because it allows for batch processing. If you have 500 CHK files, you don’t want to rename them one by one. Using CMD, you can reformat them all in a single second.
Step 1: Open Command Prompt as Administrator
- Press the Windows Key on your keyboard.
- Type cmd.
- Right-click the “Command Prompt” result and select Run as Administrator. This ensures the system won’t block your commands with “Access Denied” errors.
Step 2: Navigate to the Corrupted Drive
You need to point CMD to the drive where your lost files are located. If your USB drive is drive E, type the following and press Enter:
E:
Step 3: Enter the Hidden Folder
Navigate into the folder where the CHK files are stored by typing:
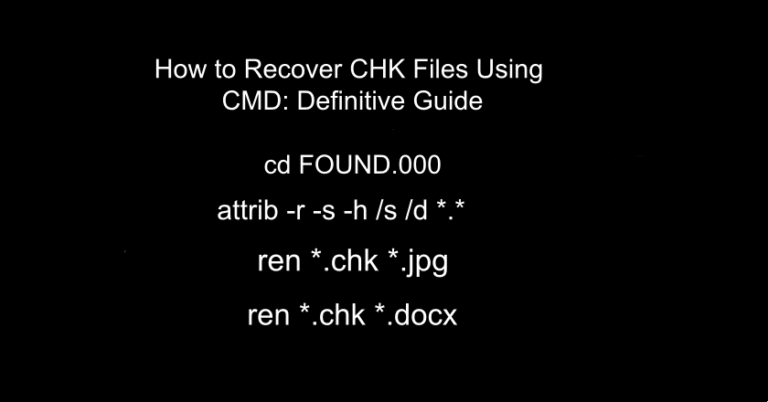
cd FOUND.000
Step 4: Fix File Attributes (If Necessary)
Sometimes CHK files are locked as “System” or “Read-only” files. To unlock them so you can change their extensions, run this command:
attrib -r -s -h /s /d *.*
-r: Removes Read-only attribute.-s: Removes System attribute.-h: Removes Hidden attribute.
Step 5: Execute the Recovery Command
This is the core of how to recover chk files using cmd. You must now tell the system to rename the .chk extension to the format you lost.
If you lost photos (JPG), type:
ren *.chk *.jpg
If you lost Word documents, type:
ren *.chk *.docx
Once you press Enter, all files in that folder will instantly change their format. You can then go to the folder in File Explorer and see if the images or documents open correctly.
The Limitation of the CMD Method
While learning how to recover chk files using cmd is a vital skill, it is not a “magic bullet.” The primary challenge is that a FOUND.000 folder usually contains a mix of different file types. If you rename a .chk file that was originally a video to a .jpg, it will not open. If you don’t know the original file type, you may need to use a “File Header Checker” or repeat the CMD rename process with different common extensions (.png, .pdf, .mp4, .zip) until the files become usable.
WinfrGUI: A Modern, Easier Alternative
If the command line feels too technical, or if you are dealing with a massive drive with thousands of mixed file types, there is a much simpler way to handle this. WinfrGUI is a powerful, free alternative to the manual CMD method. It serves as a graphical user interface for Microsoft’s official Windows File Recovery tool. Instead of typing complex syntax, WinfrGUI allows you to recover data using a simple point-and-click interface.
Why choose WinfrGUI over CMD?
- Automatic Identification: Unlike the manual rename method in CMD, WinfrGUI can scan the internal signatures of the files to determine if they are photos, documents, or videos automatically.
- Deep Scan Mode: If your file system is heavily damaged, WinfrGUI’s deep scan can find fragments that CHKDSK might have missed entirely.
- Safety: It recovers files to a new destination by default, preventing any accidental overwriting of your original data.
If you have tried how to recover chk files using cmd and found that the files are still unreadable, WinfrGUI is the professional-grade next step to ensure your data is actually restored rather than just renamed.
Professional Best Practices for Data Health
To avoid having to search for how to recover chk files using cmd in the future, follow these “Golden Rules” of data management:
- The 3-2-1 Backup Rule: Always keep 3 copies of your data, on 2 different types of media (e.g., an external drive and a cloud service), with 1 copy located off-site.
- Avoid Hard Shuts: Always shut down your PC through the Start menu. A sudden loss of power while the OS is writing to the directory index is the most common cause of CHK files.
- Hardware Health Monitoring: Use tools to monitor the S.M.A.R.T. status of your drives. If a drive starts producing CHK files frequently, it is a sign of physical failure, and the drive should be replaced immediately.
Troubleshooting Common CMD Errors
When attempting to learn how to recover chk files using cmd, users often run into a few common hurdles:
- “The system cannot find the path specified”: This usually means you aren’t in the right drive or the folder is named differently (like
FOUND.001). Use thedircommand to list all folders and verify the name. - “Duplicate file name exists”: If you already have a
file1.jpgin that folder, the rename command might fail for some files. It is best to move the CHK files to a completely empty folder before running the command.
Summary and Final Thoughts
Recovering your data doesn’t always require expensive professional services. By mastering how to recover chk files using cmd, you gain a powerful, built-in way to rescue your files from the “purgatory” of the FOUND.000 folder. It is a fast, free, and effective technique for most common data corruption issues. However, technology has evolved. For users who want a higher success rate with less manual effort, WinfrGUI offers a robust alternative that takes the guesswork out of file extensions. Whichever method you choose, acting quickly and working on a backup copy will give you the best chance of getting your digital life back on track.
Recovery Cheat Sheet
| Step | Command | Description |
| 1 | X: | Switch to the affected drive |
| 2 | cd FOUND.000 | Enter the recovery folder |
| 3 | attrib -r -s -h /s /d *.* | Unlock all files |
| 4 | ren *.chk *.jpg | Change extension to JPG (or docx, etc.) |
🔗 More Tutorials: