Recovery Command Prompt Windows 10: Essential Fix Commands
When your Windows 10 system refuses to boot, gets trapped in an endless restart loop, or exhibits severe instability due to corruption, the standard troubleshooting tools available from the desktop environment become useless. This critical system failure demands a powerful, low-level interface to perform surgical repairs on the operating system’s core components. This is where the Recovery Command Prompt Windows 10—accessible through the Windows Recovery Environment (WinRE)—becomes your indispensable emergency toolkit. It allows experienced users and technicians to bypass the failed graphical user interface (GUI) and interact directly with the disk, boot records, and system files. This environment is the last line of defense before resorting to a complete system reinstallation. This article serves as an authoritative guide, providing the essential, high-impact commands you need to know, starting with the critical step of data preservation. We will detail the proper use of utilities like bootrec, SFC, and DISM—the core tools necessary to rescue a non-functional Windows 10 installation, restore file integrity, and bring your system back to life.
Accessing the Recovery Command Prompt
Before you can begin any repairs, you must first successfully enter the Windows Recovery Environment (WinRE). Since the operating system itself is compromised, this process almost always requires external media.
Prerequisite: Windows 10 Installation Media
The most reliable way to access WinRE and the Recovery Command Prompt is by booting from an official Windows 10 Installation Media (a bootable USB drive or DVD). If you do not have one, you must create one using the Microsoft Media Creation Tool on a working computer.
Step-by-Step Access
- Boot from the Media: Insert the USB drive or DVD and restart your computer. You may need to press a specific key (e.g., F2, F12, Delete, Esc) during startup to enter the boot menu and select your media as the boot device.
- Language Selection: When the Windows Setup screen appears, confirm your language, time, and keyboard preferences. Click Next.
- Initiate Repair: Crucially, do not click “Install now.” Instead, click the small link in the bottom-left corner that says “Repair your computer.”
- Navigate to Command Prompt: From the repair menu, follow this path:
- Click “Troubleshoot.”
- Click “Advanced options.”
- Finally, click “Command Prompt.”
The system will now boot into a fully functional command-line environment, giving you control over the damaged Windows installation.
Drive letters are often re-assigned in WinRE. Your main Windows partition (usually ‘C:’) might appear as ‘D:’, ‘E:’, or another letter. Before running commands like SFC or chkdsk, use the DIR command (DIR D:) to verify the drive letter that contains your Users, Program Files, and Windows directories.
Phase 1: Data Recovery Priority: Using WinFR and WinfrGUI
Before making any changes to a potentially failing drive, the highest priority is often data extraction. The Command Prompt in WinRE allows you to run Microsoft’s official data recovery tool, Windows File Recovery (WinFR).
Windows File Recovery: WinFR
- Purpose: $WinFR$ is a free, command-line tool released by Microsoft for recovering accidentally deleted or corrupted files from local drives, including those in a damaged state.
- Relevance to Recovery Command Prompt: While WinFR itself is not pre-installed in WinRE, it can often be downloaded and run from a separate working USB drive using the Command Prompt, or used after the system is partially repaired.
WinfrGUI: Graphical Interface
- Purpose: WinfrGUI is a third-party graphical user interface (GUI) designed to simplify the complex command-line syntax of WinFR.
- Practicality: For users uncomfortable with command-line syntax, using a third-party recovery utility with a GUI (run from bootable media or a separate working system) is often the most practical and efficient way to retrieve critical files before attempting destructive repairs like a system reset.
General Recovery Command Structure (Using WinFR)
If you were to execute WinFR from the command line after downloading it, the general syntax involves specifying the source drive, destination drive (must be different), and recovery mode:
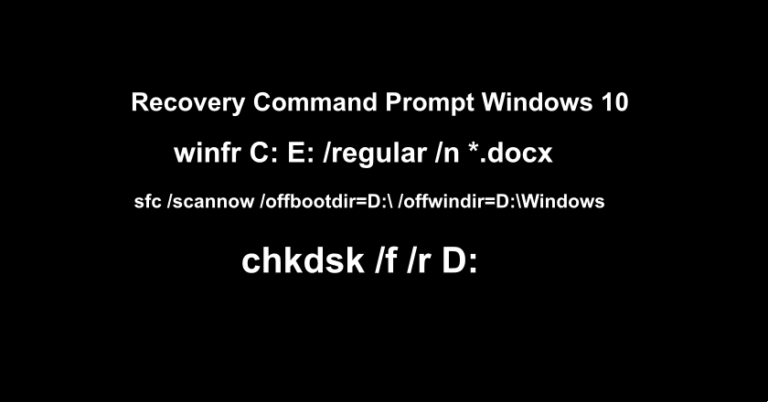
winfr C: E: /regular /n *.docx
- Note: This command structure is highly complex and requires careful planning of the destination drive (e.g., an external USB drive) to avoid overwriting lost data. Always prioritize backing up critical data before proceeding to boot repairs.
Phase 2: Fixing Boot Configuration: The bootrec Commands
The most common reason for a system failure is damage to the Master Boot Record (MBR) or the Boot Configuration Data (BCD). These two elements tell your computer how and where to load Windows. We use the bootrec utility to fix them.
Goal: Repair issues with the Master Boot Record MBR and Boot Configuration Data BCD.
To effectively resolve these boot problems, familiarity with the full capabilities of the Recovery Command Prompt Windows 10 environment is critical. When you are in the Command Prompt, the following sequence of commands is typically run to ensure all boot components are correctly written and configured.
Command 1: bootrec /fixmbr
- Purpose: This command writes a new MBR (Master Boot Record) to the system partition without overwriting the existing partition table. The MBR is the first sector of the hard drive and contains the executable code necessary to start the boot process.
- When to Use: When you encounter errors like “Operating System Not Found,” or if a non-Windows operating system overwrote the Windows boot loader.
Command 2: bootrec /fixboot
- Purpose: This command writes a new boot sector to the system partition. The boot sector is responsible for directing the computer to the next stage of the boot process.
- When to Use: It is often used after
fixmbr, or specifically when the boot sector is corrupted or replaced by an incompatible boot sector. For systems using UEFI (most modern Windows 10 PCs), this command may sometimes result in an “Access is denied” error if the boot configuration is locked; in this case, proceed to BCD repair or thediskpartsection.
Command 3: bootrec /scanos
- Purpose: This command scans all disks for installations compatible with Windows and lists the installations that are found. This step is a diagnostic check to see what Windows installations the system can detect.
Command 4: bootrec /rebuildbcd
- Purpose: This is the most comprehensive command for BCD repair. It scans all disks for compatible installations, lists them to the user, and asks if you want to add the detected installation(s) to the Boot Configuration Data store.
- Note: If successful, this process re-creates the entire BCD file, resolving the majority of boot-related corruption issues. This command is often run as the final step in the
bootrecsequence.
Phase 3: Repairing System File Integrity: SFC and DISM
If your computer boots but crashes or operates erratically, the issue often lies with corrupted core Windows files (DLLs, EXEs). The System File Checker and Deployment Image Servicing and Management tools are used to check and replace these files using a known good source.
Goal: Fix corrupted core Windows files that cause crashes or performance issues.
System file integrity is crucial for stability, and the ability to run $SFC$ and $DISM$ makes the Recovery Command Prompt Windows 10 a powerful recovery tool.
Using the System File Checker: SFC
The standard sfc /scannow command is used to check and verify the integrity of all protected system files and replace incorrect versions with correct Microsoft versions. However, in the Recovery Environment, you must use the offline syntax because the Windows installation you are fixing is not the active operating system.
The Crucial Offline Command:
sfc /scannow /offbootdir=D:\ /offwindir=D:\Windows
- Explanation:
/scannow: Runs the scan and repair immediately./offbootdir=D:\: Specifies the drive letter of the system partition (where the boot files reside)./offwindir=D:\Windows: Specifies the path to the Windows directory (the folder containing the OS files you are repairing).
- Action: This command scans and replaces corrupted Windows system files.
Using the Deployment Image Servicing and Management DISM Tool
If the System File Checker (SFC) fails to complete, or reports that it could not fix all issues, the Windows image itself (the source files SFC uses) may be corrupted. In this scenario, the DISM tool is necessary to repair the base Windows installation image.
Note: When using DISM in WinRE (offline mode), the syntax is different from when you run it while logged into Windows (online mode). You must specify the location of the Windows image you are trying to repair.
The Sequential DISM Commands (Replace ‘D:’ with your Windows drive letter):
- CheckHealth: Determines if the image has been flagged as corrupted.
DISM /Image:D:\ /Cleanup-Image /CheckHealth - ScanHealth: Performs a more thorough scan to check the extent of the corruption.
DISM /Image:D:\ /Cleanup-Image /ScanHealth - RestoreHealth (The Fix): Repairs the local image using a known good source file from the installation media.
DISM /Image:D:\ /Cleanup-Image /RestoreHealth
- Purpose: By running these commands, you repair the fundamental component of the operating system, allowing SFC to run successfully afterward, or fixing issues that SFC could not reach.
Phase 4: Disk and File Management: chkdsk and diskpart
Sometimes, the root cause of boot failure or file corruption is a physical problem with the hard drive or a misconfigured partition. These two utilities address those deeper issues.
Goal: Address underlying hardware/disk issues and manage partitions.
The last layer of software troubleshooting available in this toolset is disk management, rounding out the power of the Recovery Command Prompt Windows 10 to address physical disk errors and partition configuration.
Checking for Disk Errors: chkdsk
The Check Disk utility is vital for identifying and fixing logical file system errors (e.g., cross-linked files, bad sectors) on the hard drive.
Command:
chkdsk /f /r D:
- Explanation of Switches:
/f: Tellschkdskto fix errors it finds on the disk./r: Locates bad sectors and attempts to recover readable information (implies/f).D:: Replace with your actual Windows partition drive letter.
- Purpose: This utility scans and fixes logical file system errors on the drive. Depending on the size and speed of the drive, this process can take a significant amount of time—be patient and let it complete.
Advanced Partition Management :diskpart
Before attempting any boot repairs, you may need to use diskpart to verify that the correct partition is marked as “Active” or to correctly identify drive letters.
Commands (Sequential):
- Start the Utility:
diskpart - List Volumes: Identify all visible partitions and their associated drive letters. This is critical for knowing which letter to use for SFC and chkdsk.
list volume - Select Volume: Select the partition that contains your Windows boot files (often the small FAT32 partition on UEFI systems, or the system reserved partition on older MBR systems).
select volume X - Mark as Active (MBR systems only): For older MBR systems, you must ensure the boot partition is marked active. (Skip for modern UEFI systems).
active - Exit Diskpart:
exit
- Purpose: Used to identify correct drive letters and ensure the primary boot partition is correctly configured for the operating system to load.
Conclusion
You now possess the essential commands of the Recovery Command Prompt Windows 10 to address the most common and severe system failures. We began with the crucial first step: data recovery using tools like WinFR and WinfrGUI to protect your files. Then, by meticulously following the steps for fixing the MBR and BCD (bootrec), repairing critical system files (SFC and DISM), and validating disk health (chkdsk), you have performed a level of maintenance that no automated tool can match.
🔗 Also Read: