How to Use Winfr–Syntax, Examples, and Recovery Tips
Oops — you just deleted an important file, and now you’re wondering how to use winfr to get it back. Don’t worry, you’re not alone! Winfr (Windows File Recovery) is Microsoft’s free, powerful tool designed exactly for situations like this. It’s a bit tricky at first because it runs in the command prompt, but this guide will walk you through how to use Winfr step-by-step, with clear examples and handy tips to boost your success. And if typing commands isn’t your thing, no sweat — we’ll also introduce WinfrGUI, a simple, visual alternative that makes file recovery easy for anyone. Whether you’re a beginner or have tried Winfr before, this guide is here to help you confidently recover your lost files and turn a stressful moment into a success. Ready? Let’s dive into how to use winfr the right way!
What Is Winfr and What Can It Recover?
Winfr, short for Windows File Recovery, is a command-line application introduced by Microsoft to help users recover deleted files on NTFS, FAT, exFAT, and ReFS file systems. It’s available for free on the Microsoft Store and works on Windows 10 version 2004 and later, including Windows 11.
You can use Winfr to recover:
- Files deleted from Recycle Bin
- Files lost due to accidental formatting
- Lost data from corrupted or inaccessible partitions
- Specific file types like documents, photos, videos, and archives
However, since Winfr is purely CLI-based, many users find it difficult to use without prior command-line experience.
Basic Syntax of Winfr: Step-by-Step Breakdown
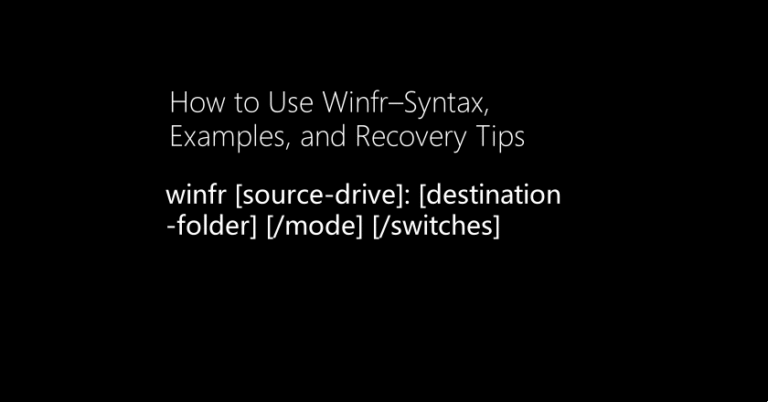
Using Winfr effectively starts with understanding its basic command structure. Here’s the general syntax you’ll use in the Command Prompt:
winfr [source-drive]: [destination-folder] [/mode] [/switches]
Let’s break down each part:
- source-drive: this is the drive letter where your deleted files were originally located — for example,
C:orE:. - destination-folder: this is the folder path where Winfr will save recovered files.
- Important: this must be on a different drive than the source to avoid overwriting the files you want to recover. For example, if your source is
C:, your destination could beD:\Recovery. - /mode: choose the scan mode based on your situation:
/regular— Quick scan, best for recently deleted files./extensive— Deep scan, useful for formatted drives or severe corruption./segment— Scans specific file segments (advanced users).
- /switches: optional filters to narrow your search, such as
/nto specify certain file types or folder paths.
How to Use Winfr – 5 Practical Examples
Alright, now that you’ve got the hang of the basics on how to use Winfr, let’s dive into some real-life examples. These practical scenarios will show you exactly what commands to run depending on your situation — whether you want to recover everything, just a few specific files, or tackle a corrupted drive. Don’t worry, I’ll break each one down step-by-step so you can follow along without any confusion. Let’s jump in and get those lost files back!
Example1. Recover all deleted files from drive C: to D:
- Open Command Prompt as administrator.
- Type the command above and press Enter.
- Winfr will scan the entire
C:drive using the Regular mode, which is faster and best for recently deleted files. - All recoverable files will be saved to the
D:drive in a folder namedRecovery_[date].
winfr C: D: /regular
Explanation: this command is a straightforward way to recover any deleted files from your main drive (C:) without filtering. It’s great if you want to retrieve everything lost recently.
Example 2. Recover only Word documents (.docx):
- Run Command Prompt as administrator.
- Enter the command above to scan the
C:drive. - The
/n *.docxfilter restricts the recovery to Word document files only. - Check the
D:drive for recovered.docxfiles once the process completes.
winfr C: D: /regular /n *.docx
Explanation: using the /n switch lets you target specific file types, making the scan faster and more focused. This is perfect if you only want to recover your Word documents without sifting through other file types.
Example 3. Recover files deleted from a specific folder:
- Open Command Prompt with admin rights.
- Use this command to scan the
Documentsfolder inside userJohn’s profile on theC:drive. - The scan looks only inside that folder for deleted files.
- Recovered files will be saved on the
D:drive.
winfr C: D: /regular /n \Users\John\Documents\
Explanation: this example helps when you know exactly where the deleted files were located. Instead of scanning the whole drive, you limit the search to a folder, speeding up recovery and reducing clutter.
Example 4. Recover files from a formatted or corrupted drive:
- Open Command Prompt as administrator.
- Type the above command to scan the entire
E:drive. - The
/extensivemode performs a deep scan, which takes longer but is effective for formatted or damaged drives. - Check the
D:drive for recovered files when done.
winfr E: D: /extensive
Explanation: if a drive was accidentally formatted or is corrupted, the quick regular scan won’t find much. Extensive mode digs deeper, scanning the disk sectors to find recoverable files even when the file system is damaged.
Example 5. Recover multiple file types in one scan:
- Run Command Prompt with admin privileges.
- Execute the command above to scan the
C:drive extensively. - The command searches for both
.jpgimages and.pdfdocuments in one go. - Recovered files will be saved on the
D:drive.
winfr C: D: /extensive /n *.jpg /n *.pdf
Explanation: this command is perfect when you want to recover multiple types of important files without running separate scans. Using multiple /n switches tells Winfr to look for several file types at once, saving time and effort.
Recovery Tips for Using Winfr Effectively
Using Winfr can be tricky at first, but following these practical tips will boost your chances of a successful file recovery:
1. Always use a different drive or partition as your destination folder.
When you recover files, saving them back to the same drive you’re scanning can overwrite the very data you want to restore. To avoid this, pick another drive (like a USB stick or a second hard drive) to save recovered files safely.
2. Switch to /extensive mode if the quick scan doesn’t find your files.
The regular scan is fast but limited to recently deleted files. If nothing shows up, don’t panic — try the /extensive mode. It performs a deeper scan and can recover files from formatted or corrupted drives, though it takes longer.
3. Use file filters (/n) to narrow down your search.
If you know the type of files you want (like photos, documents, or videos), use filters such as /n *.jpg or /n *.docx. This speeds up the scan and helps avoid sorting through tons of unrelated files afterward.
4. Close unnecessary programs before starting recovery.
Running many apps at once can interfere with the recovery process or slow down your system. Close background programs to give Winfr the best chance to scan efficiently without interruptions.
5. Run Command Prompt as an administrator.
Sometimes, permission issues can prevent Winfr from accessing certain drives or folders. Right-click on Command Prompt and select “Run as administrator” to ensure Winfr has the access it needs.
Easier Alternative: Try WinfrGUI (Free & Visual)
Let’s be honest: Command-line tools aren’t for everyone. If you find Winfr intimidating or complicated, WinfrGUI offers a simple, 100% free graphical interface built on the same powerful Winfr engine.
Why try WinfrGUI?
- No need to remember commands or switches—just point and click.
- Select your source and destination drives with easy dropdowns.
- Choose the file types you want to recover using simple checkboxes.
- Start recovery with a single click—no confusing syntax.
- It’s completely free with no ads or hidden charges, forever.
If you prefer a visual, beginner-friendly tool without losing recovery power, WinfrGUI is the best choice.
Common Issues and How to Fix Them
Even with the right commands, you might encounter some common problems. Here’s how to troubleshoot:
1. Error: Source and destination must be different
This happens if you try to save recovered files to the same drive you’re scanning. To fix it, choose a different drive (like an external USB or another partition) as the destination folder.
2. No files recovered after scan
If Winfr doesn’t find any files, try switching to /extensive mode for a deeper scan. Also, double-check your filters (/n) or try scanning a different folder or drive to increase your chances.
3. Winfr crashes or closes immediately
This usually means you didn’t run Command Prompt with administrative privileges. Close the window, then reopen Command Prompt by right-clicking it and selecting “Run as administrator.”
4. Recovered files have random or unreadable names
Winfr sometimes can’t restore original file names or folder structures, especially after deep scans. Don’t worry—check the file types, timestamps, and contents to identify your files. Renaming them afterward can help keep things organized.
Related Commands to Explore for File Recovery and System Maintenance
Want to expand your troubleshooting toolkit? These Windows commands work well alongside Winfr for better system health and file management:
robocopy – Reliable file and folder backup
Perfect for copying large amounts of data or backing up recovered files quickly and efficiently.
chkdsk – Check and repair disk errors
Use this command to scan your drives for logical or physical errors that could be causing data loss or preventing recovery.
attrib – Show hidden or system files
Sometimes files aren’t deleted but just hidden by the system. Use attrib to reveal these files before assuming they’re lost.
sfc /scannow – System file checker
Repairs corrupted or missing Windows system files, helping stabilize your PC before or after recovery attempts.
Conclusion
Now that you know how to use Winfr, you’ve unlocked a powerful, free way to recover deleted files on your Windows PC. Sure, the command line can seem intimidating, but with the right steps and modes, Winfr can rescue files lost by accident, formatting, or corruption. Just remember to save recovered files to a different drive and use the extensive mode if a quick scan doesn’t find what you need. And if commands aren’t your thing, WinfrGUI offers an easy, friendly way to recover files without any typing — just point and click. Knowing how to use Winfr gives you confidence and control when disaster strikes. So next time you accidentally delete something important, you’ll be ready to recover it quickly and stress-free. Go ahead — reclaim your files and peace of mind!
🔗 Also Read: