Recover Permanently Deleted Files Windows 11 Using CMD
Accidentally deleted important files in Windows 11 and emptied the Recycle Bin? Don’t panic—there’s still hope. When files are permanently deleted, they aren’t immediately erased from your drive. With the right tool and method, you can recover them. One of the most reliable ways is using the built-in Command Prompt utility via Microsoft’s Windows File Recovery tool. This method allows you to deeply scan your drives and restore deleted documents, photos, videos, and more—even if they’re no longer visible. In this guide, we’ll walk you through how to recover permanently deleted files Windows 11 using CMD, step by step. You’ll learn the syntax, parameters, and common use cases for winfr, plus how to handle issues and what to do if CMD fails. Whether you’re tech-savvy or a beginner, this article will help you safely and efficiently recover your data without third-party software.
What Is the Windows File Recovery CMD?
winfr (Windows File Recovery) is a command-line tool developed by Microsoft to help users recover permanently deleted files in Windows 10 and 11. It supports a variety of file systems, including NTFS, FAT, exFAT, and ReFS, and offers three recovery modes—Regular, Segment, and Signature—each tailored to different data loss scenarios, such as accidental deletion, drive formatting, or corrupted partitions.
Basic Syntax
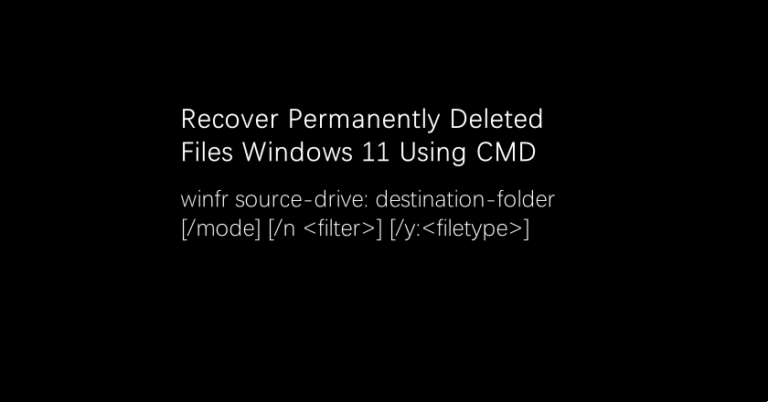
The winfr command follows this structure to recover permanently deleted files in Windows 11 using CMD:
winfr source-drive: destination-folder [/mode] [/n <filter>] [/y:<filetype>]
<source-drive>: The drive where files were deleted (e.g.,C:)<destination-folder>: Where recovered files will be saved (must be on a different drive)/mode: Select recovery mode –Regular,Segment, orSignature/n <filter>: Specify file name/path or use wildcards like*.docx/y:<filetype>: (Optional) Set specific file extensions for Signature mode (e.g.,/y:jpg,png)
Note: The destination folder must not be on the same drive as the source to avoid data overwriting.
Parameter Explanation Table
| Parameter | Description |
|---|---|
source-drive: | Drive where files were deleted (e.g., C:) |
destination-folder | Folder to save recovered files (must be on a different drive) |
/regular | Default mode for recent deletions |
/segment | Advanced mode for fragmented or older files |
/signature | File-type-based scan for formatted or corrupted drives |
/n <filter> | Specify file name or pattern (e.g., *.docx, /folder/.pdf) |
/y:<filetype> | File types to scan for in signature mode (e.g., jpg, mp4, zip) |
Usage Examples
To help you understand how to use the command more effectively, here are five real-world examples based on common file recovery scenarios:
Example 1: Recover permanently deleted Word documents
Step 1: You permanently deleted some Word documents from the C: drive.
Step 2: You want to save the recovered files to D:\Recovery.
Step 3: Run the command in regular mode filtering for .docx files:
winfr C: D:\Recovery /regular /n *.docx
Explanation: This command recovers permanently deleted Word documents from drive C: and saves them to D:\Recovery.
Example 2: Restore PDFs from a specific folder
Step 1: The deleted PDF files were originally in C:\Users\John\Documents.
Step 2: Use segment mode for more thorough scanning.
Step 3: Recover files named like report*.pdf:
winfr C: E:\Restored /segment /n \Users\John\Documents\report*.pdf
Explanation: Recovers PDF files that start with “report” from John’s Documents folder to E:\Restored.
Example 3: Recover deleted photos from SD card
Step 1: Your SD card is connected as the D: drive.
Step 2: Use signature mode to target media file types.
Step 3: Recover .jpg and .png files to F:\Output:
winfr D: F:\Output /signature /y:jpg,png
Explanation: This scans your SD card for lost photo files—even if the folder structure is gone—and restores them to F:\Output.
Example 4: Recover Excel files from Downloads folder
Step 1: You deleted Excel files from C:\Users\John\Downloads.
Step 2: Use regular mode for recent deletions.
Step 3: Target only .xlsx files:
winfr C: E:\Recovered /regular /n \Users\John\Downloads\*.xlsx
Explanation: Recovers recently deleted Excel spreadsheets from the Downloads folder and saves them to E:\Recovered.
Example 5: Deep scan to recover all file types
Step 1: You lost files from an external drive (F:).
Step 2: Choose D:\RestoreAll as the destination.
Step 3: Run a segment mode scan for all file types:
winfr F: D:\RestoreAll /segment /n *.*
Explanation: Best for deep recovery when you don’t know which file types were lost—restores everything it can find.
What If CMD Doesn’t Work? Try WinfrGUI
If Command Prompt feels too complex or the winfr command fails to recover your files, don’t worry—WinfrGUI offers a hassle-free alternative. It’s a completely free graphical tool built on Microsoft’s Windows File Recovery engine, designed for users who prefer a simple point-and-click interface.
✅ No command-line knowledge required
✅ Fully supports all Windows File Recovery modes
✅ Completely free
✅ Easily recover documents, videos, and images
WinfrGUI makes it easier than ever to recover permanently deleted files on Windows 11 without the frustration of command-line syntax.
Common Issues & Helpful Tips
- Always run CMD as Administrator to ensure proper access and avoid permission-related errors.
- Use separate drives for source and destination to prevent data from being overwritten during recovery.
- Recovered files may have generic or changed names if original metadata is lost—check file contents carefully.
- Do not install new programs or save files to the source drive after deletion; this reduces the chance of permanent data loss.
- Note that Signature mode does not preserve folder structure or original filenames—it focuses solely on file types.
Related Commands You May Need
Below are four useful Windows commands that can support your file recovery process or help manage files and system issues:
| Command | Description |
|---|---|
chkdsk | Checks and repairs file system errors on a drive, which may help recovery. |
attrib | Displays or changes file attributes—useful for finding hidden files. |
sfc /scannow | Scans and repairs corrupted system files that might interfere with recovery. |
cd | Changes the current directory in Command Prompt, helpful for navigation. |
These commands are especially helpful before or after running winfr, making the file recovery process on Windows 11 more effective and controlled.
Conclusion
Permanently losing files doesn’t mean they’re gone forever. As we’ve shown, you can still recover permanently deleted files Windows 11 using CMD by running Microsoft’s official winfr tool. Whether you’re restoring Word documents, Excel files, images, or videos, using Command Prompt gives you powerful control over the recovery process. Just remember to follow the correct syntax, choose the right recovery mode, and avoid writing new data to the source drive. For users who prefer a more visual and user-friendly method, WinfrGUI is a free and reliable alternative that brings all the power of winfr to an intuitive interface. It’s ideal if you’re uncomfortable with command-line tools or if the CMD method fails. In either case, acting quickly increases your chance of a successful recovery. Don’t let accidental deletion cause permanent damage—use the right tool today to bring your files back to life.
🔗 Also Read: