How to Use Windows File Recovery Windows 11
Accidentally deleted an important file on Windows 11? Emptied the Recycle Bin and now panicking? Don’t worry — you still have a chance to get those files back! In fact, Microsoft offers a free tool that can help: Windows File Recovery. In this guide, I’ll walk you through how to use Windows File Recovery Windows 11 step by step. Whether you’ve lost photos, documents, or entire folders, this tool can scan your hard drive and help recover what’s gone. I’ve personally tested these methods, so I know they work — even if you’re not a tech expert! If the idea of using command lines feels intimidating, I’ll also show you an easier alternative that gives you the same recovery power without the hassle. Let’s get started so you can bring your lost files back where they belong!
What is Windows File Recovery?
Windows File Recovery is a free tool from Microsoft that helps you get back files you’ve accidentally deleted from your computer or external storage devices. Whether it’s a word document, family photo, or an important work file, this tool gives you a second chance to recover it — as long as you act fast. What makes it different from most recovery apps? It runs through the command line, meaning there’s no buttons or menus — you’ll need to type out commands to use it. While that might sound a bit technical, don’t worry: once you know the right commands, it’s powerful and effective.
What it works with:
- File systems: NTFS (default for Windows), FAT32, exFAT, ReFS
- Devices: Internal drives, SSDs, external hard drives, USB flash drives, memory cards
What it can recover:
- Documents, photos, videos, music, and many other file types
What it can’t do:
- It won’t work on cloud storage (like OneDrive) or network locations
- There’s no graphical interface — it’s all command line
If you’d rather avoid typing commands, consider tools like WinfrGUI, which gives you the same recovery engine but with a friendly interface.
How to Download and Install Windows File Recovery on Windows 11
Getting Windows File Recovery on your PC is quick and easy. Just follow these steps:
1️⃣ Open the Microsoft Store — Click the Start menu and type “Microsoft Store,” then open it.
2️⃣ Search for Windows File Recovery — In the Store’s search bar, type Windows File Recovery and press Enter.
3️⃣ Download and install — Find the official app by Microsoft, click Get, and let it install. It’s completely free.
After installing, you’ll need to run Windows File Recovery as an administrator. Simply right-click the app in your Start menu and select Run as administrator — this gives it the permissions it needs to scan and recover your files properly. If you run into issues like the “error: failed to push some refs to”, or want to learn more about file recovery, check out our detailed guide here: Fix “error: failed to push some refs to” and Recover Files.
Basic Syntax of the Windows File Recovery Command
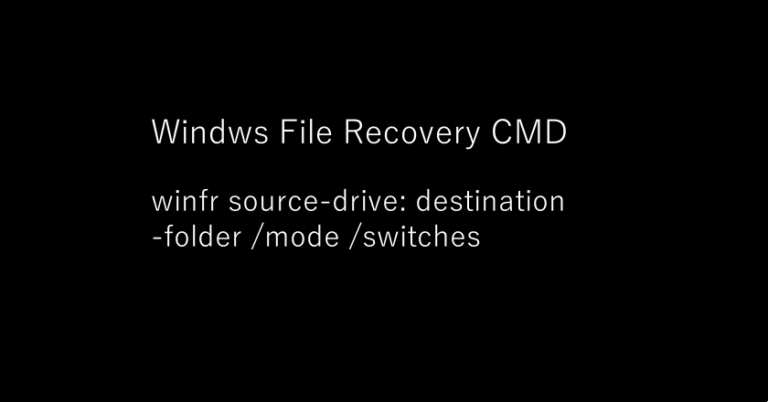
To use Windows File Recovery, you’ll need to type commands in a specific format. Here’s the basic structure:
winfr source-drive: destination-folder /mode /switches
source-drive: This is the drive where your files were deleted (for example, C: or E:).
destination-folder: This is where the recovered files will be saved. It must be on a different drive than the source — otherwise, recovery might fail or overwrite data.
/mode: Choose a recovery mode:
/regular— for recently deleted files/extensive— for files deleted a while ago, or after formatting or corruption
/switches: Optional filters to narrow your search, like by file type or folder.
Pay close attention to spaces, colons, and slashes — the command won’t work if the syntax is wrong.
How to Use Windows File Recovery: Examples
Here are some common ways to use the tool — I’ve added notes to help you understand what each part does:
Example 1: Recover recently deleted files from C: drive to D: drive
winfr C: D:\Recovery /regular
➡ This tells Windows File Recovery to scan the C: drive (where files were lost) and save recovered files into a folder called “Recovery” on the D: drive. It uses /regular mode, which works best for files that were deleted recently (for example, files you just removed from the Recycle Bin).
Example 2: Recover files after formatting the C: drive (deeper scan)
winfr C: D:\Recovery /extensive
➡ This runs a more thorough scan using /extensive mode, ideal for recovering files after formatting, partition issues, or file system corruption. Again, results will be saved in D:\Recovery.
Example 3: Recover only Word documents from the C: drive
winfr C: D:\Recovery /regular /n *.docx
➡ This command limits recovery to files ending with .docx (Word documents). The /n switch helps focus the scan so it’s faster and less cluttered.
Example 4: Recover photos (JPG format) from a USB drive (E:) to D:
winfr E: D:\USBRecovery /extensive /n *.jpg
➡ This scans your USB drive deeply and saves recovered JPG images to the D:\USBRecovery folder. Useful when files were deleted long ago or after formatting the USB.
An Easier Alternative: WinfrGUI
If typing commands feels overwhelming, you can try WinfrGUI — it’s a free tool that gives you a clean, graphical interface bLet’s be honest — not everyone feels comfortable typing out long commands in a terminal window. If you want the power of Windows File Recovery without the stress of command lines, WinfrGUI is a great solution. WinfrGUI is a 100% free tool that gives you a simple, click-and-recover interface. It’s built on the same Microsoft recovery engine, so you get reliable results — just with a lot less hassle.
Why choose WinfrGUI?
✅ No command lines — just a clean, user-friendly interface
✅ Quick file type filters (recover only what you need)
✅ Same recovery power as Windows File Recovery — without the learning curve
Troubleshooting FAQ for Windows File Recovery on Windows 11
Q1. What should I do first after deleting files by mistake?
If you accidentally delete files, the very first thing you should do is stop using the drive immediately. Any new data written to that drive could overwrite the deleted files, making them impossible to recover. Avoid saving new files, installing software, or even browsing on that drive until you attempt recovery.
Q2. Can I save the recovered files back to the same drive?
No, it’s important not to save recovered files on the same drive where the data was lost. Saving files to the same drive risks overwriting other deleted files you might want to recover later. Always choose a separate drive, external USB, or a different partition as the destination folder for recovery.
Q3. Which recovery mode should I try first?
Start with Regular mode, which scans recently deleted files and is much faster. If Regular mode doesn’t find your files, switch to Extensive mode. Extensive mode performs a deeper scan and can recover files deleted a long time ago, or those lost due to formatting or corruption—but it takes longer to complete.
Q4. Why is Windows File Recovery not finding my files?
There are a few common reasons for this:
- You may be scanning the wrong drive letter—verify the source drive where files were lost.
- You might be using Regular mode when Extensive mode is needed for older or formatted files.
- Your command syntax could have errors—double-check spelling, spaces, colons, and slashes.
Q5. What if Windows File Recovery gives a syntax error?
Windows File Recovery requires exact command syntax. Even a missing colon (:), slash (/), or extra space can cause errors. Carefully review your command for mistakes. For example, winfr C: D:\Recovery /regular is correct, but missing the colon like C D:\Recovery /regular will cause a syntax error.
Q6. Can I recover files from an external USB or SD card?
Yes! Just identify the correct drive letter for your USB or SD card (like E: or F:) and use it as the source in your command. For example: winfr E: D:\USBRecovery /extensive. Always remember to recover files to a different drive than your source to avoid overwriting.
Conclusion
Losing files can feel like a nightmare, but now you know exactly how to use Windows File Recovery Windows 11 to get them back. While the tool might look a bit technical at first, with the right commands you can recover deleted files from your hard drive, USB, or SD card in no time. And if typing out commands isn’t your thing? Tools like WinfrGUI offer the same recovery engine with a friendly interface that anyone can use. No matter which method you choose, the key is to act fast — the sooner you try recovery, the better your chances. I hope this guide helps you save your files! If you found it useful, don’t forget to bookmark it, share it, or leave a comment. And remember: back up your important data regularly to avoid the stress of data loss in the future!
🔗 Also Read: How to Use WinFR to Recover Deleted Files on Windows