How to Create a Windows 10 Recovery Disk in Minutes

Ever had your Windows 10 PC crash out of nowhere—and refuse to boot up again? It’s one of the worst feelings, especially when your important files, photos, or work projects are locked behind a black screen.
But here’s the good news: you can prevent a total disaster by creating a Windows 10 recovery disk right now—before something goes wrong. This handy little USB drive can help you troubleshoot startup problems, restore your system, or even reinstall Windows if needed. The best part? You don’t need to be a tech expert. It only takes a few minutes, and the tools are already built into your system. In this guide, I’ll walk you through exactly how to create a recovery disk in Windows 10, what to do with it, and how to stay protected in 2025. Don’t wait until it’s too late—this small step could save your entire PC.
Windows 10 Recovery Disk: What & How
A Windows 10 recovery disk is a bootable USB drive or DVD that helps you repair or restore your PC when things go wrong. Whether you’re facing boot failures, system crashes, or malware damage, this tool gives you access to:
- Startup Repair
- System Restore
- Command Prompt
- Reset This PC
- System Image Recovery
It won’t automatically reinstall Windows along with your apps and files unless you include system files during setup—but it’s essential for getting back into a locked or non-booting computer.
What You’ll Need to Create One:
- A working Windows 10 PC
- A USB flash drive (16GB or more) — all existing files on it will be erased
- Administrator access to your PC
- (Optional) An external drive if you plan to create a full system image
Ready to get hands-on? Here are the most straightforward methods to create a recovery disk that can save your PC when disaster strikes.
Method 1: Create a Recovery Drive Using Windows Built-in Tool
This is the simplest and fastest way to create a recovery disk. It uses Windows’ built-in tool and takes only a few clicks.
Step-by-Step Instructions
Step 1: Plug in a USB flash drive with at least 16 GB of space. Be aware: all data on it will be erased.
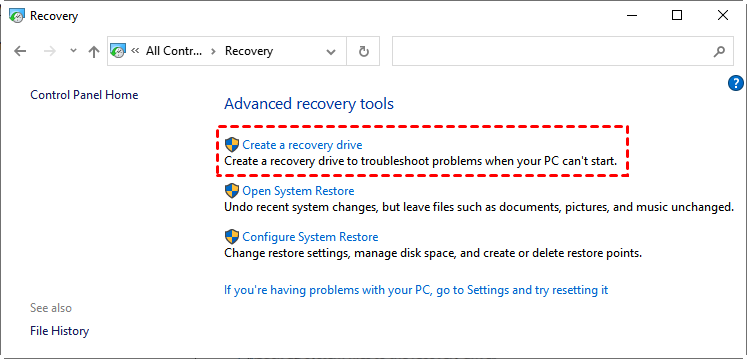
Step 2: Press Windows + S, type “Recovery Drive”, and click on “Create a recovery drive”. Click Yes if prompted by User Account Control.
Step 3: In the recovery drive window, check “Back up system files to the recovery drive” (recommended), then click Next.
Step 4: Choose your USB drive from the list and click Next.
Step 5: Review the warning that your drive will be formatted, then click Create. Wait while Windows creates the recovery drive.
Step 6: When the process completes, click Finish and safely eject your USB. Store it somewhere safe—you’ll need it if Windows ever fails to boot.
Time needed:
- ⏱Without system files: ~5–10 minutes
- ⏱With system files: ~20–30 minutes
Pros & Cons:
- ✅No third-party software needed
- ✅Built into all Windows 10 editions
- ✅Works with most standard USB drives
- ❌Won’t include personal files or installed applications
- ❌Won’t work if your system files are already damaged
Method 2: Create a Full System Image (Optional But Powerful)
If you want a complete backup—including your apps, settings, and personal files—you should consider creating a system image. A system image is a snapshot of your entire Windows installation. It can be restored later to bring your PC back to its exact state.
How to Create a System Image
Step 1: Plug in an external hard drive or connect to a network location with enough storage (at least 50–100 GB).
Step 2: Press Windows + S, search for “Control Panel”, go to System and Security > Backup and Restore (Windows 7).
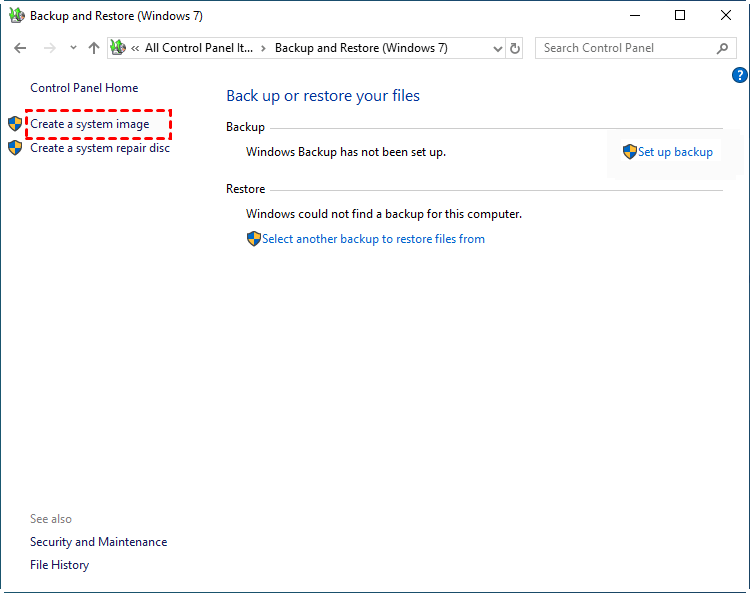
Step 3: In the left panel, click “Create a system image.”
Step 4: Select where to save the image: external drive, DVDs, or network location. Click Next.
Step 5: Confirm the default system drive (usually C:) and add any other drives if needed. Click Next.
Step 6: Review your choices and click “Start backup.” The process may take time depending on system size.
Step 7: After backup, you may be prompted to create a System Repair Disc—use a blank CD/DVD if desired.
Step 8: Pair this image with a recovery USB, and you’ll be able to fully restore your system in the event of total failure.
Also, if you ever need to recover files from a USB stick or external drive, check out our Top 9 USB Stick Recovery Tools of 2025 (Free & Paid) for trusted software recommendations.
How to Use a Recovery Disk When Your PC Won’t Start
Once your recovery disk is ready, it’s crucial to understand how to use it effectively when your PC won’t start or runs into serious problems. A recovery disk provides several essential tools that can help you fix your system and get back up and running.
When your computer won’t boot, start by inserting the recovery USB drive and powering on your PC. You’ll need to access the boot menu by pressing a key such as F12, F2, Esc, or Del (this varies by manufacturer). Then, select the USB drive as the boot device to launch the recovery environment.
Inside the recovery environment, you’ll find multiple options to troubleshoot and repair your system:
- Startup Repair: Automatically diagnose and fix common boot issues that prevent Windows from starting properly.
- System Restore: Roll back your PC to a previous working state without affecting your personal files. This is useful if a recent change caused problems.
- Reset This PC: Reinstall Windows while keeping or removing your personal files, useful for serious system issues or starting fresh.
- Command Prompt: Access advanced troubleshooting tools for power users, including running system scans or repairing disk errors.
- System Image Recovery: If you created a full system image backup earlier, you can restore your entire PC to that exact saved state, including apps, settings, and files.
Keep Your Recovery Disk Updated
Your recovery disk isn’t a “set it and forget it” tool. It’s important to update it regularly to ensure it works with your current system setup. Here’s when to refresh or recreate your recovery disk:
- After a major Windows update, especially feature upgrades that change system files.
- After installing important applications or drivers that you want to be included in the recovery environment.
- If your recovery disk is over a year old, as outdated files may reduce its effectiveness.
Also, label your recovery disk clearly and store it somewhere safe and easily accessible. Avoid using the USB drive for other purposes, as this can corrupt or erase the recovery files, making the disk unusable when you need it most.
Common Problems and Fixes
“Recovery drive can’t be created” error
This usually happens if your USB drive isn’t set up correctly or there’s not enough space. To fix it:
- Make sure your USB drive is formatted as FAT32 or NTFS.
- Confirm there’s at least 16GB of free space available.
- Check that your system files are intact and not corrupted.
“USB not recognized” issue
If your USB drive isn’t detected:
- Try plugging it into a different USB port.
- Use another USB flash drive to rule out hardware problems.
“We can’t create the recovery drive” with system files option
This error occurs when essential Windows recovery files are missing or damaged. To resolve it:
After repairs, try creating the recovery drive again.s are missing. Try using DISM or SFC tools to repair your system before attempting again.
Run the System File Checker (SFC) and Deployment Image Servicing and Management (DISM) tools to repair your system files.
What If You Didn’t Create a Recovery Disk?
If your PC has already crashed and you don’t have a recovery disk, don’t panic—you still have practical options to get your system back up and running.
Option 1: Download a Windows 10 Recovery ISO from Microsoft
You can download a clean Windows 10 ISO file directly from Microsoft’s official website. Once downloaded, use a tool like Rufus to create a bootable USB drive. This will allow you to reinstall or repair Windows without a recovery disk.
Option 2: Use a Friend’s PC to Create a Recovery Disk
If you have access to another Windows 10 PC with the same version, you can create a recovery USB on that machine. Just follow the usual recovery disk creation steps and then use the USB on your own PC.
Bonus: Recover Deleted Files After a Crash Using WinfrGUI
Sometimes, after fixing your system, you might realize important files are missing. That’s where WinfrGUI comes in handy.
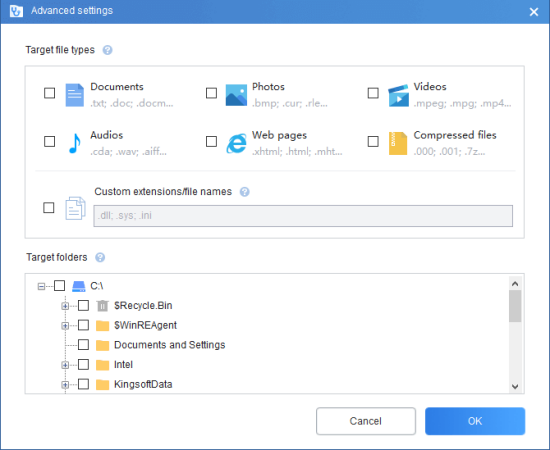
WinfrGUI is a 100% free and beginner-friendly file recovery software built on Microsoft’s Windows File Recovery command-line tool. It offers a simple, clean interface—no command-line skills needed.
Why WinfrGUI is Useful:
- Recovers deleted files like Word documents, photos, PDFs, and more
- Works primarily on NTFS drives such as internal hard drives and SSDs
- Perfect for recovering lost data after system repairs or crashes
In short, WinfrGUI is an excellent companion tool to use after you’ve repaired your PC but need to recover lost data.
Final Thoughts
Creating a Windows 10 recovery disk is one of those tasks that takes just a few minutes now—but can save you hours of frustration later.
Whether you want a simple bootable USB for emergency repairs or a full system image for complete restoration, Windows gives you the tools to get the job done without spending a dime.
And if you ever lose files along the way, free tools like WinfrGUI can help you recover them safely.
Don’t wait for a crash—create your Windows 10 recovery disk today.
Also Read👉Can I Use A Recovery Disk On A Different Computer Windows 10