[Solved] The Windows RE Image Was Not Found Error
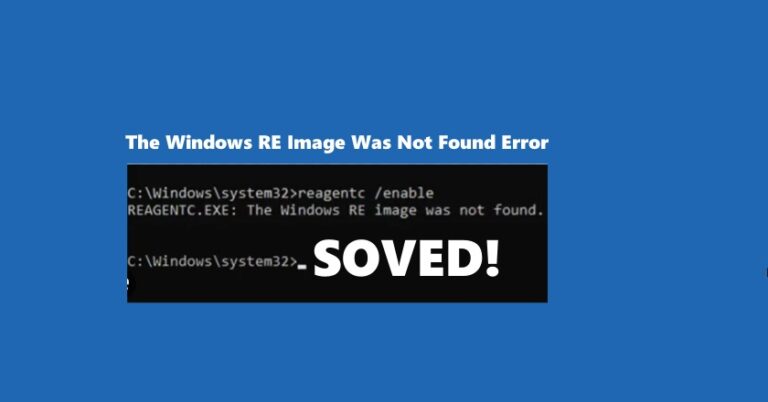
If you tried resetting your PC and suddenly hit a wall with the error message “The Windows RE image was not found”, don’t panic—you’re not alone. This error usually appears when Windows can’t locate the Recovery Environment (WinRE), which is essential for performing reset, refresh, or recovery operations. The good news? You don’t have to reinstall Windows from scratch or risk losing your data. In this guide, we’ll walk you through 5 easy fixes, explain why this error occurs, and show how to recover important files using WinfrGUI if you’re stuck.
What Does “The Windows RE Image Was Not Found” Mean?
The message typically appears during:
- Using Reset this PC
- Attempting to refresh or repair the system
- Trying to access recovery options via the boot menu
The core issue? Windows can’t locate the WinRE image file (winre.wim) or the entire Recovery Environment is disabled or missing. That image is usually located in a hidden recovery partition, and if it’s missing, corrupted, or disconnected, you’ll get this error.
Why This Happens
Here are the most common reasons:
- Corrupted or deleted Recovery partition due to partition changes or cloning
- Disabled WinRE in system settings
- Missing or corrupted
winre.wimfile - BIOS/UEFI misconfigurations after updates or hardware changes
- OS upgrades (e.g., Windows 10 to 11) removing or disabling recovery
Let’s dive into the five ways to fix it.
Windows Recovery Environment Missing? Here Are 5 Easy Fixes
If you’re getting errors like “Windows Recovery Environment not found” or “Recovery environment is disabled”, you’re not alone. This issue often blocks access to reset and recovery features in Windows 10/11—and even tools like WinfrGUI may fail to work properly without WinRE. But don’t panic. Below are five easy and effective fixes to restore or work around the missing recovery environment and protect your files in the process.
Quick Overview: 5 Fixes for Missing WinRE
| Fix | Description |
|---|---|
| 1. Enable WinRE | Use reagentc /enable to turn recovery back on |
| 2. Reassign Recovery Partition | Point Windows to the correct recovery partition |
3. Restore winre.wim | Copy the recovery image from another PC or media |
| 4. Use Installation Media | Boot from USB to repair or reset your system |
| 5. Recover Files with WinfrGUI | Save important data before reinstalling Windows |
Fix 1: Re-enable Windows Recovery Environment (WinRE)
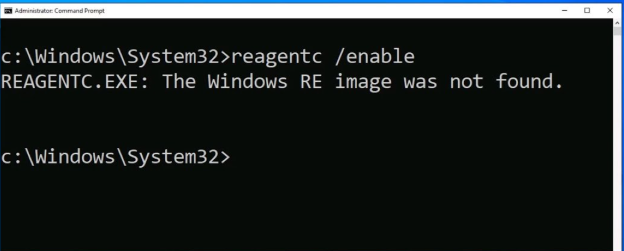
Step 1: Before anything else, check if WinRE is simply disabled. Open Command Prompt as Administrator. Right-click the Start button and select Command Prompt (Admin) or Windows PowerShell (Admin).
Step 2: Check WinRE Status. Type the following command and press Enter: nginx reagentc /info
- This command will show whether WinRE is enabled and the location of the recovery image.
- If WinRE is enabled, you’ll see its status as “Enabled,” and the location of the recovery image will be displayed. If it’s disabled, you’ll see “Windows RE status: Disabled.”
Step 3: Enable WinRE. If WinRE is disabled, you can enable it by typing the following command: bash reagentc /enable. This will reactivate WinRE and restore recovery options.
Step 4: Verify the Change. Run reagentc /info again to confirm that WinRE is now enabled.. You should now see “Windows RE status: Enabled” if the process was successful.
If the recovery image location is missing or incorrect, you may need to specify a valid recovery image path using reagentc /setreimage /path <path> before enabling WinRE.
Fix 2: Rebuild or Reassign the Recovery Partition
Sometimes the WinRE image exists—but Windows can’t find it due to partition issues.
Step 1: Open Command Prompt as admin.
Step 2: Type: sql diskpart list disk select disk 0 (or your system disk) list partition Look for a partition labeled Recovery.
Step 3: If found, assign a drive letter (temporarily): pgsql select partition X assign letter=R exit
Step 4: Now point Windows to that location: bash reagentc /setreimage /path R:\Recovery\WindowsRE reagentc /enable
Step 5: Finally, remove the drive letter again if needed: lua diskpart select partition X remove letter=R exit
This will manually guide Windows to the missing image.
Fix 3: Manually Restore the WinRE Image File (winre.wim)
If the winre.wim file is missing, you can copy it from:
- A working PC with the same version of Windows
- Windows installation media
Step 1: Locate winre.wim on another PC at: makefile C:\Windows\System32\Recovery\
Step 2: Copy it to your broken system at: makefile C:\Recovery\WindowsRE\ (You may need to create the folders manually.)
Step 3: Then run: bash reagentc /setreimage /path C:\Recovery\WindowsRE reagentc /enable
Now Windows will know where to look during recovery.
Fix 4: Use Windows Installation Media to Reset or Repair
If internal recovery options won’t work, using a USB recovery drive is a solid backup plan.
Step 1: Create a Bootable USB Drive
- Download the Windows Media Creation Tool from Microsoft’s official website.
- Insert a USB drive (at least 8GB) into your PC and run the tool.
- Follow the on-screen instructions to create a bootable USB with the latest version of Windows.
Step 2: Boot from the USB Drive
- Restart your PC and press the appropriate key (usually F12, ESC, or DEL) to enter the Boot Menu.
- Select your USB drive as the boot device and hit Enter.
Step 3: Choose Repair or Reset Options
- Once the Windows Setup screen appears, click Repair your computer in the bottom left corner.
- From the options menu, select Troubleshoot.
Step 4: Select a Repair Option. You can choose between:
- Reset this PC: Reinstalls Windows while giving you the option to keep or remove your personal files.
- Startup Repair: Attempts to fix issues that prevent Windows from booting correctly.
By using the installation media, you can bypass the internal recovery environment entirely, making it a reliable solution for serious system issues.
Fix 5: Recover Your Files Before a Clean Install (with WinfrGUI)
Let’s say none of the above fixes work. At this point, a clean install might be the only option. But here’s the issue: if you didn’t back up your files, they could be lost during the reset.
That’s where WinfrGUI comes in.

What is WinfrGUI?
WinfrGUI is a free file recovery tool based on Microsoft’s own Windows File Recovery, but with a graphical interface—no command-line needed. It helps you recover deleted files from internal drives, external USBs, and even SD cards. Unlike full system restores, it doesn’t overwrite existing data and is safe to use before a reinstall.
How to Use WinfrGUI:
Step 1: Download WinfrGUI – Click the button below to get it for free.
Step 2: Run the installer and follow the on-screen instructions. Once installed, open WinfrGUI to begin the recovery process.
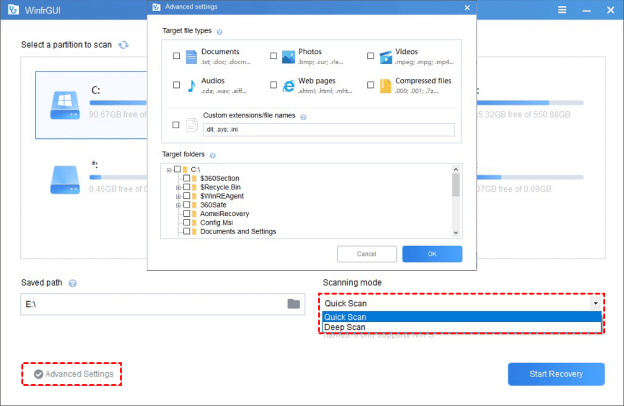
Step 3: Choose the drive where your files were deleted (e.g., C:, D:, external drive, or USB). WinfrGUI will scan this drive to find lost files.
Step 4: Choose a Scan Mode
- Quick Scan: Best for recently deleted files or light data loss.
- Deep Scan: Recommended for formatted drives, emptied Recycle Bin, or older deletions. It takes longer but finds more.
Step 5: Click the Scan button. WinfrGUI will search the selected drive and display a list of recoverable files grouped by type or folder.
Step 6: Browse or search through the results. Use the preview feature to confirm files before recovery.
Save recovered files to a different drive to avoid overwriting data.
💬Personal Tip:
I’ve tested WinfrGUI after a failed reset—it successfully pulled back my work documents and family photos before I did a fresh Windows install. No tech skills needed. It’s especially handy when your PC’s recovery options are broken.
Prevent This Error in the Future
Once you’ve fixed or worked around the problem, it’s smart to prevent it from happening again.
- Create a recovery drive: Use Windows’ built-in tool to back up WinRE to a USB.
- Enable System Restore: So you can roll back when something breaks.
- Avoid deleting system partitions during disk cleanup or resizing.
- Keep WinRE enabled after major OS updates.
Frequent Asked Questions
Q1. What is Windows RE and why is it important?
Windows Recovery Environment (WinRE) is a set of recovery tools that helps repair or restore your system in case of boot issues or crashes.
Q2. How do I check if WinRE is enabled on my PC?
Open Command Prompt as an administrator and type reagentc /info. This will show you if WinRE is enabled or disabled on your system.
Q3. Can I recover files if WinRE is not working?
Yes! You can use tools like WinfrGUI to recover files before you attempt a system reset or reinstall.
Q4. What should I do if the WinRE partition is missing?
You can reassign or rebuild the recovery partition manually using Command Prompt and the diskpart tool to restore the recovery environment.
Q5. Is it possible to restore WinRE from another PC?
Yes, you can manually copy the winre.wim file from a working PC and restore it to your system using reagentc /setreimage to point to the correct path.
Final Thoughts
“The Windows RE image was not found” might sound like a serious error—but with the right steps, it’s completely fixable. From re-enabling WinRE to manually restoring the image or using installation media, you have several paths to recover your system. And if things get too messy, don’t forget: WinfrGUI is a powerful tool to safely recover your personal files before doing anything drastic.
🔗 Also Read: Recover RAW Partition Without Losing Data [2025 Guide]