Windows 10 Create Recovery Partition Without Extra Tools
Looking to prepare your Windows 10 system for emergencies without relying on third-party software? You’re not alone. Many users want to know how to “Windows 10 create recovery partition” using only built-in tools—and for good reason. A recovery partition acts as a safety net, giving you a way to reset or repair your system when things go wrong, whether due to malware, file corruption, or system failure.
In this guide, we’ll walk you through how to manually create a recovery partition in Windows 10 using only the tools Microsoft provides—no paid software, no external utilities. And yes, it’s a bit technical, but with clear steps and a little patience, anyone can do it.
What Is a Recovery Partition in Windows 10?
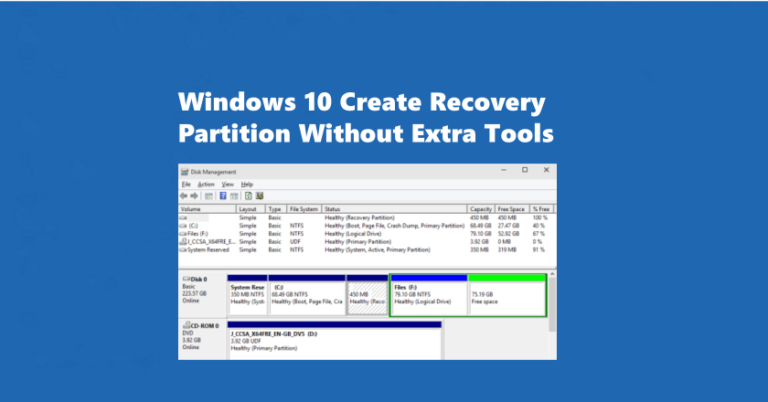
A recovery partition is a dedicated portion of your hard drive that stores system recovery tools and sometimes a full image of your operating system. When your system becomes unbootable or unstable, this partition allows you to boot into recovery mode and repair or reset Windows.
There are typically two types of recovery partitions:
- OEM Recovery Partition: Comes pre-installed by your laptop or PC manufacturer.
- Custom/User-Created Partition: Made manually by you for added protection or to replace a missing OEM version.
Creating your own recovery partition gives you flexibility and ensures you’re not left helpless if your system gets corrupted.
Can You Create a Recovery Partition Without Extra Software?
Yes—you absolutely can. Windows 10 includes everything you need to create a working recovery partition:
- Disk Management for partitioning your drive
- Command Prompt and DISM (Deployment Image Servicing and Management) for handling system files
- ReagentC for configuring the Windows Recovery Environment (WinRE)
No third-party apps or utilities are required, though they can sometimes simplify the process. But for those who value transparency and control, the native method works perfectly.
Step-by-Step: Windows 10 Create Recovery Partition Without Extra Tools
Step 1: Back Up Your Data
Before modifying partitions, back up your important files. You can use built-in tools like File History or create a system image via Control Panel > Backup and Restore. This is critical—partitioning errors can result in lost data.
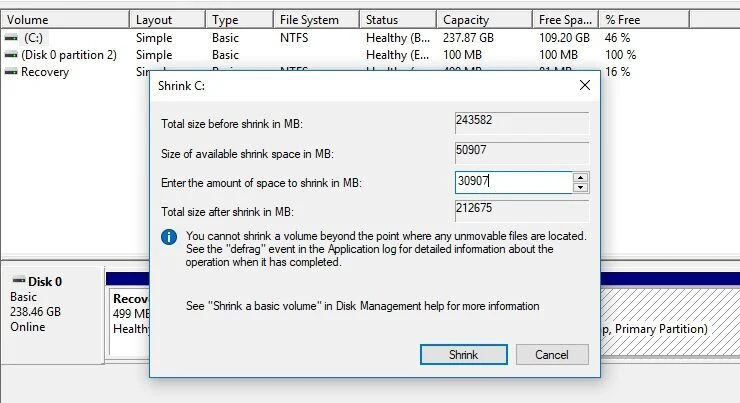
Step 2: Create Unallocated Space
- Press
Windows + Xand choose Disk Management. - Right-click your main volume (usually C:) and select Shrink Volume.
- Shrink by at least 600 MB to 1 GB (recommended size for WinRE files).
- This creates unallocated space on your drive.
Step 3: Create and Format the New Partition
- Right-click the unallocated space > New Simple Volume.
- Assign a drive letter (e.g., R:) temporarily.
- Format it as NTFS and label it something like Recovery.
Step 4: Copy Recovery Files
We’ll now point Windows to use this new partition for recovery tools:
- Press
Windows + X> select Command Prompt (Admin) or Windows Terminal (Admin). - Type the following to check the current WinRE location: nginx
reagentc /info - If enabled, disable it first: bash
reagentc /disable - Create a folder for the recovery tools on your new partition: arduino
mkdir R:\Recovery\WindowsRE - Copy WinRE.wim to this folder (it’s usually in C:\Windows\System32\Recovery): bash
xcopy /h C:\Windows\System32\Recovery\WinRE.wim R:\Recovery\WindowsRE\ - Point Windows to this new location: bash
reagentc /setreimage /path R:\Recovery\WindowsRE - Re-enable Windows RE: bash
reagentc /enable - Confirm with: nginx
reagentc /info
Now your recovery environment is stored on your custom partition!
Step 5: Hide the Recovery Partition (Optional but Recommended)
To prevent accidental modification:
- Go to Disk Management.
- Right-click the Recovery partition > Change Drive Letter and Paths > Remove.
This hides it from File Explorer but keeps it functional during boot.
Step 6: Test Your Recovery Partition
Time to make sure it actually works:
- Press
Windows + I> Update & Security > Recovery > Restart now under Advanced startup. - Alternatively, hold Shift while clicking Restart on the login screen.
You should now enter the recovery environment, which is running from your new partition.
Pros & Cons of This Method
✅ Pros:
- No external software or USB drive needed
- Built using Microsoft’s own tools
- Fully customizable and transparent
❌ Cons:
- Not beginner-friendly
- Lacks the polish of OEM recovery tools
- Doesn’t include full system reset image unless you manually create one
Extra Tips and Troubleshooting
- Partition Too Small? ReagentC may fail if the partition is under 500 MB.
- Command Errors? Make sure you’re running Command Prompt as administrator.
- Missing WinRE.wim? Try locating it in the
C:\Recovery\WindowsREfolder or extract it from installation media.
What If You Lose Files During Setup?
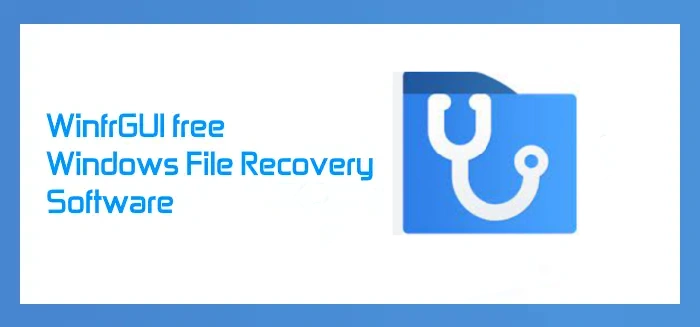
While rare, partitioning mistakes can cause data loss. If that happens, you’ll need a reliable recovery tool. That’s where something like WinfrGUI comes in.
🔎 WinfrGUI is a free, user-friendly recovery tool based on Microsoft’s Windows File Recovery command-line utility. It provides a graphical interface, making it easier to recover lost files from deleted partitions, formatted drives, or corrupted file systems—all without needing to be a tech expert.
Even though this article focuses on using built-in tools, WinfrGUI is a smart safety net to have in case anything goes sideways.
Conclusion
The process to Windows 10 create recovery partition without extra tools may seem a bit involved, but it offers a powerful, built-in way to protect your system. By carving out space on your hard drive and configuring it properly, you gain the ability to reset or troubleshoot your PC even when the main Windows installation fails.
No third-party apps, no guesswork—just the tools that come with Windows 10. Whether you’re replacing a lost OEM partition or building your own recovery solution from scratch, this guide gives you full control.
Just remember: back up your files, follow each step carefully, and don’t be afraid to test your setup. When trouble strikes, you’ll be glad you took the time to prepare.
Also Read👉Recovery Partition Missing Windows 10? Simple Fixes [2025]