7 Ways to Repair an NTFS File System Error Without Losing Data
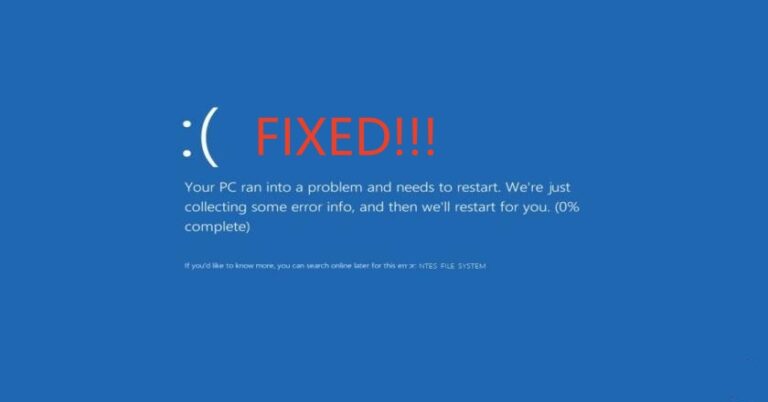
You’ve just been hit with the dreaded “NTFS File System Error.” The message might be a blue screen of death with NTFS_FILE_SYSTEM or an error when you try to access a drive that just won’t open. Your stomach probably just dropped, thinking of all the precious photos, important documents, and crucial projects you might have lost. Take a deep breath. In most cases, this error is a logical issue with the file system, not a catastrophic physical failure of your drive. Your data is likely still on the disk, just inaccessible. The key is to avoid panicking and, most importantly, do not format the drive. This guide will walk you through seven safe, reliable methods to repair the error and get your data back, starting with the simplest solutions and moving to more advanced ones.
Crucial First Step: Disconnect and Protect Your Data
Before you attempt any fixes, a crucial safety measure is to prevent further damage. If you’re working on a desktop, consider physically disconnecting the affected drive. If it’s an external drive, unplug it. If you have any accessible data on the drive, back it up to another location immediately. If the drive is completely inaccessible, don’t worry—the methods below are designed for that very scenario.
Method 1: The First Line of Defense – The CHKDSK Utility
Windows has a powerful, built-in tool specifically designed for this kind of problem: CHKDSK (Check Disk). It scans your file system for errors and attempts to fix them automatically. This is often the quickest fix for an NTFS file system error. This should always be your first step, as it’s the safest and most effective solution.
How to Use CHKDSK
Step1: Open Command Prompt as an Administrator. Click the Start button, type “cmd,” right-click “Command Prompt” from the results, and select “Run as administrator.” This is essential for the command to have the necessary permissions to fix the disk.
Step2: Run the command. In the Command Prompt window, type the following and press Enter:
chkdsk X: /f /r
- Replace
Xwith the letter of the drive that’s giving you the error. - The
/fflag tells CHKDSK to fix any errors it finds. - The
/rflag tells it to locate bad sectors on the drive and recover any readable information. This is a more thorough scan and can take a long time, so be patient.
If the drive you are trying to repair is your main Windows C: drive, Windows can’t run the scan immediately. Instead, it will prompt you to run the scan the next time you restart your computer. Type Y and press Enter, then restart your PC. The scan will begin automatically and can take anywhere from a few minutes to several hours, depending on the size of your drive.
Method 2: System File Checker (SFC) for Corrupted Windows Files
Sometimes, an NTFS file system error isn’t caused by the drive itself, but by corrupted core Windows system files. These corrupted files can interfere with how Windows reads and interacts with your drives, leading to the error. The System File Checker (SFC) is a simple but effective tool to fix this.
How to Use SFC
Step1: Open Command Prompt as an Administrator (same as Method 1).
Step2: Type the command:
sfc /scannow
Step3: Press Enter. SFC will scan all protected system files on your computer and replace any corrupted ones with a clean copy. This process will take some time to complete. Once finished, a message will tell you if any files were repaired.
After the scan, restart your computer and check if the NTFS error is gone.
Method 3: The More Powerful DISM Tool
If SFC doesn’t solve the problem, it might be because the source files that SFC uses to perform its repairs are themselves corrupted. In that case, you need to turn to the Deployment Image Servicing and Management (DISM) tool. DISM is a more advanced tool that can repair the Windows system image, providing a clean slate for SFC to work with.
How to Use DISM
Step1: Open Command Prompt as an Administrator.
Step2: Type the command:
DISM /Online /Cleanup-Image /RestoreHealth
Step3: Press Enter. This command will connect to Windows Update to download fresh, uncorrupted files to repair your system image. This can take a while, and the progress bar may seem to stall at 20% for some time. Do not close the window.
Once DISM is complete, run SFC again (Method 2). The SFC tool should now be able to successfully find and fix any remaining corrupted files.
Method 4: Fixing Boot Errors with Bootrec Commands
If the NTFS error is preventing your computer from booting into Windows entirely, the problem might be with the Master Boot Record (MBR) or the boot sector. This is a common issue and can be fixed using a set of commands in the Windows Recovery Environment.
How to Use Bootrec
Step1: Boot into the Windows Recovery Environment (WinRE). You can do this by creating a bootable Windows installation USB drive.
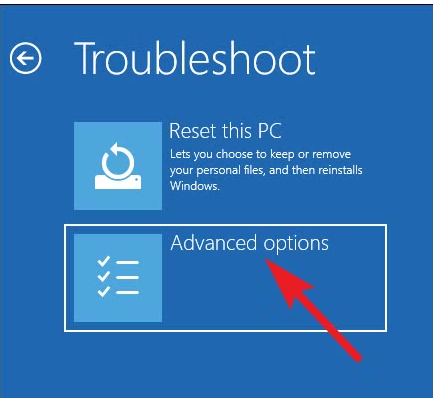
Step2: Once in WinRE, click on Repair your computer -> Troubleshoot -> Advanced options -> Command Prompt.
In the Command Prompt, type the following commands, pressing Enter after each one:
bootrec /fixmbr(rewrites the MBR)bootrec /fixboot(rewrites a new boot sector)bootrec /rebuildbcd(rebuilds the Boot Configuration Data)
After running these commands, restart your PC. With a repaired boot record, your system may now be able to load correctly.
Method 5: Revert Changes with System Restore
Did the NTFS error appear right after you installed new software, updated a driver, or made a change to your system? If so, the problem might be a conflict caused by that change. A System Restore can roll back your computer’s system files to a previous state without affecting your personal files like documents or photos.
How to Use System Restore
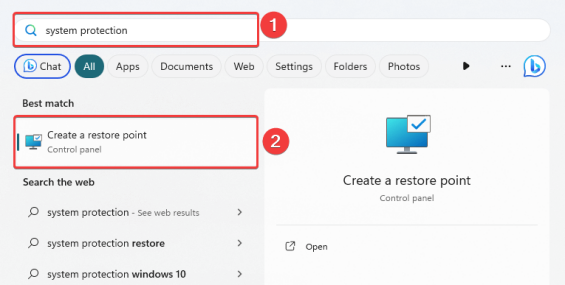
Access System Restore. This can be done through the Control Panel or the Windows Recovery Environment (WinRE).
Step1: Select System Restore and follow the on-screen prompts.
Step2: Choose a restore point from a date before you started experiencing the error.
Step3: Confirm the restore point and click Finish. Your computer will restart and revert the system files.
This is a non-destructive fix that can reverse a problematic change and often solve file system errors.
Method 6: Check the Drive’s Physical Health
Sometimes, a logical error is just a symptom of a deeper, physical problem with the drive itself. If the above methods haven’t worked, it’s time to check the drive’s physical health using a diagnostic tool.
How to Check Your Drive’s Health
Step1: Use a third-party tool like CrystalDiskInfo. This is a highly reputable, free utility that provides a detailed health status of your hard drive. It reads S.M.A.R.T. (Self-Monitoring, Analysis, and Reporting Technology) data, which is a built-in feature of modern drives that reports on their health.
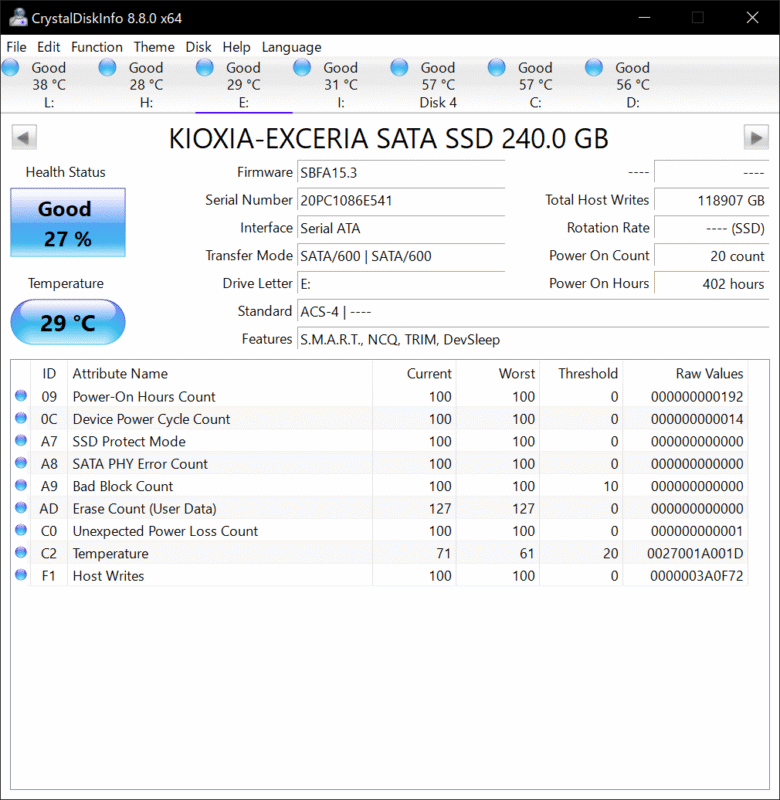
Step2: Look for the “Health Status” and “Raw Read Error Rate.” If the status is anything other than “Good,” or if you see a high number of reported errors, it’s a strong indication that the drive is physically failing.
You should also check the physical connections. A loose SATA cable or a faulty USB port can cause read errors that appear to be an NTFS file system problem.
Method 7: The Last Resort – Third-Party Data Recovery Tools
If you have tried all the above methods and the drive remains inaccessible, your last resort is to use a specialized data recovery tool. These tools don’t try to fix the file system. Instead, they bypass it, scanning the raw data on the disk’s platters to find and rebuild files. This method focuses on recovering your data, not on fixing the drive for future use.
One of the best options for this is the Windows File Recovery (WinFR) tool, a free, official Microsoft utility. While it’s a command-line tool that can be intimidating for many users, there is an excellent graphical user interface called WinfrGUI. This tool makes the powerful WinFR easy to use, allowing you to select the drive and file types you want to recover with a simple point-and-click interface.
Other reputable options include:
- Recuva: A free and user-friendly tool for recovering deleted files.
- EaseUS Data Recovery Wizard: A powerful, paid tool with a high success rate.
Keep in mind that while these tools can recover files, the recovered data should be saved to a different, healthy drive to prevent further data loss.
Conclusion
By this point, you’ve tried the most effective and safest methods for recovering from an NTFS file system error. If you’ve worked through all seven steps and your drive is still inaccessible, it’s a sign of a more serious physical problem. Continued attempts to fix it could lead to the permanent loss of your data. At this point, the smartest thing you can do is to stop. Do not attempt any more fixes. The final, professional step is to consult a professional data recovery service. They have specialized equipment that can recover data from physically damaged drives that no software can. While costly, it is often the only way to recover your data from a critically damaged drive.
🔗 More Tutorials: