I Accidentally Saved Over a Word Document, What to Do?
A Quora user recently asked, “I accidentally saved over a Word document. How can I recover the previous version?” If you’re facing the same issue, don’t worry—there are several ways to restore your lost content. You can use Word’s Version History, AutoRecover, Windows File History, or OneDrive backups to retrieve an earlier version. If these options don’t work, third-party recovery tools like WinfrGUI can help restore overwritten files. Follow these steps to increase your chances of recovering your document efficiently.
Recover the previous version of the error saved Word document
The AutoRecover feature of Microsoft Word allows you to save multiple versions of your document automatically while you are working on it. If you enable this feature, it will save automatically. Word documents that have not been saved can be recovered with the use of this capability. This is how you can accomplish it:
Getting back from files that have been saved:
Access the Word document that you wish to retrieve and navigate to the “File > Info” menu option.
- Select “Version History” from the menu. You will see a list of the different versions of the document, together with the date and the name of the person who created it.
- Choose the version that you would like to bring back.
It is important to remember that in order for this feature to function, your document must be stored in OneDrive. It will not be possible for you to retrieve your document using this approach if it has not been uploaded to OneDrive.
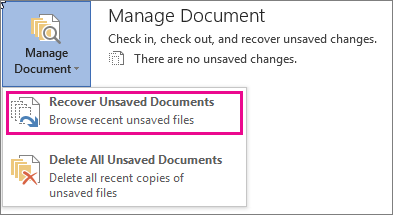
How to recover from unsaved files:
When you encounter “i accidentally saved over a word document” issue, you can still recover it. Here’s how:
- Go to “Files > Information” in Word and search for documents with unsaved changes in front of the “Manage Document” button.
- Click on the “Restore” button to recover unsaved files.
- When notified, click “OK” to write the content of the last saved version with the selected version.
Recover error saved Word documents from backup
If you enable Windows backups, you may be able to retrieve a previous Word document. This is true if you take action. You can accomplish the following:
- Right-click the saved Word document and select “Properties” from the menu. You may now access the document’s properties.
- You can check for a previous document version by clicking the “Previous Version” tab. You can check for an earlier document version.
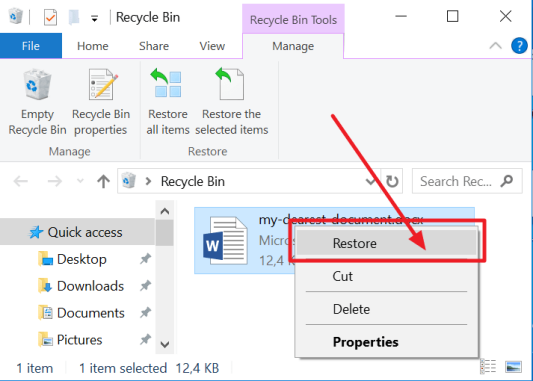
In the event that there are many versions available, select the version that you wish to use, and then click the “Restore” option in order to take you back to the version that was previously available.
To access the history of files in Windows, the following steps need to be taken:
Continue with the following steps in order to enable the Windows file history:
- Enter “Control Panel” into the search box of Windows, and then open the window that displays the Control Panel.
- Select “System and Security” from the menu.
- Look at the File History.
- When you want to enable the file history function, you need to click on the “Open” button.
Please note that the file history feature requires an external drive to work. If you do not have one, you can add a network location on your PC to back up your files.
Bonus Tips: Use WinfrGUI to Recover an Overwritten Word Document
How to Use WinfrGUI?
- Download and Install WinfrGUI
- Get WinfrGUI from the official website and install it on your PC.
- Select the Drive Where Your Document Was Stored
- Choose the drive (e.g., C:\Users\YourUsername\Documents) where the file was originally saved.
- Choose the Scanning Mode
- Use Quick Scan for recently lost files or Deep Scan for overwritten or older files.
- Search for Previous Versions of the Document
- Use filters to find
.docxor.docfiles and look for older versions of your document.
- Use filters to find
- Recover and Save the File
- Once the document is found, restore it to a new location to prevent further overwrites.
Why Use WinfrGUI?
- 100% Free and Easy to Use
- Works Even If the File History Feature Was Disabled
- Can Recover Unsaved, Deleted, or Overwritten Word Files
I Accidentally Saved Over a Word Document: FAQs
Here are some frequently asked questions about mistakenly saving Word documents:
Can I find the Word document I saved?
Yes, you did. The easiest way is to press Ctrl+Z to cancel the action and restore the previous version of the document.
How to recover Word documents that saved errors on Mac?
To recover a Word document that saved errors on Mac, open the document, select “File > Back to” and select Open Last, Save Last or Save First.
How can I restore an earlier version of a Word document?
You can right-click the document and select “Restore the previous version” to select and restore the desired version. Or go to “File > Information” in Word and click on the file name below the document manager. Select “Reset” from the menu to replace the previously saved version.
How do I recover a rewritten Word document?
Right-click on the file written on your desktop, select “Properties” and go to the “Previous Version” tab. Select the version you want and click “Restore”.
Conclusion
If you find yourself saying, “I accidentally saved over a word document,” you need not be concerned. When it comes to recovering your data, you have the option of using AutoRecover, retrieving older versions, or recovering from backups. You can also recover files that have been erased by using WinfrGUI. You should exercise caution when working with essential papers, and you should think about activating backup systems to prevent the loss of data.
>>Also Read: 6 Ways to Recover Earlier Version Of Excel File