How to Recover Permanently Deleted Excel Files in Windows 10
How to recover permanently deleted Excel files in Windows 10 is a common concern after unexpected data loss. Excel files are widely used for budgets, reports, financial analysis, and business operations. Losing one can interrupt work and cause serious stress. The good news is this: Even if you permanently deleted the file using Shift + Delete or emptied the Recycle Bin, recovery may still be possible.Recovery depends on whether the data has been overwritten.The sooner you act, the higher the success rate.
Key Takeaways
- Permanently deleted Excel files in Windows 10 can often be recovered if the data has not been overwritten.
- Stop using the affected drive immediately to improve recovery success.
- Try built-in Windows 10 tools first, such as File History, Previous Versions, or Windows File Recovery.
- Check Excel features like AutoRecover and AutoSave if the file was lost after a crash.
- If built-in options fail, use a reliable Windows 10 data recovery tool WinfrGUI and save recovered files to a different drive.
Built-in Windows 10 Recovery Methods
| Situation | Method to Try |
|---|---|
| You enabled Windows Backup | Restore from File History |
| You are comfortable with command-line tools | Use Windows File Recovery |
Method 1. Use File History to Recover
When learning how to recover permanently deleted Excel files in Windows 10, File History is one of the first tools you should check. File History is a built-in Windows 10 backup feature. It automatically saves copies of your files if it was enabled in advance. If File History was active before deletion, you can restore a previous version of your Excel file.
Step1: Type “Restore your files” in the Windows search bar. Select Restore your files with File History.
Step2: Browse through the available versions of your files.
Step3: Select the Excel file you want to restore and click Restore.
Tip: File History must have been enabled prior to deletion. Also Related 3 Ways to Recover Deleted Excel Files Not in Recycle Bin
Method 2. Use Windows File Recovery Tool
Windows File Recovery is a command-line tool from Microsoft that can recover files lost from NTFS and FAT file systems. Steps to use Windows File Recovery:
Step1: Download and install Windows File Recovery from the Microsoft Store.

Step2: Open Command Prompt as administrator.
Step3: Use this command format:
winfr source-drive: destination-drive: /n \path\to\file.xlsx
Step4: Follow on-screen instructions to complete recovery.
Tip: Make sure to choose the correct recovery mode (Regular, Extensive, or Segment) based on your file type and drive condition. If you’re not comfortable with command-line tools, you can try WinfrGUI — a free graphical interface for Windows File Recovery that simplifies the entire process.
Leveraging Excel’s Built-in Features
Excel itself includes recovery mechanisms.
| Situation | Method to Try |
|---|---|
| AutoSave enabled (OneDrive / Office 365) | Recover via AutoSave |
| AutoRecover enabled | Recover via AutoRecover |
| Excel crashed or closed unexpectedly | Check Temporary Files |
Method 1. AutoSave and AutoRecover
Excel’s AutoSave and AutoRecover features can help recover unsaved workbooks in the event of a crash or unexpected shutdown. Steps to access AutoRecover files:
Step 1: Open Excel and click the File tab.
Step 2: Go to Info > Manage Workbook.
Step 3: Click Recover Unsaved Workbooks.

Step 4: Browse the list, open the file you need, and save it.
Method 2. Temporary Files
Excel creates temporary files while you work on a document. These can sometimes be used to recover your lost data. Steps to find temporary files:
Step 1: Open File Explorer and go to the folder where the Excel file was saved.
Step 2: Look for files with a .tmp extension or names starting with ~.
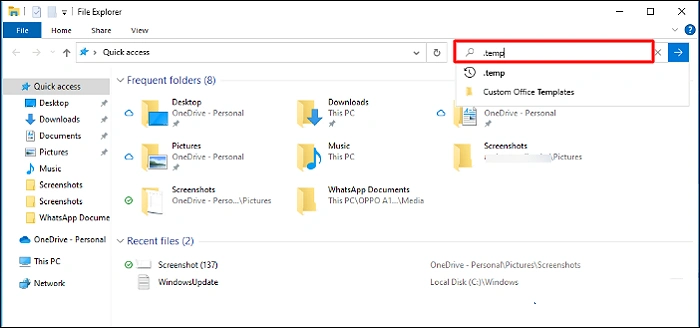
Step 3: Open these files in Excel to check for recoverable data.
Step 4: If found, save the file with a new name to prevent further loss.
Tip: Temporary files are often deleted when Excel is closed properly. Also Related 7 Fixes to Accidentally Clicked Don’t Save Excel Issue
Utilizing Data Recovery Software
If built-in options fail, use professional recovery tools.
| Situation | Recommended Tool |
|---|---|
| You prefer a simple GUI solution | WinfrGUI |
| You need deep-scan capabilities | Stellar Data Recovery |
| You want a flexible all-in-one tool | Disk Drill |
Tool 1. WinfrGUI
WinfrGUI is a user-friendly graphical interface for the Windows File Recovery command-line tool. It simplifies the process of recovering lost files without requiring command-line knowledge.Steps to use WinfrGUI:
Step 1: Download and install WinfrGUI from the official website.
Step 2: Launch the program and select the drive where your Excel file was deleted.
Step 3: Choose a destination folder on a different drive to save the recovered files.
Step 4: Click Scan, preview the results, select your Excel file, and click Recover.
Note: WinfrGUI supports both NTFS and FAT file systems.
Tool 2. Stellar Data Recovery
Stellar Data Recovery is a powerful recovery tool designed for both beginners and advanced users. It supports a wide range of file types, including Excel files, and works with both internal and external drives. Steps to use Stellar Data Recovery:
Step 1: Download and install Stellar Data Recovery from the official website.
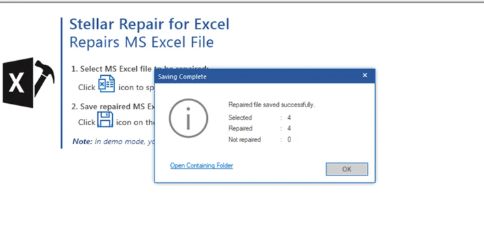
Step 2: Launch the program and select the drive where your Excel file was lost.
Step 3: Click Scan to begin searching for deleted or lost files.
Step 4: Preview the scan results, select your Excel file, click Recover, and save it to a new location.
Note: Stellar offers both a free version (limited recovery) and paid versions with more features.
Tool 3. Disk Drill
Disk Drill is a comprehensive data recovery tool known for its quick scans and high recovery success rates. It supports many file formats, including Excel files, and is available for both Windows and Mac. Steps to use Disk Drill:
Step 1: Download and install Disk Drill from the official website.

Step 2: Open the program and choose the drive where the Excel file was deleted.
Step 3: Click Search for lost data and wait for the scan to complete.
Step 4: Preview the recoverable files, select the Excel document, and click Recover to save it to a secure location.
Note: Disk Drill offers a free trial with limited recovery capabilities. Also Relate Is It Possible to Restore a Deleted Excel Worksheet?
5 Troubleshooting FAQs for Excel File Recovery
Q1. What should I do immediately after deleting an Excel file?
Act quickly. The sooner you try to recover the file, the better your chances. Avoid saving new data to the same drive to prevent overwriting the deleted file.
Q2. Can I recover Excel files without installing third-party software?
Yes. Before using external tools, try built-in Windows features like File History, Previous Versions, or AutoRecover in Excel.
Q3. Which recovery tool should I use?
It depends on your needs. WinfrGUI is great for beginners who prefer a simple interface. For deep scans, try Stellar Data Recovery. If you want a versatile solution, Disk Drill is also reliable.
Q4. How can I prevent Excel file loss in the future?
Set up regular backups using Windows Backup or File History, and consider using cloud storage (like OneDrive or Google Drive) for real-time file syncing and protection.
Q5. Should I test a recovery tool before using it on important files?
Absolutely. Try recovering a non-essential file first to familiarize yourself with the process and ensure the software works as expected.
Conclusion
Losing an Excel file can be stressful. However, if you understand how to recover permanently deleted Excel files in Windows 10, you still have a good chance of getting it back. Start with built-in Windows features.
Check Excel’s AutoRecover options. If necessary, use a reliable data recovery tool. What matters most is acting quickly and avoiding further disk activity. And for long-term safety, enable regular backups. Prevention is always easier than recovery.
🔗 Also Read: How To Undo In Excel After Save: 4 Different Ways