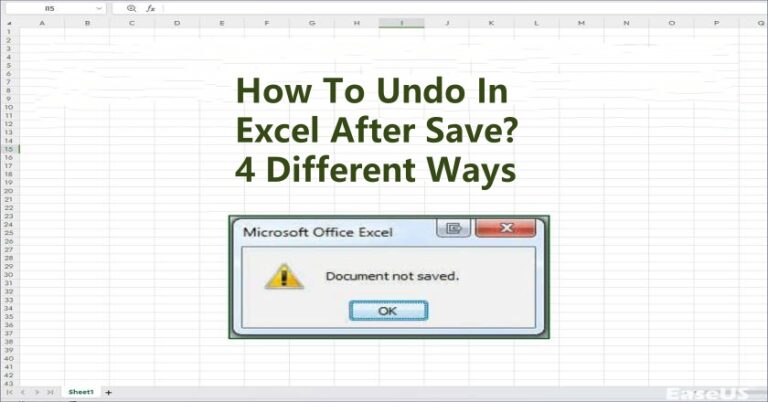
How to Undo in Excel After Save and Close
It happens to almost everyone at some point — you save and close an Excel file, only to realize later that you want to undo certain changes or recover a previous version. Maybe you accidentally saved over your original data, closed the file without keeping important edits, or your computer crashed before you could save everything.The good news? Losing your Excel data doesn’t always mean it’s gone forever. Microsoft Excel and Windows offer several features to help you restore or recover previous versions of your files. Additionally, specialized tools like WinfrGUI can help you recover deleted or lost Excel files due to accidental deletion, formatting, or system issues. In this guide, we’ll walk you through four proven methods to undo changes in Excel after saving and closing, plus how to recover overwritten or deleted Excel files.
Quick Answer
✅ Use Excel’s built-in features — Version History, AutoRecover, or Previous Versions (if enabled).
✅ Recover files with WinfrGUI — A free tool that helps retrieve Excel files lost due to deletion, formatting, or other issues.
Solution 1: Use the Undo Button
If your Excel worksheet is still open, you can easily undo recent changes by clicking the Undo button on the Home tab or in the Quick Access Toolbar. Click the dropdown arrow next to the Undo icon to see a list of recent edits, then select the most recent action to revert multiple changes at once. Note that the undo history applies to the entire workbook, so if you’ve edited multiple sheets, undoing may affect all those changes, making it hard to undo edits on just one sheet.
The Undo history applies to the entire workbook, so be cautious if you’ve made changes in multiple sheets.
Solution 2: Use the Ctrl+Z Shortcut
Pressing Ctrl+Z is a quick way to undo changes while the Excel file is open. However, once you save and close the workbook, the undo history is cleared and you won’t be able to undo previous edits unless you have a backup. After undoing, remember to save your file again to keep the restored changes.
The undo feature only works before the file is closed; after closing, Excel clears the undo stack, so it’s important to act promptly or use backup methods like Version History or recovery tools.
Solution 3: Use Version History to Undo the Save
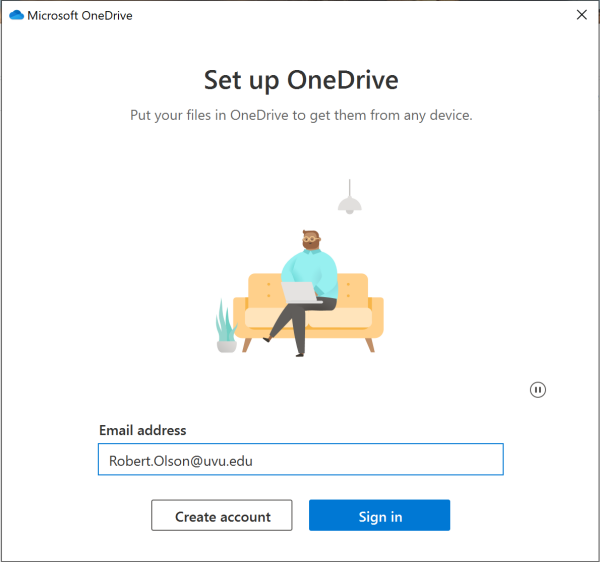
Another effective way to undo a save in Excel is by accessing the workbook’s version history, which lets you recover previous versions of your file. This feature works best if your Excel files are stored in OneDrive, which provides 2 GB of free storage and automatically saves earlier file versions. To restore a previous version, follow these steps:
Step 1: Go to the OneDrive website and log in with your account information.
Step 2: Select the folder where you saved your files by clicking on it.
Step 3: Right-click on the Excel document you want.
Step 4: Select “Version History” to view all previous versions of the file.
Step 5: Once you find the desired version, click “Download” to save a copy or “Restore” to replace the current version.
Version History is available only if the file was saved in OneDrive or SharePoint and versioning is enabled.
Solution 4: Cancel Changes by Creating a Backup Using VBA
To quickly recover original data from a modified worksheet, it’s a good idea to create a backup copy of the sheet using a simple VBA script. Follow these steps:
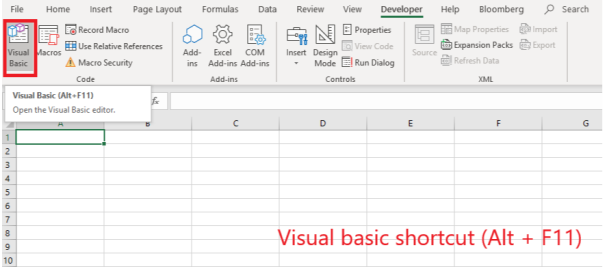
Step 1: Keep the original data in the worksheet and press Alt + F11 to open the Microsoft Visual Basic Application window.
Step 2: In the Microsoft Visual Basic Application window, click on “Insert” > “Module” and then copy and paste the provided VBA code into the module window.
Step 3: Press the F5 key to run the code. This will create a backup sheet with content identical to the original sheet.
This method works best when you create the backup before making major edits or if you’ve lost data but still have access to the file. It’s a handy way to safeguard your data, but it requires some familiarity with VBA.
How to Recover Previous Versions in Excel
1️⃣ Use Windows File History or Previous Versions
If you have File History, Windows Backup, or a similar backup feature enabled on your PC, you can restore an older version of your Excel file without needing extra software. Here’s how to do it:
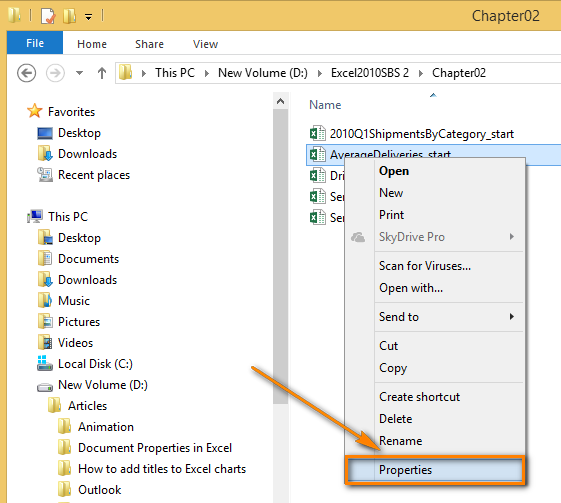
Step 1: Go to the folder where your Excel file is saved, right-click the file, and select Properties from the menu.
Step 2: In the Properties window, click on the Previous Versions tab — here you’ll see a list of available versions if File History, Windows Backup, or Restore Points were enabled on your system.
Step 3: From the list, select the version you want to recover; you can click Open to check the contents first, or click Restore to replace your current file with that version immediately.
👉 Alternative method inside Excel:
- Open Excel > File > Info > Manage Workbook > Recover Unsaved Workbooks.
- Browse the list and open the version you need, then save it.
These options work only if you had enabled File History, Backup, or AutoSave before the file loss or overwrite occurred. If you didn’t, try the recovery tool below.
Step 2: Select the file you want to recover and click “Open.”
Step 3: To save the file, click on “Save As” on the top bar of the file.
2️⃣ Recover with WinfrGUI
When Windows’ built-in tools don’t have a usable backup (for example, if the file was permanently deleted, the disk was formatted, or the file became corrupted), WinfrGUI provides an easy and free solution.
Why use WinfrGUI?
✅ 100% free with no technical skills required.
✅ Supports recovery of Excel files lost through deletion, formatting, or corruption.
✅ Simple point-and-click interface.
1️⃣ Open WinfrGUI, select the drive or folder where your Excel file was stored, and click Find Lost Data to start scanning the selected location for lost files.
2️⃣ When the scan completes, filter the results by clicking Documents in the left panel, select the file types .xls or .xlsx, and use the Preview button to confirm you’ve found the correct Excel file.
3️⃣ To recover your file, select the desired Excel file from the list, click Recover, and save it to a different location (preferably on another drive) to avoid overwriting other potentially recoverable data.
Never save recovered files back to the original drive or folder where you lost them. This reduces the risk of overwriting additional recoverable data.
How to Undo in Excel After Save and Close FAQ
Here are some frequently asked questions about undoing changes in how to undo in excel after save:
Q1. How to undo all changes to get back the original data in Excel?
You can cancel all changes and restore the original data in Excel by using the “Undo” function, which can be done by pressing Ctrl + Z on the keyboard or going to the “Edit” menu and selecting “Undo.” If you want to revert all data back to its original state, you may need to close the file without saving the changes or use the “Open” function to open the original file again if you have a copy of the original file.
- Use the back button and shortcut keys to undo all edits and restore the original data.
- Restore any changes using the backup of the original data.
- WinfrGUI has an option to cancel all edits and restore the original data.
Q2. Can you recover an Excel file that you accidentally overwrote?
If you have enabled File History or Windows backup in Windows 10 or 11, you can try to recover the Excel file that was overwritten by using a previous version. You can revert changes in Excel after saving by using the “Previous Versions” or “Document Recovery” feature. If you have enabled auto-save or have previous versions saved, you can go to “File” > “Info” > “Previous Versions” to view and restore the desired version. If the document is still open, you can undo the changes by clicking the Undo button on the Quick Access Toolbar or by using the shortcut Ctrl+Z. Don’t forget to save the document again after you have undone the changes!
Q3. How can you revert changes after saving a document?
Normally, if you frequently use the undo feature and haven’t closed the document yet, you can return to the point where you started making edits. To do this, save the document with a new name using the “Save As” command, then undo the changes and save the document with the original name. This is a summary of our guide on how to reverse changes in Excel after saving and closing the program. We hope you find it valuable. If you have any further questions, please refer to the FAQ section.
Conclusion
This article describes four easy Excel recording cancellation methods. Choose any of these strategies to finish. This tutorial should be useful and instructive. Comments are welcome if you need help comprehending the material. If you have additional methods that we may have overlooked, please share them with us. For other file recovery software needs, consider using WinfrGUI.
🔗 Also Read: How to Undo Changes in Excel After Save and Close