
How to Restore Windows 10 to Previous Date

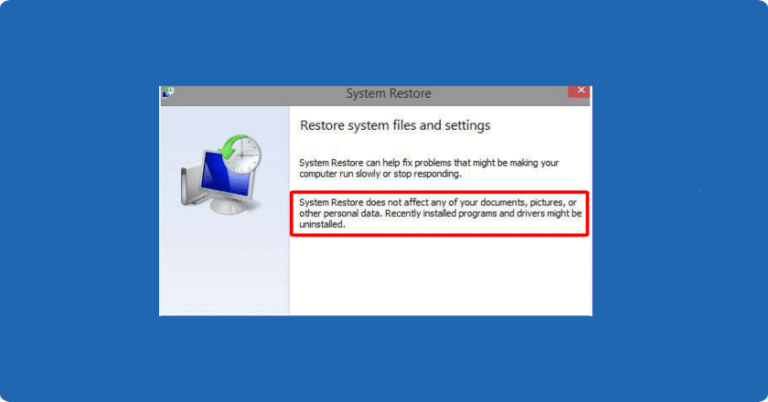
So, your Windows 10 PC is acting weird and you’re thinking, “I wish I could just go back to how it was yesterday.” Good news—you actually can by using the System Restore feature to restore Windows 10 to a previous date. It’s like hitting undo on whatever messed things up and rolling your computer back to an earlier, trouble-free point.
I’ve used it myself when updates or apps caused issues, and it’s saved me more than once. If you’re not sure how to do it, don’t worry—I’ve got you. In this article, I’ll show you exactly how to restore your PC step by step. Plus, if you lost any files along the way, I’ll share a great tool to help you get them back. Let’s get started!
MMethod 1: Roll Your Computer Back Using System Restore
Whenever something goes wrong on my Windows 10 or 11 PC—like after a bad update or app install—System Restore is usually my go-to fix. It lets you bring your computer back to a previous point in time, without affecting your personal files. Think of it as a time machine for your system settings. Here’s exactly how to do it:
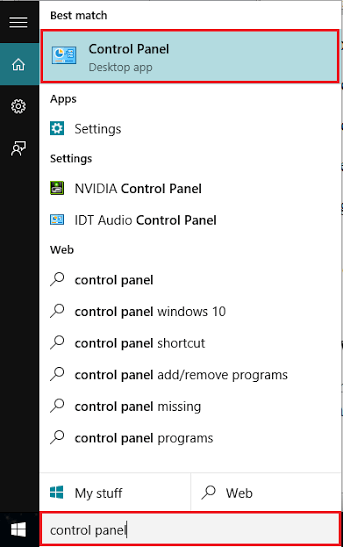
Step 1: Click the Start button and type Control Panel, then open it. In the search bar at the top right, type “Recovery”.
Step 2: Click on Recovery, then select “Open System Restore”. A pop-up will appear asking if you want to restore your system files and settings. Just click “Next” to continue.
Step 3: You’ll see a list of restore points with dates and descriptions (like “Windows Update” or “Driver Installation”). Choose a restore point from before the issue started and click Next.
Step 4: Double-check the restore point details. Once you’re ready, click Finish, then confirm by clicking Yes. Your computer will restart and begin the restoration process.
⚠️ Important: Make sure to save any open files before you start—your PC will reboot automatically.
Method 2: Restore Your Computer to a Previous Date Using Safe Mode
If your computer won’t start normally or keeps running into issues, Safe Mode gives you a clean, minimal environment where you can safely run System Restore and roll your PC back to a working state.
Step 1: To trigger recovery mode, power on your computer, then immediately hold down the power button to force it off as soon as the Windows logo appears—repeat this forced shutdown process three times, and on the third try, Windows should automatically enter the blue Recovery screen.
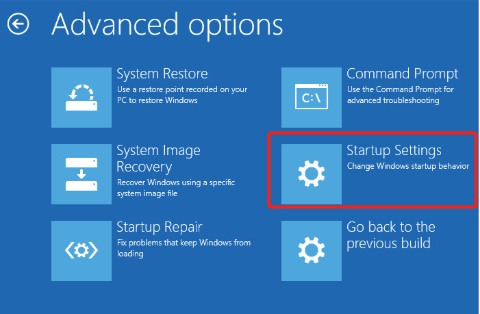
Step 2: Once the recovery options appear, click “Troubleshoot”, then go to “Advanced Options”, select “Startup Settings”, and hit “Restart” so the system can reboot into the Safe Mode selection screen.
Step 3: After your computer restarts, you’ll see a list of options—press 4 or F4 on your keyboard to enter Safe Mode, which loads only the essential drivers and services needed for basic troubleshooting.
Step 4: When you’re in Safe Mode and the desktop loads, open the Control Panel, search for “Recovery”, select “Open System Restore”, then follow the prompts to choose a restore point from before your system started acting up, and confirm the process to begin restoring Windows to that previous healthy state.
Once your PC finishes the restoration and restarts, you should be back in a working environment—hopefully free of whatever issues drove you into Safe Mode in the first place.
Method 3: Use a Recovery Disk to Restore Your PC to a Previous Date
If Safe Mode doesn’t work or your system simply won’t boot at all, your best bet is to use a Windows installation or recovery disk to access recovery mode and perform a system restore from there. Here’s how to do it step by step:
Step 1: Insert your Windows installation media or recovery USB drive into the computer, then shut down or restart the machine.
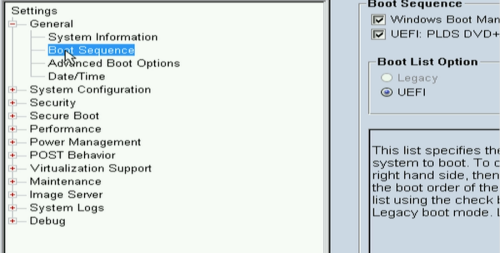
Step 2: As the computer starts, enter the BIOS or UEFI settings (usually by pressing F2, F12, Del, or Esc, depending on your device), then change the boot order to make your USB or disk the first boot device, and save the changes before exiting.
Step 3: Your PC will now boot from the recovery media—once you see the Windows setup screen, click “Next”, and then look for and select “Repair your computer” in the lower-left corner.
Step 4: On the next screen, choose “Troubleshoot”, then go to “Advanced Options”, and select “System Restore”.
Step 5: The System Restore tool will launch—just like in Safe Mode—and from here, you can follow the same steps as Method 2: choose a restore point, confirm, and let Windows roll back your system to an earlier state.
This method is especially useful if your system is severely damaged or completely unbootable—just make sure you have a valid installation or recovery disk ready.
Method 4: Restore Your PC to a Previous Date Using Command Prompt
If nothing else works, you can launch System Restore through Command Prompt using a bootable recovery disk or USB.
Step 1: Plug in your Windows installation or recovery drive, restart your PC, and enter the BIOS to set the USB/DVD as the first boot device (usually by pressing F2, F12, or Del), then save and exit.
Step 2: Once the Windows setup screen appears, click “Next”, then choose “Repair your computer” in the bottom-left corner.
Step 3: Go to Troubleshoot > Advanced Options > Command Prompt.
Step 4: In the Command Prompt window, type rstrui.exe and press Enter.
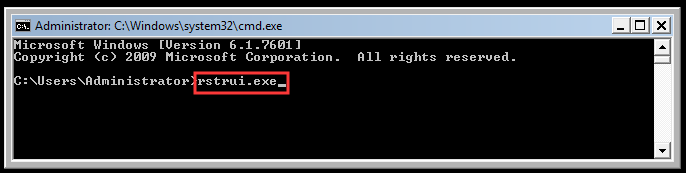
Step 5: This will open the System Restore window—just pick a restore point and follow the prompts to roll your PC back.
Quick, simple, and it works even when the GUI won’t load properly.
Recovering Lost Files with Data Recovery Software:
Are you looking to recover lost files on your Windows 10 or 11 system? While investigating the process of restoring your computer to a previous date, there is always the risk of losing data and files unintentionally. This may include important documents or beloved memories, but don’t worry. We have a solution for you! Recommended WinfrGUI. An easy-to-use graphical interface for Windows File Recovery. This tool makes the recovery process easier without requiring complicated commands or parameters.
Why choose WinfrGUI for data recovery?
WinfrGUI differs from the data recovery tool due to its simplicity and efficiency. Here’s what makes it different:
- ✅ Easy to use: WinfrGUI has an easy-to-use graphical interface making the recovery process easy even for new users.
- ✅ Comprehensive recovery: Whether it’s a document, media file or log. WinfrGUI supports a variety of file types to make sure no valuable information is left behind.
- ✅ Performance: With a powerful scanning algorithm, WinfrGUI quickly finds and recovers lost files, reducing the time spent on recovery.
- ✅ Pre-scan function: To ensure the correctness of the recovery process, WinfrGUI allows you to view the removable items before starting a restore.
With WinfrGUI, recovering lost files on Windows has never been easier. Sorry about data problems and enjoy all smooth recovery with the power of Winfr GUI.
Restore Computer to Earlier Date FAQs
If you have more questions about restoring your computer to a previous date, please see the FAQ below:
Q1: How do I fix the system restore startup in Windows?
There are many ways to fix system recovery boot problems in Windows, such as using boot restore in safe mode or using Windows commands. You can also restore your computer using disk boot.
Q2: Can I restore Windows 10 to the previous date?
Yes, you can restore Windows 10 to a previous date. Windows 10 has various methods including system recovery, safe mode, bootable drives and instructions.
Q3: How can I restore my computer to a previous date without a recovery point?
If you don’t have a restore point, you can still restore your computer to the previous date using System Image Recovery. (if you have created one). Another way you can use third-party recovery software such as WinfrGUI to recover.
Q4: Why can’t I reset my PC to yesterday?
Restoration to a prior date is impossible for numerous reasons. There may be no restore point or locked system restore choices. Users may find restore difficult in certain instances.
Conclusion
In conclusion, having the ability to restore your computer to a previous date can be a lifesaver when facing problems on your Windows 10 or 11 computer. Generating recovery points frequently is a good practice to make sure you’re ready for any future bugs and remember that if you want to recover lost data before performing a system recovery, WinfrGUI is an easy-to-use tool that can help you easily get various types of files.
🔗 Also Read: How to Perform Windows Factory Reset from Boot?
 MyRecover
 FoneTool
