How to Zip a Folder in Windows and Mac
I remember the first time I needed to send a bunch of photos to a client—my email kept bouncing back because the files were too large. I knew compressing them into a ZIP file was the answer, but I wasn’t sure how to zip a folder properly, especially with different steps on Windows and Mac. Worse, I kept wondering if I’d lose any data during compression or if I could recover the folder later if I deleted it by mistake.
If you’ve ever felt stuck like I did, don’t worry. In this guide, I’ll walk you through exactly how to zip a folder on both Windows (10/11) and Mac, step by step. Whether you’re compressing files for storage, sharing, or archiving—and even if you accidentally delete a zipped folder—I’ve got you covered with recovery tips using tools like WinfrGUI. Let’s get into it.
What Does It Mean to “Zip” a Folder?
Zipping a folder is the process of compressing its contents into a single file with the .zip extension. This not only saves disk space but also makes it easier to transfer multiple files at once. The ZIP format is widely supported across operating systems, making it ideal for cross-platform file sharing.
For example, if you need to send 20 PDF documents to a colleague, zipping them puts everything into one neat package. It’s faster to upload, easier to download, and more organized.
Why Zip Files? Common Use Cases
Zipping isn’t just for power users or tech geeks. Here are some everyday reasons you might want to zip a folder:
| Use Case | Benefits |
|---|---|
| Emailing large folders | Reduce total size, bypass attachment limits |
| Archiving old files | Save space while preserving folder structure |
| Uploading to the cloud | Quicker uploads and downloads |
| Sharing multiple files | Avoid missing attachments or broken links |
| Backing up important data | Compressed backups take less space |
In short, zipping is both practical and powerful.
How to Zip a Folder on Windows (10/11)
Zipping a folder on Windows is straightforward and doesn’t require any third-party tools unless you want advanced features. Here’s how to do it:
Method 1: Use the Built-in Right-Click Menu
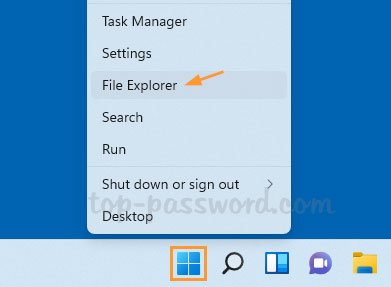
Step 1: Open File Explorer and locate the folder you want to compress.
Step 2: Right-click on the folder.
Step 3: From the context menu, select Send to > Compressed (zipped) folder.
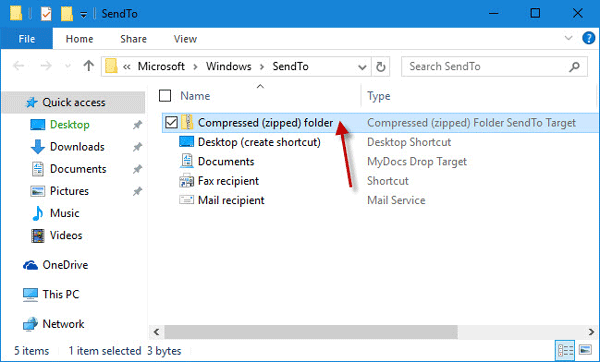
Step 4: Windows will create a new ZIP file in the same location with the folder’s name.
Step 5: (Optional) Rename the ZIP file if you want.
You can now rename the ZIP file, move it, or attach it to emails with ease.
Method 2: Use File Explorer’s “Share” Tab
Step 1: Open File Explorer and click to select the folder you want to zip.
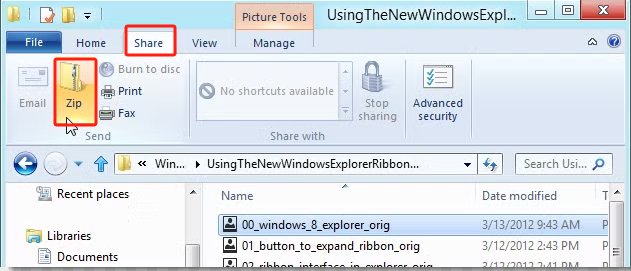
Step 2: On the top ribbon, click the Share tab.
Step 3: Click the Zip button in the toolbar.
The zipped folder will be created right next to your original folder for easy access.
This achieves the same result but gives you more visibility in modern Windows interfaces like Windows 11.
What If I Delete a Zipped Folder?
Accidents happen—I know how stressful it can be if you accidentally delete a zipped folder. But don’t worry, you have options to get it back! Here’s what you can do:
Option 1: Check the Recycle Bin
Most deleted ZIP files end up here first. Open the Recycle Bin and see if your zipped folder is there. If yes, right-click it and choose Restore.
Option 2: Use File History or Backup
If you’ve set up File History or a backup system on your PC, you might be able to recover an earlier version of the zipped folder. Go to the folder’s original location, right-click it, and select Restore previous versions.
Option 3: Use a Recovery Tool Like WinfrGUI
If the zipped folder isn’t in the Recycle Bin and you don’t have backups, try WinfrGUI. I use this free and easy Windows recovery tool whenever files go missing. It can scan your drive and recover deleted ZIP files—even if they’ve been emptied from the Recycle Bin.
Act quickly after deletion! The sooner you start recovery, the better your chances of getting your files back.
How to Zip a Folder on macOS (Monterey, Ventura, Sonoma)
macOS also has built-in support for zipping folders.
Method 1: Use Finder’s Right-Click Menu
Step 1: Open Finder and locate the folder you want to compress.
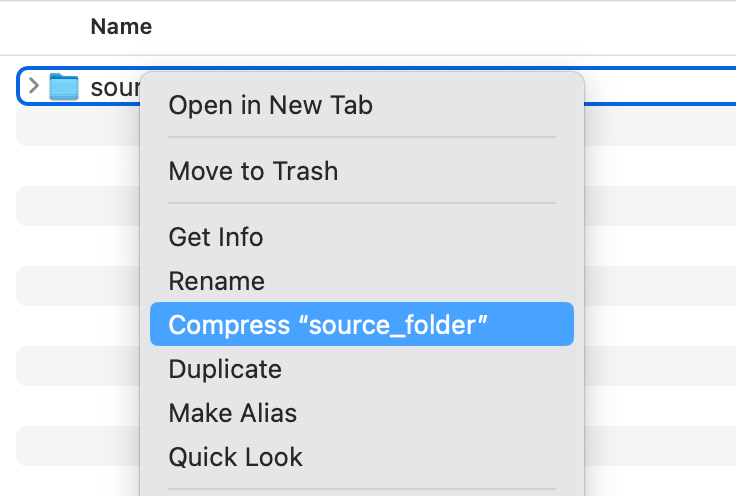
Step 2: Right-click (or hold Control and click) on the folder.
Step 3: Select Compress “[Folder Name]” from the menu.
Step 4: macOS will create a new ZIP file in the same location with the folder’s name followed by .zip.
The compressed folder will usually be named something like FolderName.zip.
Method 2: Terminal Command (for Power Users)
If you prefer the command line:
zip -r MyArchive.zip /path/to/folder
This creates a recursive ZIP file containing all the contents of the folder.
⚠️ Warning: Terminal gives no “Are you sure?” prompts—make sure your syntax is correct!
Common Issues When Zipping Files & How to Avoid Them
Zipping is simple, but a few common issues can trip you up:
| Issue | Cause | Solution |
|---|---|---|
| File too large | Windows’ built-in ZIP utility has a 4GB limit | Use 7-Zip or WinRAR |
| Non-English filenames get garbled | Encoding issues in ZIP | Use UTF-8 compatible tools |
| Folder contents missing after unzip | Zipped the folder contents not the folder itself | Double-check structure before zipping |
| Can’t unzip on another OS | Different ZIP standards | Stick to basic ZIP formats for compatibility |
Always test your ZIP on another device if you’re sending it to someone else.
Other Advanced Compression Tools
If you’re looking for more control, these tools can help:
- 7-Zip (Windows): Offers stronger compression and support for formats like .7z
- The Unarchiver (Mac): A versatile unzipping tool for various archive formats
- PeaZip (Windows/Linux): Open-source and packed with features
These aren’t necessary for basic zipping, but they’re great if you work with large archives regularly.
Conclusion
Knowing how to zip a folder in Windows and Mac is an essential digital skill, whether you’re sharing work files, archiving photos, or uploading to the cloud. It’s fast, easy, and built right into both operating systems. For anything beyond the basics—or if you lose your files—tools like WinfrGUI are your best friend.
🔗 Also Read: