5 Easy Ways to Restore Files with Version History Word
Ever wish you could hit “undo” on a Word document disaster? Whether it’s an accidental deletion, unwanted edits, or your PC crashing mid-sentence, losing the perfect draft can be incredibly frustrating. But don’t panic—Microsoft Word has your back. Thanks to the powerful version history Word feature and other built-in recovery options, you can roll back to earlier versions with just a few clicks. In this guide, we’ll walk you through 5 proven ways to restore previous versions of Word documents—whether saved, unsaved, or deleted. From Word’s AutoSave and File History to powerful free recovery tools like WinfrGUI, we cover all the methods you need to safeguard your work and recover it when things go wrong. So before you rewrite from scratch, take a moment to explore these practical recovery solutions that could save your hours—or even days—of effort.
Method 1: Restore Previous Versions of Word Documents with AutoSave
AutoSave is a built-in Microsoft Word feature that automatically backs up your document at regular intervals. If you’ve saved your file at least once, Word stores temporary versions that you can easily recover. This method is especially useful if your document crashed or you made unwanted changes.
Here’s how to access version history Word through AutoSave:
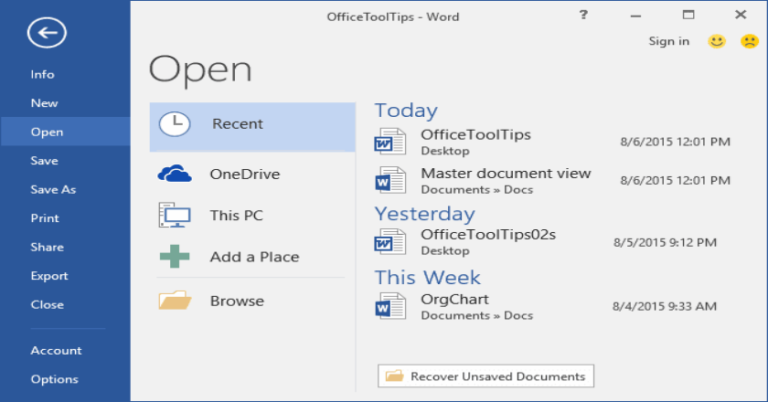
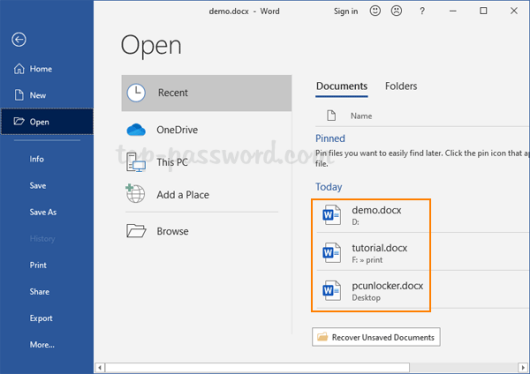
Step 1: Open the Word document you were working on.
Step 2: Go to File > Info > Manage Document.
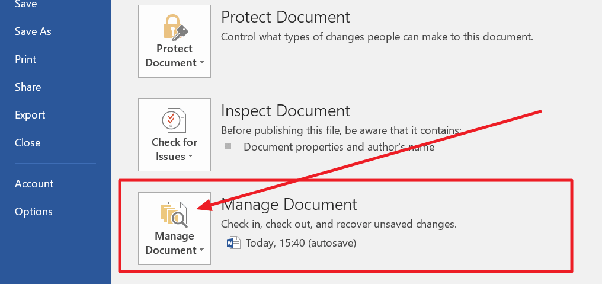
Step 3: On the right side, you’ll see a list of autosaved versions. Each one will have a timestamp, so you can easily spot the one you want.
Step 4: Click a version to preview it. If it’s the one you need, just click Restore to overwrite the current version or Save As to keep both.
If you hadn’t saved the file before the issue occurred:
- Go to File > Info > Manage Document > Recover Unsaved Documents.
- Select the unsaved file, preview it, then click Save As.
AutoSave ensures a safety net for unexpected crashes or accidental edits, helping you retrieve prior drafts without manual effort. It’s a core part of the version history Word toolkit and works best when enabled by default.If you’re unable to open the document because it’s password-protected, check out our guide Forgot Word Document Password? Here’s How to Unlock It Easily!
Method 2: Restore Previous Versions of Word Documents with File Recovery Software
If Word’s built-in recovery options don’t help, powerful third-party tools like WinfrGUI offer deeper file recovery capabilities. When a document is deleted or unsaved, Windows creates backup files such as .tmp and .asd, which recovery tools can scan and restore—even after being removed from Recycle Bin.
WinfrGUI is a user-friendly interface for Microsoft’s Windows File Recovery command-line tool. It simplifies advanced recovery with just a few clicks and boasts a 95% success rate in recovering deleted or unsaved files.
Steps to restore Word version history using WinfrGUI:
Step 1: Download and install WinfrGUI from the official website.
Step 2: Launch the software and select the drive where the file was stored.
Step 3: Use the file type filter to search for .tmp, .asd, or .docx.
Step 4: Click Start to begin scanning.
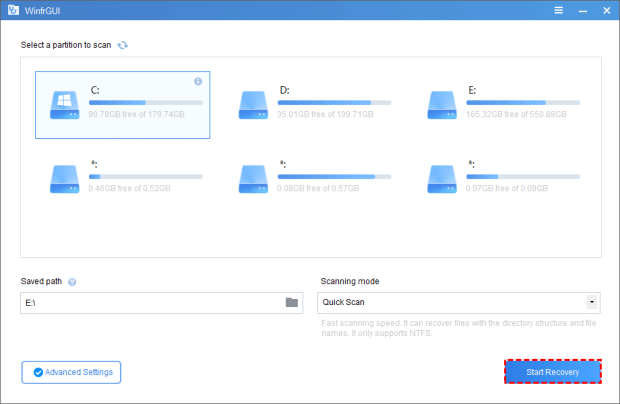
Step 5: Once completed, browse the results, select your document, and click Recover.
Method 3: Restore Word Document via Previous Versions in Windows
Windows offers a built-in feature called Previous Versions that lets you restore older file states if File History or a restore point was enabled. It works even if the document was modified or overwritten—perfect for accessing an earlier draft.
Here’s how to use version history Word via Windows:
Step 1: Navigate to the folder containing your Word file.
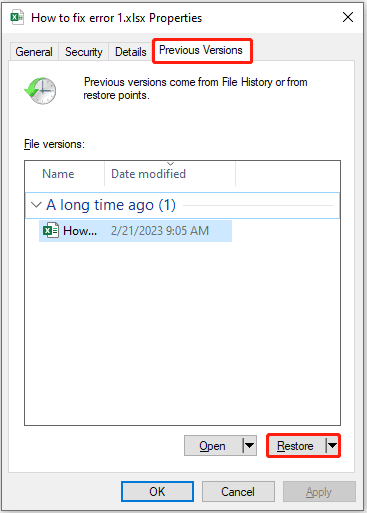
Step 2: Right-click the file and choose Properties.
Step 3: Click the Previous Versions tab. You’ll see a list of earlier versions, usually created by File History or restore points.
Step 4: Select a version and click Open to view it, or Restore to overwrite the current file.
If you accidentally saved over your original document, this method is a lifesaver. You can even copy the previous version to a different folder if you want to preserve both.
Keep in mind this option is only available if system protection or File History was enabled prior to the issue. If it’s not set up yet, consider turning it on now to protect your files in the future.
This is a simple, no-software-needed way to access version history Word on your local system.
Still can’t find your saved file? Check out this guide for more help I Saved My Word Document but It Disappeared? Top 4 Solutions
Method 4: Restore from Backup (External Drive or Cloud Storage)
If you’ve been backing up your files to an external drive or cloud storage platform (like Google Drive, OneDrive, or Dropbox), restoring a previous version is straightforward. Backups are your ultimate fallback when built-in recovery tools or software don’t help.
✅ If You Use an External Drive:
Step 1: Plug in your external hard drive or USB drive.

Step 2: Open the backup folder where your Word document was saved.
Step 3: Browse for older versions of the file. Some people keep multiple copies with names like Report_v1, Report_v2, etc.
Step 4: Copy the version you want and paste it to your desktop or original folder.
✅ If You Use Cloud Storage (OneDrive, Google Drive, Dropbox)
Step 1: Log into your cloud storage account in a web browser.
Step 2: Go to the folder where the Word document is stored.
Step 3: Right-click the file and look for an option like Version History:
- OneDrive: Right-click > Version History
- Google Drive: Right-click > Manage Versions
- Dropbox: Click the three dots (…) > Version history
Step 4: View the list of past versions with timestamps.
Step 5: Click Restore to replace the current file, or Download to save a copy of an older version.
Many cloud services also offer their own version history feature. For example, OneDrive allows you to right-click a file and choose Version History, letting you restore any recent edits.
This method is especially useful when Word files are corrupted, infected, or lost due to a system crash. It ensures that even if the local file is lost, the cloud keeps your work safe.
Having a backup routine is one of the smartest strategies for managing version history Word. Cloud-based autosave + manual backup = unbeatable protection.
Method 5: Restore Previous Versions with Microsoft 365 Version History
If you use Microsoft 365 and save files to OneDrive, you get access to Word’s most advanced version tracking system: Version History. This cloud-based feature automatically stores every saved version, allowing you to revisit and restore with ease.
Here’s how to access version history Word in Microsoft 365:
Step 1: Open the Word document stored in OneDrive (via the Word desktop app or Word Online).
Step 2: Click the File tab in the top-left corner.
Step 3: On the sidebar menu, click Info (usually selected by default).
Step 4: Click Version History (you’ll find it just under the file name or on the right-hand side).
Step 5: A panel will open on the right, showing all previously saved versions with their date and time.
Step 6: Click on any version to open it in a new window — this won’t affect your current file.
Step 7: If it’s the version you want:
- Click Restore to overwrite the current version
- Or click File > Save As to keep it as a separate copy
You can also use the Compare feature to track changes between versions—especially useful for collaboration.
This method is highly reliable and perfect for regular Word users who work on the cloud. If you want real-time backups, automatic saving, and cloud version control, Microsoft 365 + OneDrive is a must-have combo for managing version history Word effectively.
Bonus Tips: How to enable automatic backup in Microsoft Word
To avoid similar problems in the future, you can make Microsoft Word automatically back up your document. Follow these o reduce the risk of losing your work, you can set Word to automatically create a backup copy every time you save a document. Here’s how to enable this feature:
Steps to Enable Automatic Backup:
Step 1: Open Microsoft Word.
Step 2: Click File > Options (bottom left).
Step 3: In the Word Options window, select the Advanced tab.
Step 4: Scroll down to the Save section.
Step 5: Check the box for “Always create backup copy.”
Step 6:Click OK to apply the change.
What Happens Next:
- Word will save a backup copy (with a
.wbkextension) in the same folder as your original file. - The backup is one version behind the latest save. If the main file gets corrupted or overwritten, the backup gives you a quick fallback.
Where to Find Backup Files:
You can also check this folder for autosaved or backup files:
mathematica C:\Users\[YourUsername]\AppData\Roaming\Microsoft\Word
To access it quickly, press Windows + R, type:
shell %appdata%\Microsoft\Word
and press Enter.
Enabling this feature takes less than a minute and adds an extra layer of protection for your documents.
Conclusion
When it comes to Word document recovery, prevention is great—but knowing how to respond is even better. Whether you accidentally closed a file without saving or realized too late that a previous draft was stronger, tools like version history Word can be a true lifesaver.
This guide covered five trusted methods—from using AutoSave and Windows File History to tapping into OneDrive or powerful software like WinfrGUI. Each offers a reliable way to bring back lost content, depending on how and when your document went missing.
The bottom line? Don’t let one mistake wipe out your work. With the right tools and know-how, you can restore previous versions in minutes. Be sure to enable autosave, back up important files, and keep a recovery tool ready—because even the best writers make mistakes, but smart ones recover fast.
Also Read👉How to Recover Word Document That Was Not Saved: 2025 Guide