How to Recover “Recently Deleted Files Windows 10
If you are reading this, you are probably stressed over recently deleted files on Windows 10. Losing an important document, photo, or project file by accident can feel devastating. The good news is that learning how to recover recently deleted files Windows 10 is easier than you might think. When a file is deleted, Windows doesn’t erase it immediately—it simply marks the space as available for new data. The original file remains until it is overwritten. The most important rule in recovery is to stop using your computer immediately. Avoid downloading, installing software, or browsing the web, as any action could overwrite the missing file. By following proper recovery steps, from checking the Recycle Bin to advanced methods, you can safely restore lost data. This guide will show you how to recover your files effectively and ensure you understand how to get recently deleted files back Windows 10 without risk.
Method 1: The 1-Minute Fix
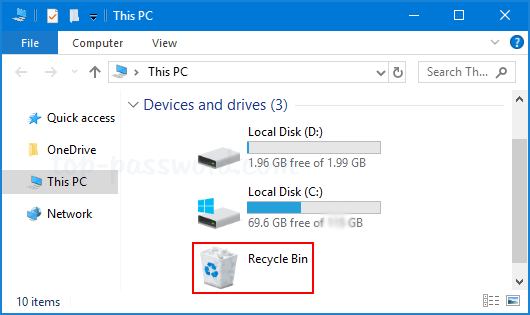
The fastest, easiest, and most frequent solution is always the Recycle Bin. This feature acts as a temporary security buffer, preventing immediate permanent data loss. It is the simplest and most reliable way to recover deleted files Windows 10 free, especially for files removed using the standard Delete key (and not the permanent deletion shortcut, Shift + Delete).
Step-by-Step Recovery from the Recycle Bin:
Step 1: Find the distinctive trash can icon on your desktop and open it. If it’s not visible, you may need to check your desktop icon settings.
Step 2: The Recycle Bin stores files based on several criteria, including the original path and the date deleted. You can click on the column headers to sort by “Date Deleted” to quickly isolate the newest items. If you know the file name, use the search bar in the top-right corner to filter the contents.
Step 3: Once you locate the missing file, right-click its name and choose the “Restore” option. The file will instantly move back to its original folder location on your hard drive, exactly where it was before it was deleted.
Step 4: If the Recycle Bin is full of old, unimportant items, you can restore multiple files at once by holding down the Ctrl key while clicking on each file, then right-clicking and selecting Restore. Alternatively, you can simply drag the file directly from the Recycle Bin window back onto your desktop or into a specific folder to bypass the restoration process.
If the file isn’t in the Recycle Bin, it means one of three things happened: the file was deleted using Shift + Delete, the Recycle Bin was intentionally or automatically emptied, or the file was deleted from an external device that bypasses the Recycle Bin (like a network drive or some USB devices). If this is the case, proceed immediately to Method 2.
Method 2: The Built-In Backup
If the Recycle Bin didn’t contain your recently deleted files on Windows 10, this is where your preventative measures (hopefully) pay off. Windows 10 includes a powerful, often overlooked feature called “File History” that automatically creates snapshots of your personal files (documents, pictures, videos, etc.) at regular intervals, provided you had it enabled and pointed to an external drive or network location. Learning how to see recently deleted files on Windows using File History can be a lifesaver. For this method to work, File History must have been enabled and configured to back up to an external storage device before the file was deleted. If you only recently enabled it, older deletions may not be covered.
Step-by-Step Recovery with File History:
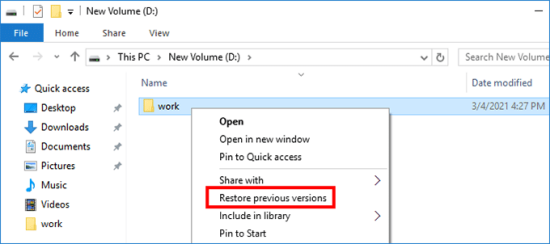
Step 1: Open File Explorer and navigate directly to the specific folder where the deleted file used to reside (e.g., your “Documents” folder or a subfolder within it).
Step 2: Right-click the folder and select “Restore previous versions” from the context menu. This action opens the folder’s Properties window to the “Previous Versions” tab.
Step 3: The window will list various dated versions of that folder, based on the backups File History has created. Use the arrows to browse through the available dates (versions). The key is to find a timestamp that is before the time the file was deleted.
Step 4: Open or Restore the File:
- Once you locate a version that you believe contains the file, you can click “Open” to verify the contents of that previous version without restoring it yet.
- If you confirm the file is present, click the green “Restore” button. This action will bring the file back to the folder’s current location. Be aware that if a file with the same name exists, Windows will prompt you to replace or keep both versions.
If the right-click menu isn’t available, you can access the full File History interface:Search for “Restore your files with File History” in the Windows search bar. Browse the full backup history, navigating through different drives and folders to pinpoint the exact location and time the file was last saved.
Method 3: Recovering Permanently Deleted Files
When dealing with permanently recently deleted files windows 10 or 11—those removed from the Recycle Bin or using the Shift + Delete shortcut—your options become more specialized. Since the file’s space is marked as free, we need tools that can scan the raw data blocks before new files overwrite them. This is often the last resort, but often highly successful if you stopped using the computer immediately.
#1. Windows File Recovery: WinFR CMD
The official, free utility from Microsoft is a command-line tool designed for deep recovery. While powerful and officially supported, it requires some technical comfort due to its lack of a graphical interface.
- When to Use It: This is best for files on an NTFS drive where the initial two methods failed, or for recovering data from corrupted drives.
- WFR Modes Explained: WFR operates in different modes based on the drive’s file system and health:
Regular Mode(/regular): Best for healthy NTFS drives where the file was deleted recently. It uses the Master File Table (MFT) to find file segments.Extensive Mode(/extensive): For non-NTFS drives (like FAT, exFAT) or if Regular Mode fails. It scans for file signatures and takes significantly longer.Segment Mode(/segment): A recovery option for NTFS drives using file record segments.Signature Mode(/signature): Used for non-NTFS drives (FAT, exFAT) to search for common file types (like JPEG, DOCX, MP3) by their headers.
- Example Command: To recover a Word document named
Report.docxfrom your C: drive to your external D: drive using Regular Mode, the command would look like this:
winfr C: D: /regular /n \Users\<YourUserName>\Documents\Report.docx
- The Crucial Command Principle: When using WFR, you must recover the data to a different hard drive than the one you are scanning. For example, if you are recovering from your C: drive, you must save the recovered files to an external USB drive (D: or E:). Attempting to save to the same drive risks overwriting the very data you are trying to recover.
#2. Free Data Recovery Software
For non-technical users, third-party software offers a friendly, user-friendly graphical interface (GUI) that abstracts away the complexity of command-line tools. These programs perform a deep scan of your drive using advanced algorithms to reconstruct file data. Well-known names in this space include WinfrGUI, Recuva, EaseUS, and Disk Drill. A particularly useful tool is WinfrGUI. It serves as a graphical front-end for Microsoft’s official Windows File Recovery (WFR) tool. This allows you to leverage the power of Microsoft’s recovery engine without having to memorize complex command syntax or deal with the command prompt interface. This is an excellent solution for recovering recently deleted files windows 10 for those who are intimidated by command lines.
Critical Warning: Always download and install any recovery software on a drive separate from the one that contained the deleted file. If your deleted file was on the C: drive, install the recovery software on a USB stick or an external drive. Installing it on C: risks overwriting the precious deleted data you are trying to save.
Troubleshooting and Prevention FAQ
Data recovery is a necessary skill, but proactive defenses are always superior. Here are answers to common questions about setting up a robust backup strategy in Windows 10.
Q1: What is the most immediate, built-in way to prevent future file loss in Windows 10?
The primary defense is Windows File History. You must enable it immediately. Go to Settings > Update & Security > Backup, select “Add a drive,” and ensure the “Automatically back up my files” toggle is set to On. This creates automatic snapshots of your personal files (Documents, Pictures, etc.).
Q2: Why is using an external drive essential when setting up File History?
File History must store its backups on a drive separate from your main Windows installation (e.g., an external USB hard drive or a network location). If your internal hard drive fails or is corrupted, your backup files will be safe and accessible on the external media.
Q3: Can cloud storage services like OneDrive truly replace a local File History backup?
Cloud storage (like OneDrive, Google Drive, or Dropbox) is excellent for real-time synchronization and offers file versioning, meaning it can save you from accidental edits or minor deletions. However, it is primarily a sync tool. It should be used in addition to, not as a replacement for, a dedicated external backup strategy (like File History or a full system image).
Q4: What is the difference between File History and a “full external backup”?
File History is a continuous, incremental backup of specific personal files and folders (Documents, Pictures, Music). A full external backup (or system image) is a complete, one-time copy of your entire hard drive, including the operating system, applications, and settings. A full backup is necessary for disaster recovery (like a complete drive failure or severe malware).
Q5: If I accidentally saved over a document, how can I use my backups to recover the previous version?
Cloud services like OneDrive are best for this, using their “Version History” feature to roll back the file to the state just before you overwrote it. File History can also accomplish this by restoring an older snapshot of the folder containing the file.
Q6: I want an external backup, but where do I find reliable software?
Windows has a built-in feature for creating system images. For more flexibility, popular third-party tools include Macrium Reflect and EaseUS Todo Backup. These utilities are trusted for creating periodic, full copies of your data—the ultimate defense against catastrophic hard drive failure or malware.
Conclusion
Navigating the landscape of data recovery can be stressful, but by following a logical sequence—checking the Recycle Bin, exploring File History, and finally, deploying dedicated recovery software—you maximize your chances of success. Quick action is always the best defense against data loss, because once the space on your disk has been overwritten by new data, the file is gone for good. Now that you’ve (hopefully) recovered your file, take five minutes to set up your backups so you never have to panic over recently deleted files windows 10 again!
🔗 More Tutorials: