How to Recover Photos from SD Card When Corrupted
The sinking feeling of losing weeks, months, or years of captured moments is real, and the terror stems from the immediate thought: Are my photos gone forever? This guide will show you how to recover photos from sd card successfully. Fortunately, the answer is usually no. When an SD card shows a corruption error, it doesn’t mean the physical data is gone; it means the card’s File System Index—the catalog that tells your computer where each file starts and ends—has become damaged. Because the files themselves are often still intact in the memory sectors, they are simply invisible to your operating system. Your job now is to use specialized tools to bypass the damaged catalog and retrieve the physical data directly. This process is called “deep scanning” or “RAW recovery,” and it has a very high success rate for corrupted cards. However, before doing anything else, you must adhere to the single most critical rule of data recovery: Stop using the SD card immediately. Do not take more photos, do not attempt to format it yet, and do not run any system maintenance software, as any new operation risks overwriting the very data you are trying to save. Simply put: Take the card out and put it somewhere safe until you are ready to recover. This guide covers quick diagnosis, simple software fixes, and the definitive solution using specialized recovery software.
Diagnosing the Problem: Software vs. Hardware
Before diving into complex recovery tools and learning how to recover photos from sd card, let’s confirm the problem lies with the card and not your accessories or computer port.
Check the Connection/Reader
One of the most common causes of the “card not readable” error is a faulty connection. The pins inside the reader can become dusty, bent, or the reader itself can fail.
- Try a Different Card Reader: If you’re using a cheap external reader, switch to a high-quality one or try the built-in reader on a different computer.
- Connect the Device Directly: If you took the photos with a camera, connect the camera directly to your computer using a USB cable. This bypasses the SD card reader entirely, letting the camera act as the bridge.
- Check the Write-Protect Switch: Ensure the tiny physical lock switch on the side of the SD card is not set to the “Lock” position.
Check Disk Management (Windows) or Disk Utility (Mac)
If changing the connection doesn’t help, check how your operating system sees the card at a low level.
- On Windows: Type “Disk Management” into the Start menu. Look for your SD card in the list of drives.
- On Mac: Search for “Disk Utility” in Spotlight.
What to look for:
- Good Sign: If the card appears, even if it shows an unknown label, an incorrect size, or the file system is listed as RAW (Windows) or Unallocated (Mac), it means the computer can physically read the hardware. You can proceed with software recovery.
- Bad Sign: If the card does not appear at all, or if Disk Management repeatedly freezes when trying to read it, the card may have suffered a physical hardware failure.
Simple Software Fixes
Sometimes, the corruption is only minor and can be repaired without needing a full-blown recovery application. These simple, non-destructive attempts are crucial steps in learning how to recover photos from sd card before escalating to professional software.
Use CHKDSK (Windows Command Prompt)
The Check Disk utility in Windows can often fix minor corruption and file system errors.
Step1:Search “cmd” in the Start menu, right-click, and select “Run as administrator.”
Step2: Check Disk Management (Section II.B) to confirm the drive letter assigned to your SD card (e.g., E:, F:, G:).
Step3: Run the Command: Type the following command, replacing E with your card’s drive letter, and press Enter:
chkdsk E: /f
The /f parameter tells the utility to fix any file system errors it finds. If successful, the card may become readable again, and your photos will instantly reappear. If it fails, or if it fixes the card but the photos are still gone (meaning they were deleted before the corruption), you must move to Phase 3.
Mac Repair (First Aid)
For Mac users, the equivalent non-destructive repair tool is built directly into Disk Utility.
Step1: Open Disk Utility: Find the application via Spotlight.
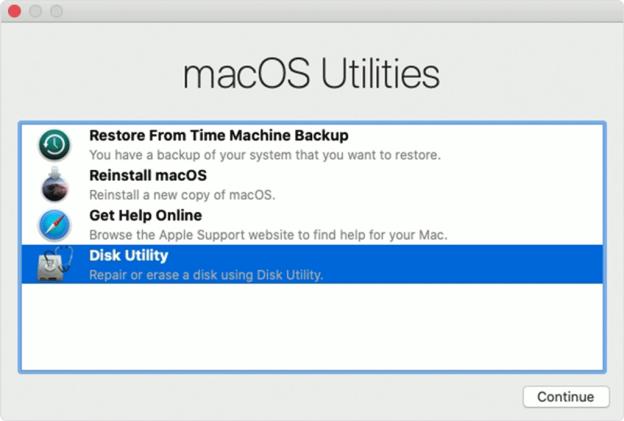
Step2: Select the SD Card: In the left sidebar, click on the corrupted volume (or the physical SD card itself).
Step3: Run First Aid: Click the First Aid button at the top of the window.
Step4: Wait for Repair: Disk Utility will attempt to verify and repair the corrupted directory structure. If successful, the drive will mount correctly.
The Definitive Solution
If the simple fixes failed, or if your card showed up as RAW or Unallocated in Disk Management, specialized recovery software is your most powerful tool for solving the core problem: how to recover photos from sd card. Data recovery software bypasses the operating system’s reliance on the corrupted file index. Instead, it performs a Deep Scan, reading every sector of memory on the card. It looks for known file signatures (like .JPG, .CR2, .MP4) and reassembles the photos and videos piece by piece, regardless of what the file system says.
Top 3 Recommended Tools (Brief Overview)
The goal is to find the best utility to address how to recover photos from sd card. We recommend having options for different skill levels and budgets:
#1. EaseUS or Disk Drill (Professional Option):
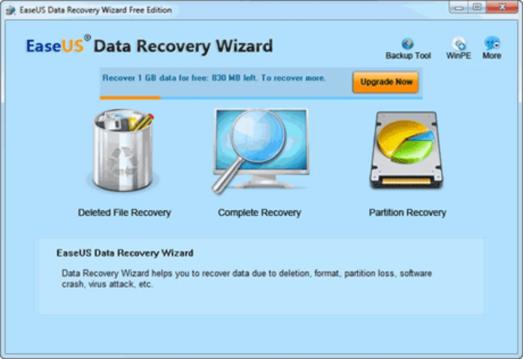
These tools are the industry standard for maximum success. They feature highly intuitive graphical interfaces and excel at recovering files from severely damaged partitions, formatted cards, and deep RAW file reconstruction. While they often require a purchase for full recovery, their free versions usually allow you to scan and preview what is recoverable.
#2. WinfrGUI (Free for Windows):
Microsoft’s Windows File Recovery (WFR) is incredibly powerful, but its command-line interface is daunting. WinfrGUI provides a user-friendly graphical wrapper for WFR, making it the perfect free solution for Windows users. It’s excellent for running the necessary deep and signature-based recovery modes required for corrupted SD cards and deleted photos.
#3. PhotoRec/TestDisk (Free & Cross-Platform):
This tool is the open-source powerhouse. PhotoRec is a command-line utility (though simple GUIs exist) renowned for its efficiency in recovering files from virtually any type of media, including severely broken or unallocated partitions across Windows, Mac, and Linux. It is highly effective but requires slightly more technical comfort than the two other options.
Step-by-Step Recovery Process
The definitive step-by-step process for figuring out how to recover photos from sd card is similar across most recovery applications:
Step1: Download WinfrGUI and install it to your computer’s main hard drive (C: drive), NOT the corrupted SD card. Installing it to the SD card will overwrite the very data you are trying to save.
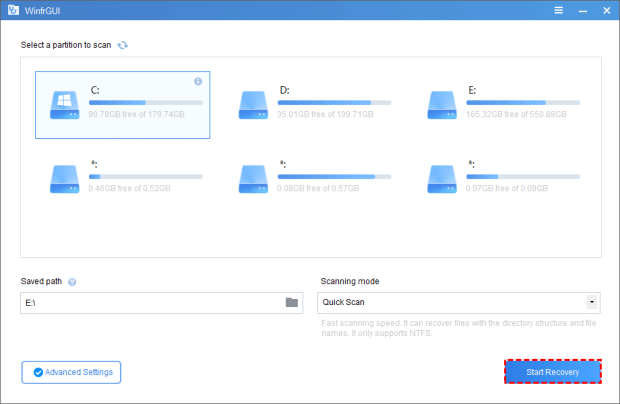
Step2: Use a reliable card reader to connect the card to your computer.Launch the software and select the SD card from the list of available drives.
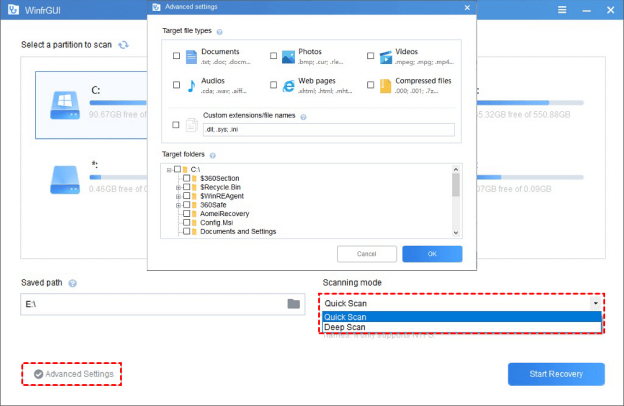
Step3: Since the card is corrupted, do not rely on a quick scan. Select the most thorough scanning option—labeled “Deep Scan,” “Quick Scan.” This tells the software to look for file patterns, not the index.
Step4: Once the scan is complete, the software will display a list of recoverable files. Often, the files will have generic names (like File0001.jpg), but you can usually preview the images to confirm they are the photos you want. Then, click “Start Recovery” to restore them to your chosen location.
Critical: Save to a New Location: When prompted to save the recovered files, NEVER save them back onto the corrupted SD card. Select a new, safe location, such as your computer’s desktop, an external hard drive, or cloud storage. This protects your recovered files and prevents further corruption.
Troubleshooting FAQ
Data recovery often involves unexpected hiccups. Here are answers to six of the most common questions you might have during the process.
Q1. What does it mean when my card shows up as a “RAW” file system?
A RAW file system indicates that the Windows operating system cannot recognize the file system (like FAT32 or exFAT). It’s essentially a blank slate to the OS. The physical data is still on the disk, but the map (index) is gone. This is the perfect time to use recovery software and perform a deep, signature-based scan.
Q2. Is it safe to run recovery software on a corrupted SD card?
Yes, it is safe. Reputable data recovery software is engineered to operate in “read-only” mode, meaning it only reads data from the card without writing any information back onto it. As long as you follow the golden rule of saving the recovered files to a separate drive, the card remains untouched during the scanning process.
Q3. I recovered my photos, but some are still corrupted/unreadable. Why?
Unfortunately, if you continued using the card after the files were deleted or the card was corrupted, those files may have been partially or fully overwritten by new data (even a small thumbnail file). Additionally, severe physical damage (like a bend or crack) can destroy specific memory sectors, making data retrieval from those areas impossible.
Q4. How long does a “deep scan” usually take?
The time required depends entirely on the card’s size and its read speed (often determined by the quality of your card reader). A 64GB card might take between 1 to 3 hours. It is crucial to be patient and let the process complete without interruption, as stopping the scan means you’ll have to start the extensive search from scratch.
Q5. My computer won’t recognize the card at all. What should I do?
If the card doesn’t appear in Disk Management (Windows) or Disk Utility (Mac) even after trying a new card reader, the physical controller chip inside the card has likely failed. Recovery software requires the computer to see the card as a physical device. At this point, no software will help, and the only remaining option is professional data recovery.
Q6. After recovery, can I trust and reuse the SD card by formatting it?
It is strongly advised not to reuse the card. The corruption event indicates a potential underlying firmware or hardware issue that could lead to another failure. If you successfully recovered your data, consider the card unreliable and retire it to avoid the stress and hassle of another loss.
Conclusion
If you successfully completed Phase 3 and your recovery software reconstructed your photos, you have successfully answered the question of how to recover photos from sd card and won the battle against corruption! However, if your computer fails to recognize the card entirely (even in Disk Management), or if the recovery software consistently freezes, the damage has moved beyond simple file system corruption into a potential hardware or controller failure. In this scenario, if the lost memories are irreplaceable, you must consider consulting a professional data recovery lab. Be aware that these labs use specialized forensic equipment and cleanrooms, making their services expensive and a true last resort. Finally, remember that the best prevention is a robust backup strategy: now that you’ve safely rescued your images, ensure they are stored on a reliable long-term medium, and strongly consider replacing that problematic SD card with a brand you trust to prevent future data loss.
🔗 More Tutorials: