How to Recover Unsaved Word Documents [Update]

As someone who works with tech every day, I know how frustrating it is to lose a Word document you forgot to save. You spend hours writing, editing, perfecting—and then one wrong click or a system crash wipes it out. But here’s the thing: Microsoft Word is built with several safety nets designed for moments like this. Features like AutoSave, AutoRecover, and unsaved file versions can often help you recover your lost work—if you know where to look. I’ve helped countless users get their files back using these built-in tools, and in this guide, I’ll show you exactly how to do the same. Whether the document was accidentally closed or the PC crashed unexpectedly, there’s a real chance it’s still recoverable. Let’s walk through the steps and give your hard work a second chance.
Can I Recover an Unsaved Word Document?
Yes, Word can recover unsaved documents in several ways. As a leader in digital writing, Word developers have used several useful features for such situations:
- AutoRecover: This feature automatically saves a copy of your document at regular intervals. Usually every 10 minutes. If Autorecover fails or shuts off accidentally, download the newest version.
- Word’s built-in backup function saves a duplicate of your work every time you save. Select “Always Make Backup” under File > Options > Save. The backup will have an extension “.wbk” and will be saved in the same folder as the original document.
- Auto Saving: Available for subscribers Office 365 AutoSave will save your document directly every few seconds while you’re working with it. This feature is useful in preventing data loss during failures or power outages. Be sure to enable auto-saving in the upper left corner of your Word window.
- Document Recovery: In some cases, Word will detect documents that have not been saved correctly and give you a document recovery option when you restart the program. If there is a recovery window, the document will appear on the left side of the window. Word allows you to view and revive documents that are not saved.
Even if you haven’t set up automatic saving or encountered situations where it doesn’t work when you lose your documents, there are other ways to recover them. Try exploring them further.
How to Recover Word Documents with Software?
If you do not want to use any software, there are still free ways to recover unsaved Word documents. However, if these methods don’t work, you can consider using a professional data recovery tool called WinfrGUI. Here’s how you can recover unsaved word documents using various methods:
Method 1: Recover deleted or unsaved word documents using WinfrGUI
If other recovery options haven’t worked, WinfrGUI is a powerful and beginner-friendly solution worth trying. It’s built on Microsoft’s Windows File Recovery engine, but with a simple interface that requires no command-line skills. Here’s how to use it:
Step 1: Download WinfrGUI from the official website and install it according to the instructions.
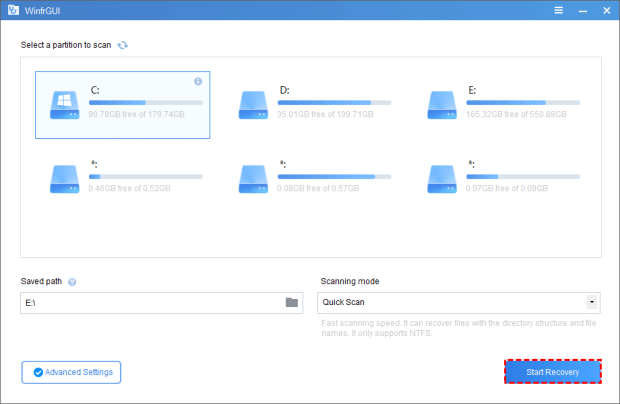
Step 2: Launch the program and choose the drive where your Word document was saved or lost.
Step 3: Click “Scan” to start searching for deleted or unsaved files. The scan progress will display in real-time.
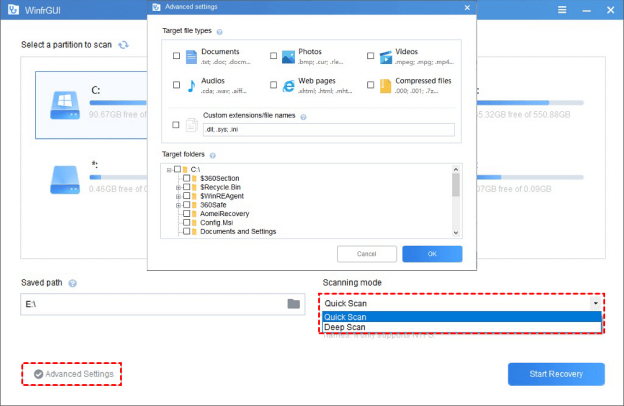
Step 4: To narrow results, filter by file type (e.g. .docx, .doc) or look for unknown Word documents under “unsaved.”
Step 5: Preview the first page of any recovered document. If it’s damaged, WinfrGUI will attempt to repair it automatically.
Step 6: Click “Start Recover” and choose a safe location on your PC to save the restored document.
How to Recover Word Documents without Software
Now let’s explore non-software ways to recover unsaved Word documents.
Method 1: Restore Deleted Word Documents from the Recycle Bin
If the Word document was recently deleted, there’s a good chance it’s still sitting in the Recycle Bin. Here’s how to restore it:
Step 1: Double-click the Recycle Bin icon on your desktop to open it.
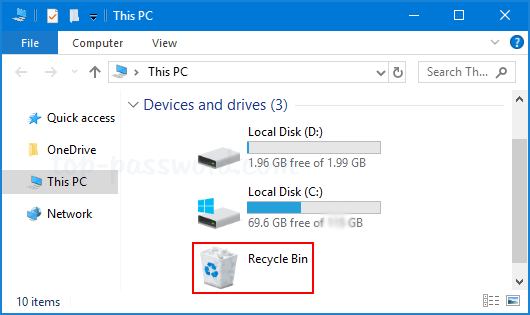
Step 2: Scroll through the list or use the search bar in the top-right corner to look for your lost Word document.
Step 3: Once you find the file, right-click it and select “Restore.” This will return the file to its original location.
Step 4: To locate the restored file, either browse manually or search for it by name in the Start menu search bar or File Explorer.
📝 Tip: If you’re unsure about the file name, sort items in the Recycle Bin by “Date Deleted” to find recent files more easily.
Method 2: Search for Word documents that have not been saved manually in the AutoRecover folder.
Word’s AutoRecover feature automatically saves temporary versions of your document in the background—even if you never clicked “Save.” These files are stored in hidden system folders and can often be recovered manually.
Step 1: Press Windows + R to open the Run dialog box.
Step 2: Type %AppData% and press Enter to access the Roaming folder within AppData.
Step 3: Navigate to: Microsoft > Word — Check for any recently modified .asd (AutoRecover) files.
Step 4: If nothing shows up, go back one level and navigate to: AppData > Local > Microsoft > Office > UnsavedFiles — This is another location where unsaved files may be stored.
Step 5: Still nothing? Try a system-wide search for AutoRecover files:
- Open File Explorer
- In the search bar, type
*.asd - Let Windows search all drives for files with the
.asdextension
Step 6: Once you find a .asd file:
- Open Microsoft Word
- Go to File > Open > Browse
- At the bottom right of the window, change the file type filter to “All Files”
- Navigate to the folder where the
.asdfile was located - Select the file and click Open
Step 7: If the document opens successfully, immediately save it with a new name to avoid losing it again.
📝 Pro Tip: You can also check Word’s built-in recovery panel: Open Word and go to File > Info > Manage Document > Recover Unsaved Documents to quickly access any unsaved files Word has backed up.
Method 3: Recover Unsaved Word Documents Using Word Backup Files (.wbk)
If AutoRecover didn’t help, Microsoft Word may have created a backup copy of your document in .wbk format. These backups are only available if the “Always create backup copy” option was enabled in Word settings.
Follow these steps to search for and open a backup file:
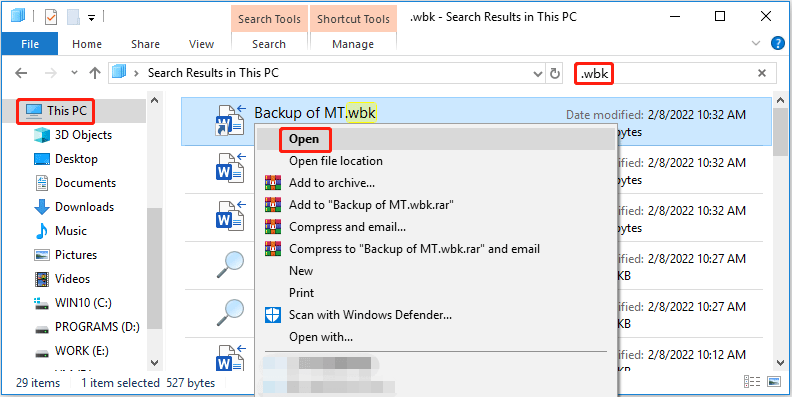
Step 1: Open File Explorer and use the search bar to look for .wbk files. Type *.wbk and press Enter to scan your drives for Word backup files.
Step 2: Look through the results and check the Name column for files that resemble the lost document.
Step 3: If you find a relevant .wbk file, double-click it to open in Microsoft Word.
📝 Note: You can enable this backup feature for future safety via File > Options > Advanced > Save > Always create backup copy.
Method 4: Use Word’s Built-in “Recover Unsaved Documents” Feature (AutoSave)
If you closed Word without saving, there’s still a chance to recover your work using Word’s built-in AutoSave and recovery tools. Here’s how to access them:
Step 1: Open Microsoft Word (a blank document is fine). Click File in the top menu, then go to the Info tab.
Step 2: Click Manage Document (or “Manage Versions,” depending on your version of Word).
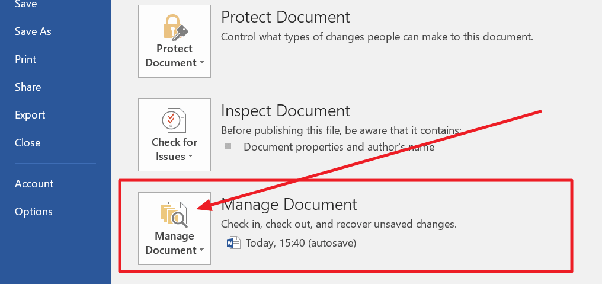
Step 3: Select Recover Unsaved Documents from the dropdown menu.
Step 4: A new window will appear showing recently unsaved files—select the one you want.
Step 5: Click Open, review the content, and then Save As to restore your file permanently.
📝 Tip: These unsaved files are usually stored temporarily, so act quickly before they’re overwritten.
Method 5: Recover Documents Using Word’s Document Recovery Pane
When Word or your system crashes unexpectedly, the Document Recovery feature automatically saves unsaved documents and prompts you to recover them the next time you open Word. Here’s how to use it:
Step 1: Restart your computer to ensure any recovery files are properly loaded.
Step 2: Open Microsoft Word again.
Step 3: On the left side of the Word window, look for the Document Recovery pane listing recovered files.
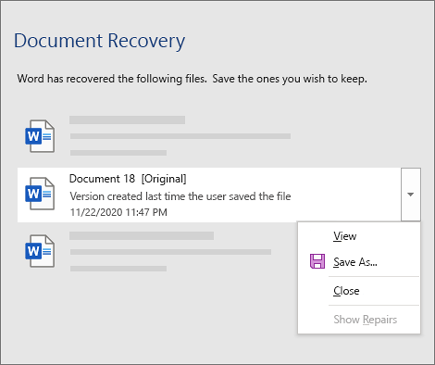
Step 4: Click on any file in the list to preview it.
Step 5: Select Open to review the document or Save As to save a copy to a secure location.
📝 Note: If the Document Recovery pane doesn’t appear automatically, you can check for recovery files manually in the AutoRecover folder.
Method 6: Recover Unsaved Word Documents from Temporary Files
While you work on documents, Windows creates temporary files to store your progress. These files usually get deleted when you save properly, but unsaved Word documents might still be hiding in the temp folder. Here’s how to find and recover them:
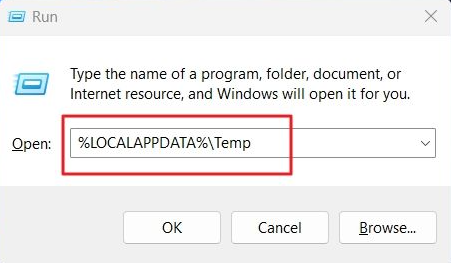
Step 1: Press Windows + R to open the Run dialog.
Step 2: Type %temp% and press Enter to open the Temporary Files folder.

Step 3: Look through the folder for files that start with ~ or have a .tmp extension—these could be your unsaved Word documents. Note the file location.
Step 4: Open Microsoft Word, then go to File > Open > Browse.
Step 5: At the bottom right, change the file type filter to “All Files (.)” to reveal .tmp files.
Step 6: Navigate to the temp folder location you noted, select the .tmp file, and click Open.
Step 7: If Word opens the file successfully, immediately save it as a regular .docx file.
📝 Tip: Temporary files can be hard to recognize—sort by date modified to find recent files more easily.
How to Prevent Losing Word Documents in the Future
Protecting your work starts with good habits and settings. Here are some essential tips to keep your Word documents safe:
Tip 1: Save Regularly
Make it a habit to save your document frequently—after every few paragraphs or edits. Use the shortcut Ctrl + S to save quickly without interrupting your flow.
Tip 2: Enable AutoRecover and AutoSave
These built-in features automatically save your work at set intervals, minimizing data loss if Word crashes or closes unexpectedly. To enable them:
- Open Word and click the File tab.
- Select Options, then click Save on the left panel.
- Check “Save AutoRecover information every” and set the time interval (e.g., every 5 or 10 minutes).
- Make sure “Keep the last AutoRecovered version if I close without saving” is enabled.
- Optionally, change the AutoRecover file location for easier access.
- Click OK to save your settings.
Tip 3: Use Backup Solutions
Regularly back up important documents to the cloud—services like OneDrive, Google Drive, or Dropbox are great options. Alternatively, use an external hard drive or USB to keep offline copies. This ensures you can restore files even if your computer fails.
Conclusion
In conclusion, losing an unsaved Word document may be painful, but there are various ways to recover it. Take advantage of Word’s integrated features such as Document Recovery and AutoRecover, or use a data recovery tool such as WinfrGUI. It also uses protective measures such as regular saving, enables AutoRecovery and Autosave, and sets backups to avoid future losses.
🔗 Also Read: 6 Solutions to Restore Previous Version Of Excel File