How to Find Backed Up Photos on Google: Full Guide
If you’ve ever wondered how to find backed up photos on Google, you’re not alone. With the automatic backup feature offered by Google Photos, it’s easy to save and access your images across devices. However, it can be a little tricky to locate your photos, especially if you’re not familiar with the platform. In this guide, we’ll walk you through the steps to find your backed-up photos quickly and easily, so you never lose your memories again.
What Are Backed-Up Photos on Google?
Before diving into the process, let’s first understand what backed-up photos on Google are. When you upload images to Google Photos, either through your smartphone or manually from a computer, Google stores them in the cloud, ensuring that they’re safe even if your device gets lost, damaged, or erased. You can access your backed-up photos from any device that has Google Photos installed or via a web browser.
Why It’s Important
The benefit of Google Photos is that it allows you to sync your photos across multiple devices seamlessly. Whether you’re using an Android phone, iPhone, or computer, your photos will be available to you wherever you go. However, finding those backed-up photos can sometimes be a bit challenging if you don’t know where to look.
How Google Photos Works for Backing Up Your Pictures
Google Photos automatically backs up images from your devices (phones, tablets, computers) that are connected to your Google account. By default, Google Photos offers 15GB of free storage, which includes photos, videos, and any other content backed up to your Google account. Once you back up your photos, they’re stored securely on Google’s cloud, making them easily accessible from any device you use. If you exceed the free storage limit, Google offers paid options through Google One to provide more space.
Step-by-Step: How to Find Backed Up Photos on Google
Guide 1: How to Use Google Photos on Your Phone (Android/iOS)
The simplest way to access your backed-up photos is with the Google Photos app on your smartphone. Here’s how to get started:
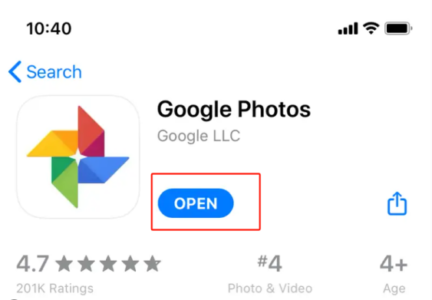
Step 1: Open the Google Photos app on your Android or iPhone.
Step 2: Make sure you’re signed in with the same Google account you use for photo backups.
Step 3: Tap the Photos tab at the bottom — here, you’ll see all your backed-up images in one place, organized by date.
Step 4: Want to find something specific? Use the Search bar at the top to look up photos by date, location, or even by keywords like “beach” or “birthday.” Google’s AI helps group your photos smartly.
Step 5: For quicker browsing, check out the Albums tab or explore categories like People, Places, and Things to find photos faster and easier.
Guide 2. Using Google Photos on the Web (Desktop or Laptop)
If you prefer viewing your photos on a bigger screen, using a computer browser is a great option. Here’s how:
Step 1: Open your favorite web browser and go to photos.google.com.
Step 2: Sign in with the same Google account you use for backups.
Step 3: Once logged in, you’ll see all your backed-up photos neatly organized in the Photos tab, sorted by date.
Step 4: Need to find specific pictures? Use the search bar at the top—just type keywords like “dog,” “birthday,” or “vacation,” and Google Photos will quickly filter and display matching images, albums, or even automatically generated tags.
This method makes it easy to browse, organize, and manage your photos right from your laptop or desktop.
Guide 3. Search and Filter Options for Easy Access
Google Photos makes finding your pictures super easy with smart search and filters. Here’s how to use them:
Step 1: Open the Google Photos app or website and tap or click on the Search bar at the top.
Step 2: Use Date Filters to narrow down your results. For example, type “February 2025” or select preset options like “Last year” to quickly find photos from a specific time period.
Step 3: Try Place Filters by typing a location name—like “Paris” or “Grand Canyon.” If your photos have location data, Google will show images taken there.
Step 4: Use Keywords or AI-powered search by entering words that describe what’s in your photos, such as “dog,” “sunset,” or “birthday.” Google’s AI can recognize objects and scenes, making it easy to find what you’re looking for without manual tagging.
With these tools, locating that perfect photo is just a few taps or clicks away!
What to Do if You Can’t Find Your Photos
It can be frustrating when you can’t locate your photos, but don’t worry—there are some simple steps you can follow to troubleshoot:
1. Check Your Google Account
Make sure you’re signed into the correct Google account—especially if you have multiple accounts. Photos are tied to the Google account they were uploaded with, so if you’re logged into the wrong one, your photos won’t show up.
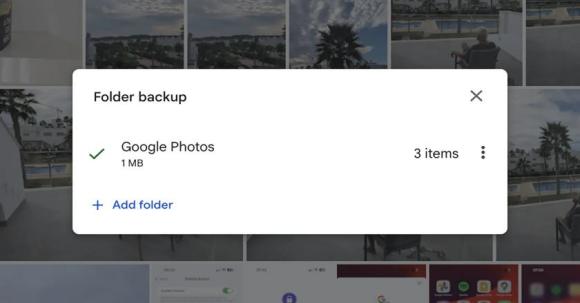
2. Confirm Backup Settings
If you’ve accidentally disabled backup or if the syncing process was paused, your photos might not be uploaded to Google Photos. You can go into the Google Photos settings to verify that backup is enabled.
3. Review Storage Limits
If your Google Photos storage is full, new photos might not have been backed up. If you’ve reached your storage limit, you can either delete old photos to free up space or upgrade to Google One for additional storage.
4. Look for Deleted or Missing Photos
In some cases, photos may not appear because they were deleted or moved. Check the Trash section in Google Photos, as deleted photos are stored here temporarily before they are permanently removed.
How to Organize and Recover Backed-Up Photos
Once you’ve found your photos, it’s a good idea to organize them to make future searches easier.
1. Use Albums and Labels
Create Albums to group related photos together. Google Photos also allows you to add Labels to your images, making it easier to find them in the future.
2. Recovering Deleted or Lost Photos
In case you’ve accidentally lost or deleted your backed-up photos from Google Photos, WinfrGUI can help. It is a data recovery tool that can scan your storage device for lost files, including images. This is especially useful if your photos weren’t backed up in the cloud but were stored locally before being deleted.
How to Use WinfrGUI:
Step 1. Download and install WinfrGUI on your computer and following the on-screen instructions to complete the installation process.
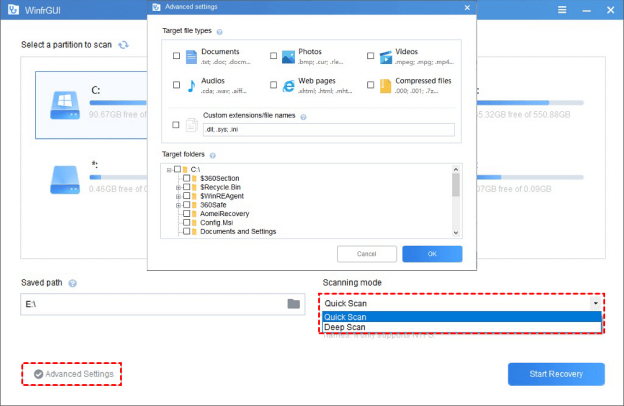
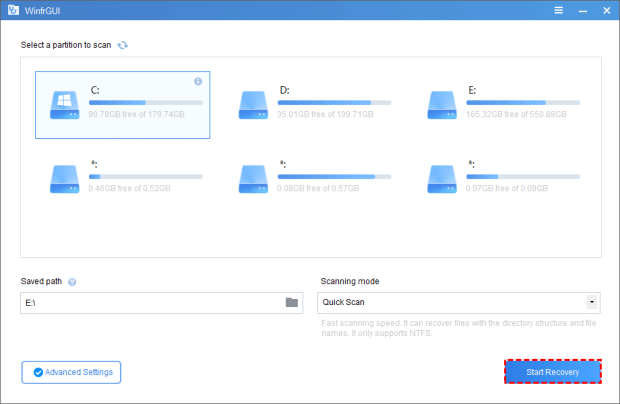
Step 2. Launch the tool and select your drive where the photos were last stored.
Step 3. Choose the recovery mode, either Quick Scan for recent losses or Deep Scan for a more thorough search.
Step 4. Let the tool scan for lost photos and recover them to a new location.
While WinfrGUI is great for recovering locally stored files, it’s important to remember that cloud backups like Google Photos are safe from accidental deletion, provided you follow the correct recovery steps.
Frequent Asked Questions
Q1. How do I know if my photos are backed up to Google Photos?
You can check your backup status by opening the Google Photos app, tapping your profile icon, then selecting “Photos settings” > “Back up & sync.” Alternatively, visit photos.google.com on any browser to see all your backed-up photos and videos.
Q2. Can I recover deleted photos from Google Photos?
Yes! Deleted photos go to the Trash folder, where they’re stored for 30 days before permanent deletion. You can restore any photos within this period by selecting them in Trash and tapping “Restore.”
Q3. What happens if I exceed my Google Photos storage limit?
When you reach your storage limit, Google won’t back up new photos or videos. To continue backing up, you can either upgrade your storage with Google One or free up space by deleting unwanted files.
Q4. How do I turn off backup in Google Photos?
Open Google Photos, go to Settings > “Back up & sync,” and toggle it off. This stops new photos and videos from syncing to your Google account.
Q5. Can I find photos from another device on my Google Photos?
Absolutely! As long as multiple devices are signed in with the same Google account and have backup enabled, your photos will be accessible across all those devices instantly.
Final Thoughts
Finding your backed-up photos on Google doesn’t have to be complicated. With Google Photos, your memories are safely stored in the cloud, accessible from any device with ease. Whether you’re using the Google Photos app or the web, the process of finding and organizing your photos is straightforward and quick. Remember to regularly check your Google Photos settings, use search filters for fast access, and consider using WinfrGUI if you need to recover lost photos from a local drive. By staying organized and backing up your photos, you’ll never have to worry about losing precious memories again!
🔗 Also Read: How to Recover Permanently Deleted Photos From Google Photos