Recover My Files Using CMD in Windows [Update]
Command Prompt, often referred to as CMD, is one of the most powerful built-in tools in Windows. While most people know it for basic system tasks like formatting disks, assigning drive letters, or converting between MBR and GPT, it can do much more than that. One lesser-known but incredibly useful feature is its ability to help users recover my files using CMD. Whether you’ve accidentally deleted a file, had a USB drive go corrupt, or lost data due to a virus attack, CMD offers a few handy commands that might help you get those files back. It’s free, already installed on every Windows system, and doesn’t require third-party software. However, it does have its limitations—especially for beginners or in more complex recovery cases. Still, if you’re comfortable with basic command-line input, CMD can be a powerful tool in your data recovery toolkit. Let’s explore how it works and when to use it.
Is It Worth Using CMD for File Recovery?
Compared with professional data recovery software, recovering files with CMD has both advantages and drawbacks:
Advantages:
• ✔️Free to use
• ✔️Pre-installed on Windows, no need to download
Disadvantages:
• ❌The user needs to manually enter the command line, which is difficult for beginners
• ❌Unable to recover all lost files
• ❌Unable to recover files in complex scenarios, such as recovering permanently deleted files from USB
Read on if you want to know how to recover permanently deleted files windows 10 using CMD.
Recover Permanently Deleted Files Windows 10 Using CMD
Read this part to learn how to recover my files with CMD attrib or use other command lines to restore data from storage devices. In addition, when the built-in CMD tool fails, you can also recover files with the help of Windows File Recovery developed by Microsoft.
Method 1. How to recover deleted files using attrib command
The most popular way to restore files is by using the attrib command. “Attrib” command can recover lost and hidden files from USB, HDD, SD card or other external hard drives due to misconfiguration or virus attack.
Step 1. Type “CMD” in the search bar, and right-click Command Prompt to run as administrator.
Step 2. Finally, enter “attrib -h -r -s /s /d C:*.*”. (replace C with the letter of the destination drive).
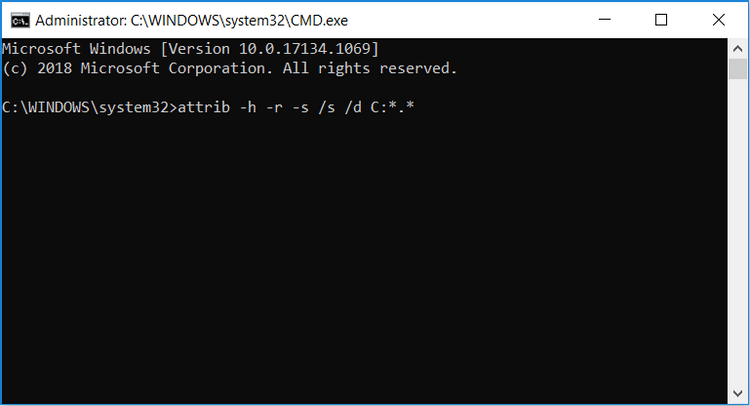
If successful, you will find the recovered files on the target disk. They may be in CHK format and need to be renamed and saved before they can be used.
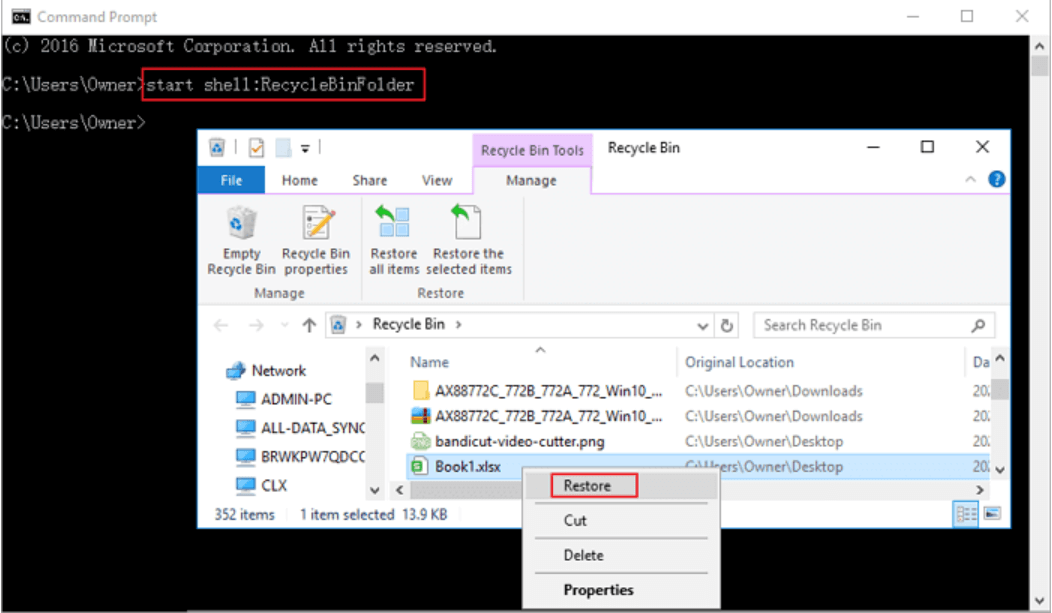
Method 2. Recover my Files using CMD from Recycle Bin
If you haven’t emptied the Recycle Bin, then you can restore them to their original location by following the command line before emptying. But please note that this method is only suitable for recovering files that have not been emptied.
Step 1. Press“Windows + R”, type in “CMD” and press Enter。
Step 2. Type in start shell:RecycleBinFolder and press Enter。
Step 3. Select the files you want to restore. Then, right-click the target file and click “Restore”
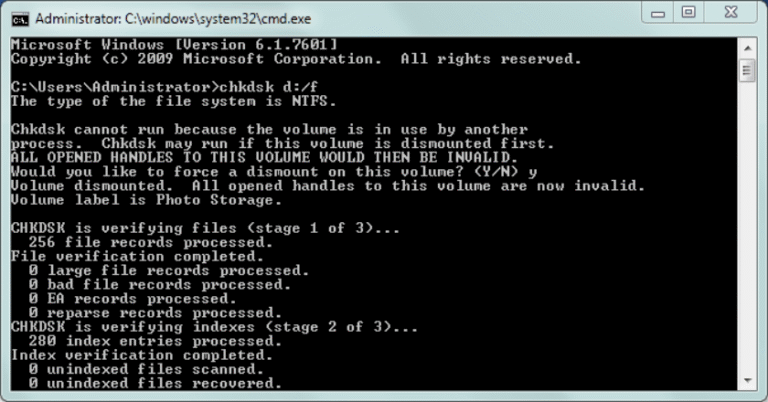
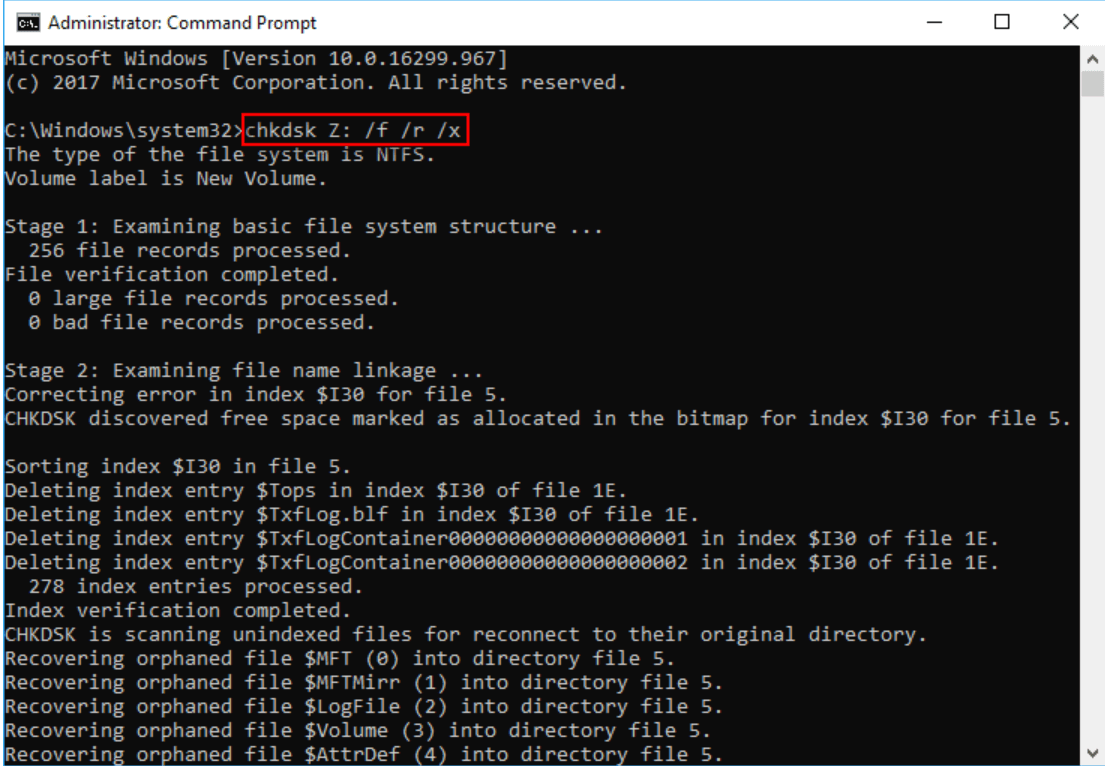
Method 3. Recover my files with CHKDSK
If you plan to recover files from a drive with RAW file system or a drive with corrupt file system, you can refer to the following command line.
Step 1. Run Command Prompt as administrator.
Step 2. Type chkdsk Z: /f /r /x (Z represents the correct drive letter) and press Enter.
Step 3. Wait for the command to complete.
Step 4. After that, type the following command lines in sequence.
- Type diskpart and press Enter.
- Type list disk and press Enter.
- Type select disk * and press Enter. (* is the target drive letter)
- Type rescan and press Enter.
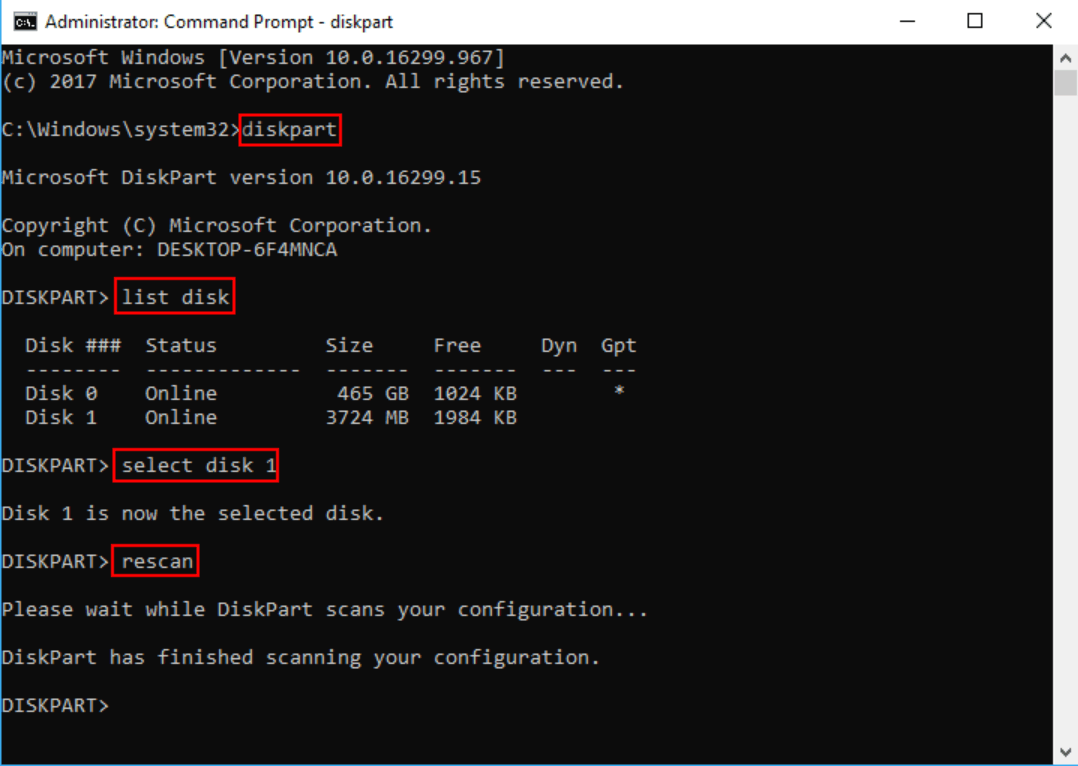
Wait for the scanning process to complete, finally check if your files are recovered.
Method 4. Recover my files with Windows File Recovery
If the above methods still don’t work, then I suggest you try Windows File Recovery, a free command-line data recovery program developed by Microsoft. It allows users to recover lost files/photos/documents from HDD/SSD/USB/SD card in Windows 10 2004 and above systems.
The program is loved by many users due to its high success rate in recovering lost files and no limit on file size. If you are eager to recover lost files, then I believe it is definitely a good choice.
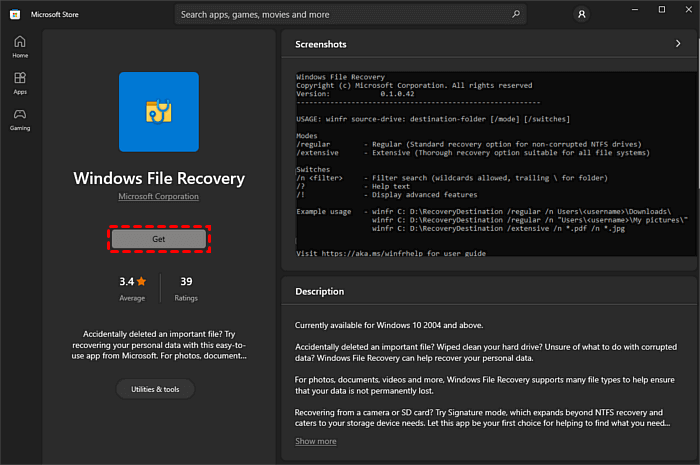
To use Windows File Recovery, get it in the Microsoft store first.
Step 1. Enter Windows File Recovery in the search bar, right-click and run as administrator.
Step 2. Run it and see your file system, then enter: winfr source-drive: destination-drive [/mode] [/switches].
Tips:
source-drive: The location where the file is located.
destination-drive: The location where the file is restored.
[/mode]: Choose the mode depends on the file system of disk.
| File System | Scenarios | Mode |
| NTFS | Deleted recently | Regular |
| NTFS | Deleted for a while | Extensive |
| NTFS | Formatted disk | Extensive |
| NTFS | Corrupted disk | Extensive |
| FAT and exFAT | Any | Extensive |
[/switches]: According to the mode, choose the suitable Switches.
| Switches | Meaning | Supported Mode |
| /n | To filter the scan range: scans for a specific file with its file name/path/type, etc. | All |
| /y: | Recovers system files. | NTFS/Segment |
| /u | Recovers undeleted files, for example, from the Recycle Bin. | NTFS/Segment |
Step 3. Enter “y” to continue, then wait patiently. Your recovered files will be saved in the destination drive.
Although there is no graphical user interface, Windows File Recovery is still a powerful application for file recovery using Command Prompt. However, it also caused inconvenience to the public. Fortunately, the free WinfrGUI fills that void.
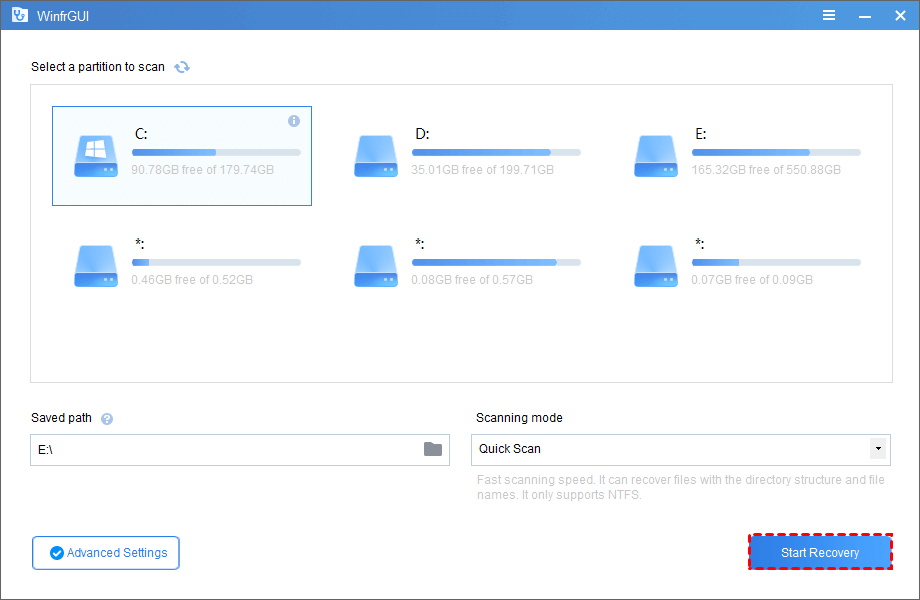
It is highly recommended to try WinfrGUI, which works exactly like Windows File Recovery. However, it has a very friendly graphical interface. With this groundbreaking technology, even beginners with no computer background can recover deleted files in a few clicks on Windows 10/11.
Step 1. Select the partition to scan and the location to save.
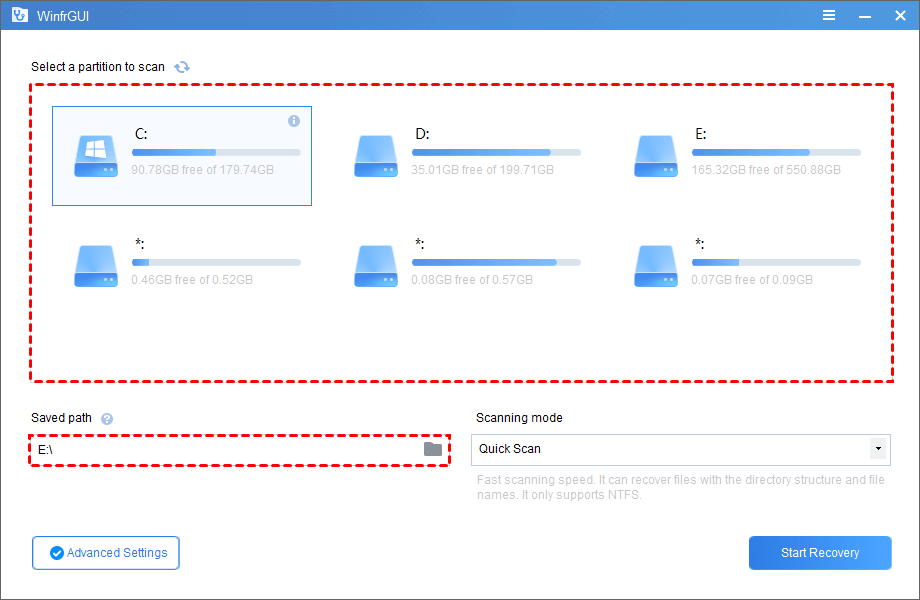
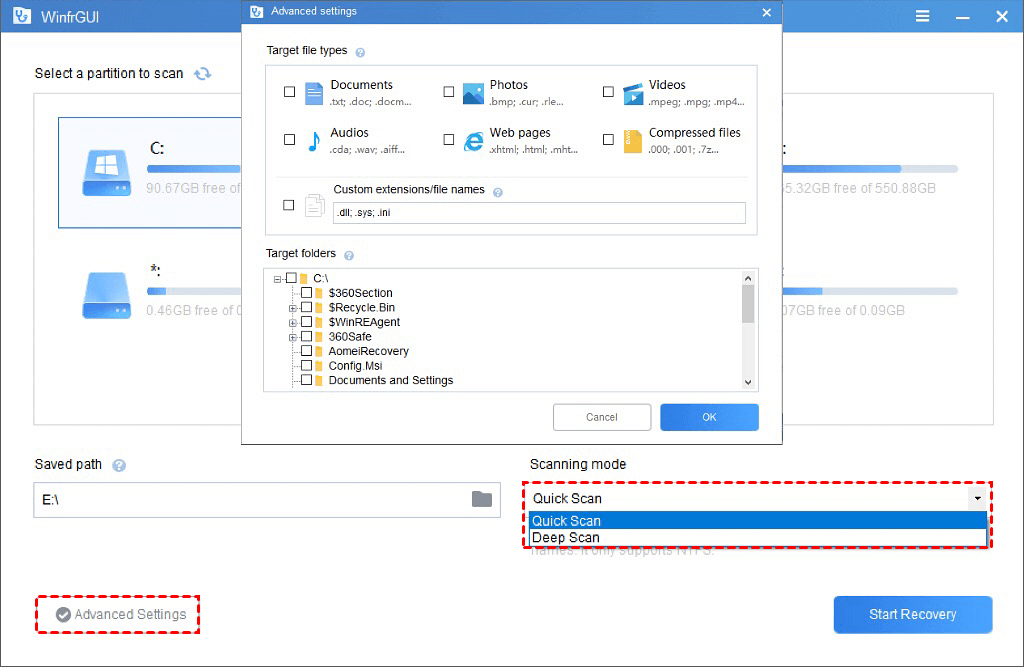
Step 2. Select scanning modes. To filter scans, click Advanced Settings.
Step 3. Then click “Start Recovery” to get all deleted files back to your computer.
Final Thoughts
Wondering how to recover my files using CMD? This guide has walked you through four practical methods—from using the simple attrib command to the more advanced Windows File Recovery tool. While Command Prompt offers free and built-in solutions, it’s not always beginner-friendly and may not recover data in more complex scenarios. That’s where WinfrGUI truly shines. It delivers the power of Windows File Recovery but with a clean, easy-to-use interface—no commands required. Whether you’re dealing with deleted documents, lost photos, or corrupted drives, WinfrGUI makes recovery faster and simpler for everyone. Try it today and bring your lost files back with just a few clicks!
🔗 Also Read: Recover Permanently Deleted Files Windows 11 Using CMD