How to Recover Deleted Files from Computer
Accidentally deleting a critical file—a vital work document, a cherished family photo, or a key project—is a heart-stopping moment we’ve all experienced. The good news is that deleted data is rarely gone forever immediately. This guide is your essential resource for discovering how to recover deleted files from computer storage, providing you with four powerful, step-by-step methods that work for both Windows 10 and Windows 11. Whether your file was recently sent to the Recycle Bin or permanently removed with the Shift+Delete command, there is often a way to bring it back. The key is to act quickly, as every moment you continue using your PC decreases the chance of a successful retrieval. We will walk you through utilizing Windows’ native tools (like File History) and recommend the most effective recovery software to ensure you maximize your data retrieval success and prevent permanent loss.
The Golden Rule of Data Recovery: Stop Immediately!
Before attempting any recovery method, you must follow the most critical rule: STOP USING THE AFFECTED DRIVE IMMEDIATELY.
When you delete a file, the operating system (OS) doesn’t erase the data blocks; it simply removes the file’s index entry and marks the space as available for new data. Any new operations—downloading, installing software, or even saving a new document—can overwrite the lost file, making it permanently unrecoverable.
- If the lost file is on your main C: drive, power down the PC as soon as possible and consider booting from a separate recovery USB stick to prevent the OS from overwriting the data.
- If the file is on an external drive or secondary partition, disconnect or stop using that specific drive letter immediately.
Method 1: The Quick Check – Recovering from the Recycle Bin
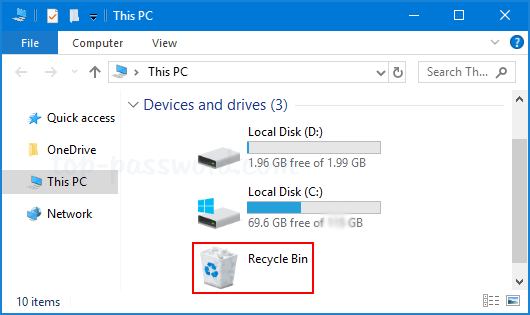
The Windows Recycle Bin is the first line of defense against accidental deletion. Files deleted by a standard mouse-click or the Delete key are temporarily stored here, giving you an easy path to restoration. Step-by-Step Guide are as follows:
Step 1: Open the Recycle Bin: Double-click the Recycle Bin icon on your desktop.
Step 2: Locate the File: Search for the file by its name, original location, date deleted, or file type. You can use the search bar at the top-right of the window.
Step 3: Restore the File:
- Right-click on the file you want to recover.
- Select the “Restore” option.
- The file will instantly be moved back to its original folder location on your PC.
If the Recycle Bin seems too cluttered, you can sort the files by the “Date Deleted” column to find your most recently lost items quickly.
Method 2: Restoring from a Backup or “Previous Versions”
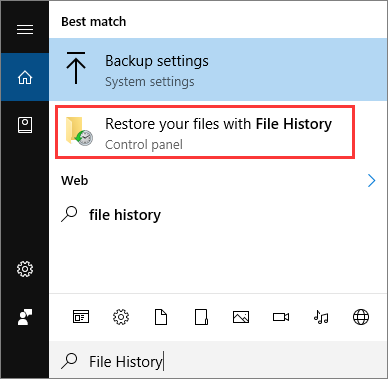
If the file is not in the Recycle Bin, the next best solution is to check your built-in backup features. This method is the second most reliable, as it recovers a whole, healthy version of the file. File History regularly saves copies of files in your Documents, Music, Pictures, Videos, and Desktop folders. It requires an external drive or network location to have been connected and configured beforehand.
Step 1: Type “Restore your files with File History” into the Windows search bar and open the application.
Step 2: Browse through the folders and search for the file.
Step 3: Use the left and right arrows at the bottom of the window to navigate through different backup dates and find the version you need.
Step 4: Once the file is selected, click the green “Restore” button (the circular arrow icon) to bring it back to its original location.
Method 3: Advanced Recovery with Recovary Software
If the file was “permanently deleted” (e.g., using Shift+Delete, from an external drive, or after emptying the Recycle Bin), it’s time to use specialized data recovery software. These tools perform a deep scan of the disk, looking for the raw data signature of the file even after its index entry is gone.
The Power of Data Recovery Tools
Modern data recovery software supports recovery from various data loss scenarios:
- Accidental Deletion
- Formatted Drives
- Corrupted Partitions
- External Storage (USB drives, SD cards, external HDDs/SSDs)
Recommended Software Options:
- Disk Drill: A top-rated, user-friendly tool known for its excellent recovery capabilities and modern interface. It offers a free version that allows for up to 500MB of recovery on Windows.
- EaseUS Data Recovery Wizard: Highly popular for its simple, step-by-step “Wizard” interface, perfect for beginners. The free version typically allows up to 2GB of data recovery.
- Recuva: A highly effective free utility (with a paid Pro option) often recommended for quick and efficient recovery of recently deleted files, offering unlimited recovery in its free tier.
Method 4: Utilizing Microsoft’s Native Command-Line Tool (Windows File Recovery)
Method 4: Utilizing Microsoft’s Native Command-Line Tool (Windows File Recovery) and Its Graphical Partner
If other methods fail, you can utilize Microsoft’s powerful, free native recovery utility. This method is the one to use for files permanently removed from your computer, external drives, or memory cards. For those who find the Command Prompt intimidating, the best way to leverage this tool is by using a simplified graphical interface like WinfrGUI. What is WinfrGUI? It is a free, third-party application that acts as a user-friendly frontend for the official Windows File Recovery (WinFR) tool, eliminating the need to type complex command lines.
Step-by-Step Guide using WinfrGUI:
Step 1: Download and Install: Download WinfrGUI from a trusted source. CRITICALLY IMPORTANT: Install the program on a DIFFERENT drive than the one you are trying to recover from to prevent the program’s files from overwriting your lost data.
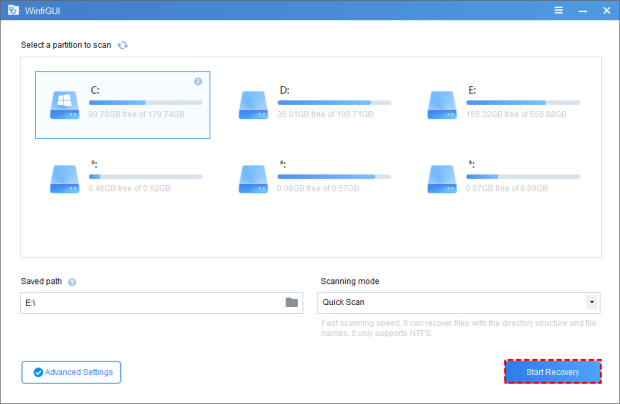
Step 2: Select Source and Destination: Launch WinfrGUI.
- Source Partition: Select the drive (e.g., C: D:, or your external drive) where the deleted file was located.
- Destination Folder: Select a different drive or folder to save the recovered files.
Step 3: Choose Recovery Mode: Select the mode that best fits your situation:
- Quick Scan: Best for recently deleted files on NTFS drives.
- Deep Scan: Best for files deleted a long time ago, files on non-NTFS drives (like exFAT/FAT32), or recovery after a drive format.
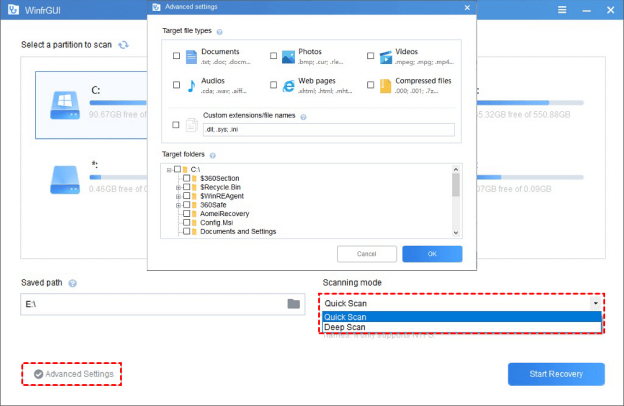
Step 4: Filter File Types: Use the filtering options to specify the type of file you are looking for (e.g., .jpg, .docx). This speeds up the scan significantly.
Step 5: Scan and Recover: Click “Start Recovery” and wait for the scan to complete. Once finished, browse the destination folder to find your recovered files.
Troubleshooting FAQ
Q1: The software ran a scan, but my specific file is still missing. Why?
The file was likely overwritten. When you use the PC, new data can permanently destroy the deleted file’s original location. The Fix: Try a Deep Scan (or /extensive mode) if available, as it checks for file fragments, not just entries. If still missing, the data is gone.
Q2: I recovered the file, but it won’t open, or it looks corrupted.
This is partial overwrite. The tool found the file’s entry, but some of its physical data was lost. The Fix: Some recovery software has a “File Repair” feature for minor damage. Otherwise, this file is only partially recovered and often unusable.
Q3: My external drive/USB stick is not recognized by the recovery software.
The problem is a connection or hardware issue, not the software. The Fix: 1. Try a different USB port/cable or a different computer. 2. If the drive makes clicking or whirring noises, stop using it immediately; it has a hardware failure and needs a professional service.
Q4: What is the single most important thing I can do to increase my recovery chances?
Stop using the source drive IMMEDIATELY! Do not save or download anything. New data overwrites the lost file’s space. The Fix: If you run recovery software, you must install it on a separate drive (e.g., install on D: to recover from C:).
Q5: Can I recover files from a drive I accidentally formatted?
Yes, often you can! A “Quick Format” only clears the file table, leaving the data mostly intact. The Fix: Use a reputable tool (like Method 4, Option A or B) and run a Deep Scan immediately. Do not write new data to the formatted drive.
Conclusion
Losing important data is stressful, but with the right knowledge, you can often turn panic into a successful retrieval. By utilizing the methods detailed in this guide—from the simple Recycle Bin to advanced solutions like Windows File Recovery—you are now fully equipped to handle common data loss scenarios. The most critical factor is speed: the sooner you attempt recovery, the higher your chances of success, as this minimizes the risk of the lost file being overwritten. Always save recovered files to a separate drive to avoid corruption. Finally, the best defense is a strong offense: establish regular backups using File History or cloud services. Master these straightforward steps, and you will effectively safeguard your digital life against permanent loss.
🔗 More Tutorials: