7 Methods for Deleted File Recovery Windows 10
Ever deleted a file on Windows 10 and felt that instant wave of regret? Whether it was a work document, an old photo, or a folder full of important stuff, it’s easy to assume it’s gone for good. But here’s the good news—deleted file recovery windows 10 is totally possible, and often easier than you’d expect. In fact, Windows gives you more recovery options than most people realize. From built-in features like the Recycle Bin and File History to powerful free tools like WinfrGUI, you have more control than you think. In this guide, we’re breaking down 11 smart recovery methods—from quick fixes to advanced tricks—to help you bring your lost files back. No tech jargon, no complicated steps, just real solutions that work. So before you give up on that missing file, let’s walk through your options together.
Method 1: Quickly Recover Files with Undo Shortcut or File Search
Before using any recovery tools, it’s smart to try two simple built-in Windows features that might save you time: the Undo shortcut (Ctrl + Z) and File Explorer Search. These methods are fast, safe, and surprisingly effective—especially right after the deletion happens.
Option 1: Use Undo (Ctrl + Z) to Instantly Reverse Deletion
If you’ve just deleted a file using File Explorer and haven’t restarted or closed the window, try this:
Step 1: Stay in the same File Explorer window where you deleted the file.
Step 2: Press Ctrl + Z on your keyboard.
Step 3: If the file doesn’t reappear, press Ctrl + Z again to undo earlier actions.
Step 4: If you undo too much, press Ctrl + Y to redo the previous step.
⚠️ Note: This only works if the session is still active. If you’ve closed the window or restarted the PC, skip to the next option.
Option 2: Search for the Deleted File in File Explorer
Sometimes files aren’t really deleted—they’re just misplaced or moved. Use Windows Search to confirm:
Step 1: Open File Explorer (Windows + E).
Step 2: Navigate to the general folder where the file was last located (e.g., Documents or Desktop).
Step 3: Click the search bar in the top-right corner.
Step 4: Type the exact file name, or try using a related keyword or file extension (e.g., .pdf, .xlsx).
Step 5: Sort results by Date Modified if you recently edited or saved the file.
Step 6: If you find the file, right-click it and choose Open file location or move it back to your preferred folder.
⚠️ Tip: Don’t remember the exact name? Try typing just part of it, or a unique word the file might contain.
Using these two simple options before anything else can often save time and prevent unnecessary recovery attempts. If the file isn’t found, move on to the next method for deeper recovery steps—or check out our guide on the Best File Recovery Software for Photos, Videos, and Documents for more advanced tools.
Method 2: Recover Files from the Recycle Bin
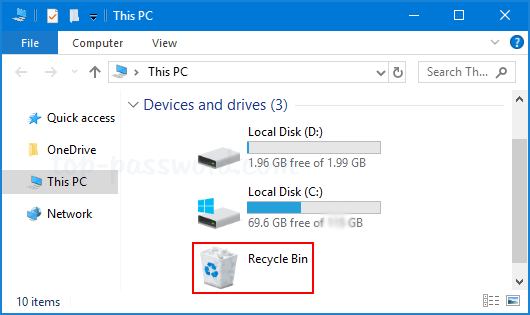
For deleted file recovery Windows 10, the first place to check is usually the Recycle Bin. When you delete a file, it’s stored there temporarily before being permanently removed—unless you’ve emptied it or set automatic cleanup. Your deleted file may still be recoverable from there.
Follow these steps to check and restore your file:
Step 1: Double-click the Recycle Bin icon on your desktop.
Step 2: Browse the list or use the search bar in the top-right corner to locate the file.
Step 3: Once you find the file, right-click it and select Restore.
Step 4: The file will be returned to its original folder automatically.
⚠️Tip: If you see a long list of deleted files, sort them by Date Deleted or use keywords to narrow your search. If the Recycle Bin is empty or the file isn’t listed, continue to the next method for deeper recovery options.hes.
Method 3: Recover Files from Backups, OneDrive, or File History
If you’ve backed up your data, you’re in luck—backups are one of the most reliable ways to recover deleted files on Windows 10. Whether you used OneDrive, File History, or created system backups manually, there’s a good chance your lost files are still accessible.
Option 1: Restore Deleted Files from OneDrive
OneDrive is often built into Windows 10 and may have saved your files automatically if you’ve used a Microsoft account.
Step 1: Visit onedrive.live.com and log in with your Microsoft account.
Step 2: Browse your folders or use the search bar to find your deleted file.
Step 3: Right-click the file and choose Download to restore it to your device.
Step 4: Don’t forget to check the OneDrive Recycle Bin for recently deleted items you can still restore.
Option 2: Use File History or Previous Versions
If you’ve enabled File History or have System Restore Points, Windows 10 can restore earlier versions of your files or folders.
Step 1: Open File Explorer and go to the folder that used to contain the deleted file.
Step 2: Right-click the folder and select Restore previous versions.
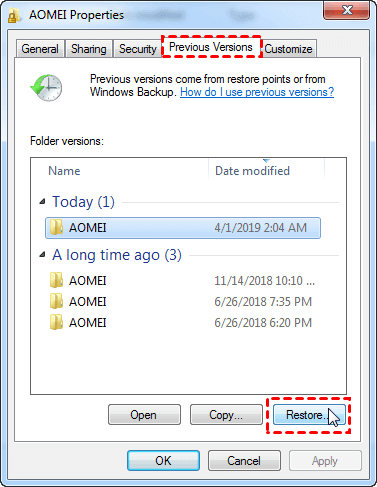
Step 3: Choose from the list of available backups.
Step 4: Click the small arrow next to the version, then select Open in File History.
Step 5: Find the file you want and click the green Restore button to bring it back.
⚠️ Note: These methods work only if File History or backups were enabled before the file was lost.
By taking advantage of built-in backup tools or cloud sync like OneDrive, you can restore files without relying on recovery software—and often without stress.
Method 4: Use Windows File Recovery or Free Alternative
Microsoft introduced a command-line tool called Windows File Recovery in 2020, designed to help users recover deleted files on Windows 10 (version 2004 and above). It’s available for free in the Microsoft Store.
Option 1: Try Windows File Recovery (Command Line Tool)
This tool can recover common file types such as JPEG, MP3, PDF, ZIP, ASF, MPEG, and PNG. However, it requires using Command Prompt and doesn’t offer a graphical interface—making it more suitable for advanced users.
How to use Windows File Recovery:
Step 1: Download and install Windows File Recovery from the Microsoft Store.
Step 2: Press Win + S, type cmd. Right-click Command Prompt and select Run as administrator.
Step 3: Enter the recovery command following this format:
winfr source-drive: destination-folder: /mode /switches
source-drive:is the drive where files were deleted (e.g.,C:).destination-folder:is where recovered files will be saved (must be different from source, e.g.,D:\Recovery)./modespecifies the recovery mode (regular,segment, orsignature)./switchesinclude file types or other options.
Example: To recover all JPEG files from drive C: to folder D:\Recovery using signature mode:
winfr C: D:\Recovery /signature /n *.jpg
Step 4: Follow the on-screen instructions and wait for the recovery process to complete.
⚠️ Note: Recovery is limited to supported file types, and it may not work well on severely corrupted or formatted drives.
Option 2: Use a Free GUI Tool – WinfrGUI
If command-line tools aren’t your thing, try WinfrGUI—a free, user-friendly file recovery GUI that simplifies Windows File Recovery with a straightforward point-and-click interface.
Why choose WinfrGUI?
✅ Completely Free: Offers 100% free use with no hidden fees or trial limits.
✅ Easy to Use: Features an intuitive GUI—no command-line skills needed; just point and click to recover files.
✅ Powerful Recovery: Handles accidental deletion, formatting, corrupted partitions, and system crashes.
✅ Windows 10 & 11 Compatible: Fully supports both Windows 10 and Windows 11 for smooth and reliable recovery.
With no hidden costs and full support for NTFS file systems, WinfrGUI is one of the best tools for reliable and accessible deleted file recovery on Windows 10.
Method 5: Recover Files Using the CHKDSK Command
CHKDSK (Check Disk) is a built-in Windows command-line tool that scans your hard drive for errors and attempts to repair them. While it’s primarily used to fix disk issues, it can sometimes help recover deleted or lost files by recovering readable data from damaged sectors. Follow these steps to use CHKDSK on Windows 10:
Step 1: Press Win + X and select Windows PowerShell (Admin) or Command Prompt (Admin) to open an elevated command window.
Step 2: Type the following command and press Enter:
chkdsk X: /r
(replace X: with the drive letter you want to check)
Step 3: If prompted to schedule the disk check on the next restart, type Y and press Enter
Step 4: Wait while CHKDSK scans and repairs the drive. This process can take some time depending on the size and condition of your disk.
⚠️ Note: CHKDSK recovers readable data from bad sectors but may not fully restore all deleted files. It’s a quick option worth trying before more advanced recovery tools.
Method 6: Check Temporary File Locations
Some applications store temporary files in a special folder called a time sheet, which is automatically deleted during boot or Many applications create temporary files that store unsaved data or backups while you work. These files are saved in special folders but are often deleted automatically during system restarts or after certain time intervals. Checking these temporary folders might help you recover lost files. Follow these steps to access and check your temporary files:
Step 1: Press Win + R to open the Run dialog box.
Step 2: Type the following path and click OK: %localappdata%\Temp

Step 4: If you find your files, copy them to a safe location immediately.
⚠️Tip: Another important temporary folder is located at: %SYSTEMROOT%\Temp
You can access it the same way using the Run dialog. Also, some applications create their own temporary folders, so check those locations if you know them.
Method 7: Recover Windows 10 Using a System Image
Windows 10 lets you create a full system image backup—a snapshot of your entire system including files, settings, and installed programs. Restoring from a system image can recover deleted files, but it’s a more drastic step and may overwrite current data. Use this method only after other recovery options fail. Follow these steps to restore from a system image:
Step 1: Open the Start menu, type Settings, and press Enter.
Step 2: Click Update & Security, then select Recovery from the left sidebar.
Step 3: Under Advanced Startup, click Restart Now (make sure to save your work before restarting).
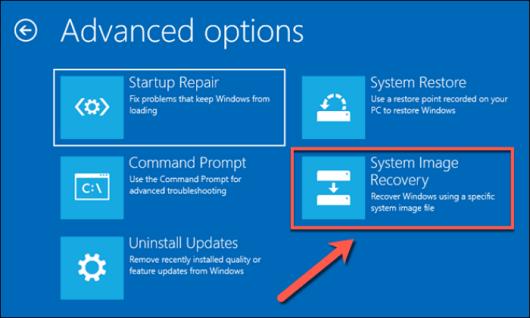
Step 4: After restart, choose Troubleshoot > Advanced Options > See More Recovery Options > System Image Recovery.
Step 5: Select your system image backup and click Next.
Step 6: Choose More Recovery Options if needed, then click Next.
Step 7: Review the system image details and click Finish to begin the recovery process.
⚠️ Warning: This will restore your PC to the exact state when the image was created and may overwrite recent files.
Conclusion
Losing a file can feel like a disaster—but it doesn’t have to be the end of the story. As you’ve seen, deleted file recovery windows 10 isn’t just for IT experts. Whether you’re dealing with accidental deletion, a formatting mistake, or a system hiccup, there’s almost always a way to get your data back. From simple tricks like Ctrl + Z to trusted tools like WinfrGUI, you’ve got plenty of options. The key is to stay calm, act quickly, and try more than one method if needed. And remember: the best recovery is prevention—backups, cloud storage, and recovery software are your best friends going forward. Still stuck? Don’t hesitate to reach out to a pro if the file is truly important. But chances are, if you follow these steps, you’ll be able to rescue what you lost—and breathe a big sigh of relief.
🔗 Also Read: How to Use Windows File Recovery [2025 Update]