Chromebook Recovery Utility Not Working? Try These Fixes
The Chromebook Recovery Utility is an essential tool designed by Google to help users restore their ChromeOS devices to a working state. Whether your Chromebook is stuck in recovery mode, experiencing software corruption, or simply won’t boot, this utility creates a recovery USB or SD card to reinstall the operating system.
However, it’s not uncommon to face issues where the Chromebook Recovery Utility fails — the app crashes, the recovery media won’t create, or the USB drive isn’t recognized. If you’re dealing with these frustrating problems, this guide provides clear, effective fixes you can try right now to get your Chromebook back on track.
What Is the Chromebook Recovery Utility?
The Chromebook Recovery Utility is a free Chrome browser extension available on the Chrome Web Store. It’s officially supported by Google and allows users to create a bootable recovery media — typically on a USB flash drive or SD card — for reinstalling ChromeOS on a Chromebook.
Common scenarios when you’ll use this tool include:
- ChromeOS corruption or boot errors
- System stuck in recovery mode
- Failed ChromeOS update
- Recovering a Chromebook after a hardware or software issue
It’s important to download this tool only from the official Chrome Web Store to avoid security risks.
Common Issues When Chromebook Recovery Utility Doesn’t Work
Many users encounter the following errors when trying to use the Chromebook Recovery Utility:
- Utility won’t open or crashes immediately upon launch
- “Verification failed” error during recovery media creation
- USB drive not detected or not recognized by the utility
- Error: “The device you inserted does not contain a Chrome OS”
- Failure to write image to USB or SD card
Understanding the exact error helps in choosing the correct fix.
Fixes for Chromebook Recovery Utility Errors
If the Chromebook Recovery Utility isn’t working properly, don’t worry—most issues can be resolved by following a few simple troubleshooting steps. Below are detailed fixes to the most common problems users face:
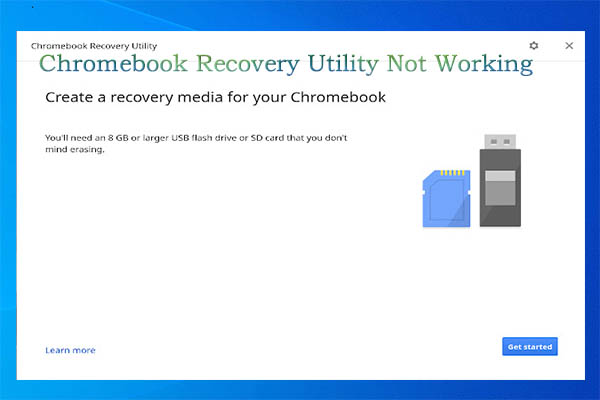
Fix1. Use a Compatible and Properly Formatted USB Drive or SD Card
One of the most common reasons the utility fails is due to an incompatible or faulty USB drive or SD card. Follow these tips:
- Capacity: Use a USB flash drive or SD card with at least 8GB of free space. Smaller drives won’t work for ChromeOS recovery media.
- Quality: Choose a reliable brand such as SanDisk, Kingston, or Samsung. Cheap or damaged drives may cause errors.
- Format the Drive:
- Before using it with the recovery utility, format the drive as FAT32 (the most compatible file system).
- On Windows, right-click the drive in File Explorer → Format → Select FAT32 → Start.
- On macOS, use Disk Utility → Erase → Format MS-DOS (FAT).
- Avoid USB hubs: Plug the drive directly into your computer’s USB port to avoid connection problems.
Note: Even if your USB drive has worked for other tasks (like file transfers), that doesn’t mean it’s suitable for Chromebook recovery. Recovery media creation is sensitive to low-level drive errors that may not show up during everyday use.
Fix2. Try a Different USB Port or Computer
If your USB drive isn’t recognized or the Chromebook Recovery Utility crashes during the process, the issue may be hardware-related. Here’s how to troubleshoot:
- Try a different USB port: Plug the USB drive into another port on the same computer. In some cases, USB 2.0 ports are more reliable than USB 3.0 or 3.1 ports when creating recovery media.
- Avoid USB hubs or extenders: Always connect the USB drive directly to your computer’s port. Hubs or extension cables can interfere with data transfer.
- Use another computer: If switching ports doesn’t help, try running the Chromebook Recovery Utility on a different device. The utility works on Windows, macOS, Linux, and ChromeOS, so you have options. Sometimes the original computer has faulty drivers or USB controller issues that prevent successful recovery media creation.
Note: If you’re using a USB 3.0 drive and it keeps failing, switching to an older USB 2.0 port (if available) can actually increase stability. Some recovery tools work better with slower, more stable data transfer rates.
Fix3. Reinstall the Chromebook Recovery Utility Extension and Clear Cache
If the Chromebook Recovery Utility isn’t opening, crashes unexpectedly, or shows errors, the problem may be caused by corrupted extension files or cached data. Follow these steps to fix it:
Step 1: Remove the Extension
- Open Google Chrome.
- In the address bar, type
chrome://extensions/and press Enter. - Find Chromebook Recovery Utility and click Remove to uninstall it.
Step 2: Clear the Browser Cache
- In Chrome, go to
chrome://settings/clearBrowserData. - In the pop-up window:
- Select “Cached images and files.”
- Leave other options unchecked (unless you want to clear more).
- Click Clear data to remove potentially corrupted files.
Step 3: Reinstall the Utility
- Visit the Chromebook Recovery Utility page in the Chrome Web Store.
- Click Add to Chrome and follow the prompts to reinstall it.
- Once installed, restart Chrome to apply changes.
Note: Extensions and browser data can become corrupted after Chrome updates or failed installations. Clearing your cache and reinstalling the extension ensures you’re working with a clean, up-to-date version of the tool.
Fix4. Manually Enter Your Chromebook’s Model Number
Sometimes, the Chromebook Recovery Utility picks the wrong model automatically, which can lead to frustrating errors like “The device you inserted does not contain a Chrome OS.” If that happens, the best fix is to enter your Chromebook’s model number manually to make sure you’re creating the correct recovery image.
Step 1: Locate Your Chromebook’s Model Number
First, you’ll need to find your exact model number. The easiest way is to flip over your Chromebook and look for a label on the bottom or back — it’s usually printed next to the serial number and looks like a code such as “G3P0C” or “Auron_Paine.”
If the label isn’t clear or you can’t find it, you can also boot your Chromebook into recovery mode to check. To do that, turn off your Chromebook completely, then press Esc + Refresh + Power all at once. This will bring up a recovery screen, and near the top or bottom, you should see your device’s model number listed clearly.
Step 2: Enter the Model Number into the Recovery Utility
Once you have the model number, go back to the Chromebook Recovery Utility. When it asks you to choose your Chromebook, look for the option that says “Enter a model number” manually — don’t let it auto-detect.
Then, type the model number exactly as you saw it (including any hyphens or capitalization if shown). This tells the utility to download the exact recovery image for your Chromebook model and helps you avoid the errors caused by mismatched system files. Taking this small extra step can save you a lot of time and frustration by ensuring your recovery media is 100% compatible with your device.
Note: Auto-detect isn’t perfect—especially on lesser-known Chromebook models. Manually entering your model number guarantees the recovery image matches your device, avoiding compatibility issues that waste time.
Fix5. Try Incognito Mode to Rule Out Browser Conflicts
Sometimes, Chrome extensions or custom browser settings can interfere with the Chromebook Recovery Utility, causing it to crash, freeze, or not detect your USB drive properly.
To troubleshoot this, open the utility in Incognito Mode, which disables most extensions and runs Chrome with default settings:
- On Windows or Linux, press Ctrl + Shift + N.
- On macOS, press Command + Shift + N.
This will open a new private browsing window. From there, launch the Chromebook Recovery Utility and try creating your recovery media again. If the tool works fine in Incognito Mode, the issue is likely caused by a conflicting browser extension (like an ad blocker or antivirus plug-in) or a custom Chrome setting. You can return to your regular Chrome window and start disabling extensions one by one to find the culprit.
Note: Some security tools and ad-blockers can block critical scripts the Recovery Utility needs. Incognito Mode helps you quickly test if something in your regular Chrome setup is causing the issue.
Fix6. Use a Different Operating System if Your Chromebook Can’t Run the Tool
If your Chromebook is too unstable to install or run the recovery utility — for example, it won’t boot properly or keeps crashing — don’t worry. You can create a recovery drive using any other computer that has Chrome installed.
The Chromebook Recovery Utility works on multiple operating systems, including:
- Windows
- macOS
- Linux
- Another ChromeOS device
Just install Google Chrome on a working computer, go to the Chromebook Recovery Utility extension page, and add the tool. Then follow the standard steps to create a recovery USB or SD card using the model number of your Chromebook. This is often the fastest and most reliable solution when your Chromebook is inoperable and you need to recover it from scratch.
Note: As long as you have Google Chrome and internet access, you can create the recovery media from any system—even a friend’s laptop. Don’t wait to fix your Chromebook if you have access to a working PC or Mac.
When to Use Both Tools for Windows and Chromebook?
If you manage multiple devices, it’s helpful to know tools for different systems. While the Chromebook Recovery Utility is specialized for ChromeOS reinstallation, Windows users require different tools for file recovery.
A great companion for Windows recovery is WinfrGUI — a free and easy-to-use graphical interface for Microsoft’s Windows File Recovery tool. WinfrGUI helps recover deleted or lost files on Windows PCs efficiently.
This knowledge benefits users who:
- Use both Windows and Chromebook devices and want reliable recovery options for both platforms.
- Want a comprehensive approach to data loss or system failure across operating systems.
Some example content ideas where you can mention both tools include:
- “How to Recover Lost Data on Windows and Chromebook Devices” — WinfrGUI for Windows file recovery and Chromebook Recovery Utility for ChromeOS reinstallation.
- “Top Recovery Tools for Windows and ChromeOS Users” — Position WinfrGUI as a top Windows recovery tool and Chromebook Recovery Utility as the go-to for ChromeOS restoration.
- “Cross-Platform Recovery Guide: Windows, Chromebook, and More” — Cover recovery methods for different systems including both utilities.
Additional Tips and Best Practices
To avoid problems and ensure smooth recovery:
- Always safely eject your USB or SD card after recovery media creation to prevent corruption or incomplete write errors.
- Keep regular backups of important data in Google Drive, external hard drives, or other cloud storage services to avoid loss during recovery.
- Create multiple recovery drives if you manage several Chromebooks or want a spare backup in case one drive fails.
- If recovery creation fails repeatedly, try using a different USB or SD card—some drives may be partially faulty or incompatible.
- Label your recovery drives clearly (e.g., “HP Chromebook Recovery – March 2025”) so you can easily identify the correct one during emergencies.
- Update your recovery media periodically, especially after major ChromeOS updates, to ensure compatibility with the latest system version.
Final Thoughts
The Chromebook Recovery Utility is a reliable, official tool for restoring ChromeOS, but errors and issues can occur due to incompatible hardware, model mismatches, or software conflicts. By following the above steps — using the right USB drive, verifying your model, reinstalling the utility, and switching computers or browsers — you can fix most problems and get your Chromebook working again.
For those managing multiple device types, remember that Windows users can benefit from tools like WinfrGUI for file recovery, making sure you’re covered no matter the platform.
Recovering your Chromebook doesn’t have to be a headache. With these practical fixes, you’ll be back up and running quickly.
🔗 Also Read: Step-by-Step Guide: How to Use Windows File Recovery Utility