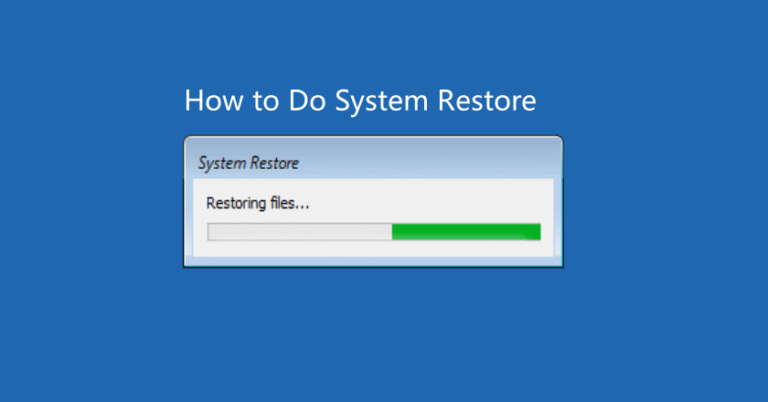
How To Do System Restore: Step by Step Guide
If your Windows PC is acting up after a recent app install, driver update, or unknown system change, there’s a built-in feature that might just save you — System Restore. It’s a recovery tool designed to revert your system settings, drivers, and registry to a previous, stable state without touching your personal files. Whether you’re on Windows 10 or 11, learning how to do System Restore can help you fix errors, crashes, or instability caused by software conflicts. The best part? You don’t need to be a tech expert to use it. In this step-by-step guide, we’ll walk you through everything you need to know — from enabling and creating restore points to actually performing a system restore when something goes wrong. We’ll also cover alternative recovery options in case System Restore fails, and share tips to keep your system protected in the future. Let’s get started and bring your system back to life!
What Is System Restore and How It Works
System Restore takes “snapshots” of your system files, registry settings, installed drivers, and some application configurations — these are called restore points. Windows automatically creates these restore points:
- Once a week by default
- Before installing new software, drivers, or Windows updates
- You can also create one manually
When your system becomes unstable due to software or driver changes, restoring to a previous point rolls back only the system settings and configurations — not your personal files.
How to Enable System Restore on Windows 10 & 11
Before you can use System Restore to recover from issues, you need to make sure it’s turned on. While System Restore is usually enabled by default for your main system drive (C:), that’s not always the case—especially after a clean install or major update. To ensure you’re protected, here’s exactly how to enable System Restore on Windows 10 and Windows 11:
Step-by-Step Instructions
- Open the Start Menu and type “Create a restore point”, then click the matching result.
This opens the System Properties window directly in the System Protection tab. - In the Protection Settings section, you’ll see a list of available drives on your computer, along with their protection status (On or Off).
- Select your system drive (usually C:) and click the Configure button.
- In the configuration window, choose “Turn on system protection.”
This enables Windows to automatically create restore points during important events like app installs or updates. - Adjust the “Max Usage” slider to allocate disk space for restore points.
A range of 5% to 10% of your drive is recommended for adequate restore history without using excessive space. - Click Apply, then OK to save your settings.
Tip: If you have critical programs installed on other drives (such as D: or E:), you can repeat the steps above to turn on protection for those drives as well. This ensures their settings and related registry data are also backed up.
How to Manually Create a Restore Point in Windows 10 & 11
While Windows automatically creates restore points before major system events, it’s a good habit to create a manual restore point before installing new drivers, major software, or Windows updates. This gives you a reliable rollback point in case something goes wrong.
Here’s how to do it step by step:
- Open the Start Menu and type “Create a restore point”, then click the result to launch the System Properties window.
- Under the System Protection tab, ensure your system drive (C:) has protection turned on.
- Click the Create button near the bottom of the window.
- In the prompt, enter a descriptive name for the restore point — for example:
Before NVIDIA GPU Driver UpdateorBefore Installing XYZ App. - Click Create. Windows will now generate the restore point, which usually takes less than a minute.
- Once done, you’ll see a confirmation message: “The restore point was created successfully.”
Tip: Manual restore points give you control and peace of mind before any risky changes. Combine them with regular backups for complete system protection. If your system won’t boot normally, see How to Perform System Restore Windows 10 from Boot for recovery options using advanced startup.
How to Restore Your PC to an Earlier Point
Noticed your PC acting weird after a recent update, driver change, or app install? Good news — you might be able to undo the damage using System Restore. It’s like a time machine for your system settings, and it won’t touch your personal files.
Here’s how to roll things back step by step:
- Click Start, search for “Create a restore point,” and open it.
- In the System Protection tab, hit the System Restore… button.
- A wizard will pop up — click Next to see a list of restore points.
- Check “Show more restore points” if you want to see older ones.
- Pick a restore point from before the problem started. You can click “Scan for affected programs” to see what apps or drivers might be changed.
- Click Next, then Finish to start the restore.
Heads up: Once you hit “Finish,” your PC will restart and begin the process — and you can’t stop it mid-way. Just sit tight; it usually takes 10 to 30 minutes. Once it’s done, Windows will boot up and let you know if the restore worked. If not, no worries — you can try an earlier point or explore other fixes.
How Long Does System Restore Take?
The process usually takes:
- 10–15 minutes on SSDs or NVMe drives
- 20–30 minutes on older HDDs
The duration depends on system speed and size of changes. After the restart, your system should be back to the selected restore point.
Alternative Ways to Access System Restore
You can launch System Restore using different methods:
| Method | How to Access |
|---|---|
| Run box | Press Win + R, type rstrui, press Enter |
| Command Prompt / PowerShell | Type rstrui and hit Enter |
| Control Panel | Go to Control Panel > Recovery > Open System Restore |
| Task Manager | Press Ctrl + Shift + Esc > File > Run new task, type rstrui |
These are handy if your system is semi-functional but not booting fully into the desktop.
What to Do If System Restore Doesn’t Solve the Issue
Tried System Restore but your issue still isn’t resolved? Don’t worry — it happens, especially if the problem runs deeper than recent changes. Here are some effective alternatives to help you troubleshoot further and get your system back on track:
1. Uninstall Problematic Updates or Drivers
If the issue started after a Windows update or driver install, undoing them might help.

- Go to Settings > Windows Update > Update History
- Click Uninstall updates to remove the most recent patches.
2. Run System File Checker (SFC)
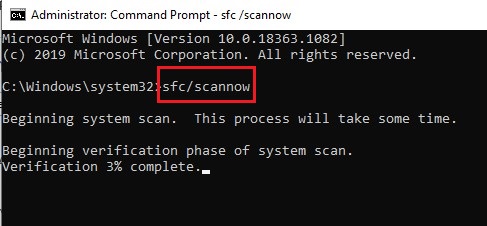
This scans and repairs corrupted system files.
- Open Command Prompt as Administrator
- Type:
sfc /scannowand press Enter
Let it run — it might take several minutes.
3. Use the DISM Tool for Deeper Repairs
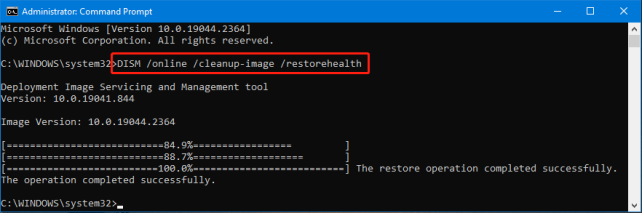
If SFC didn’t solve the issue, try DISM to repair the system image.
- In Command Prompt (Admin), run:
DISM /Online /Cleanup-Image /RestoreHealth
4. Boot into Safe Mode
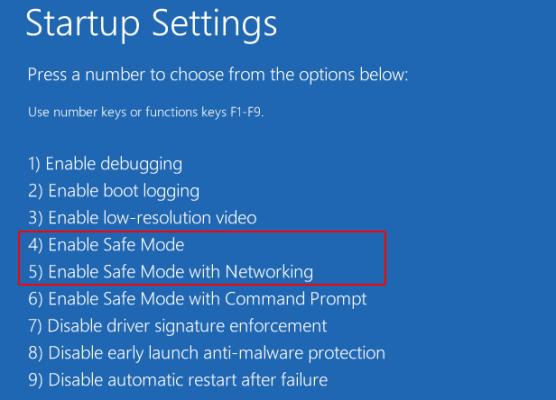
Safe Mode runs Windows with minimal drivers, helpful for diagnosing tricky issues.
- Go to Advanced Startup Options > Startup Settings > Enable Safe Mode
5. Reset or Reinstall Windows
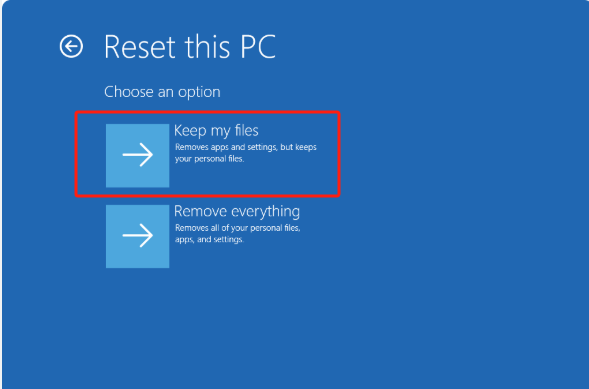
If all else fails, a reset can give you a clean slate without deleting your personal files:
- Go to Settings > System > Recovery > Reset this PC
- Choose Keep my files for a non-destructive reinstall
This reinstalls Windows but keeps your documents, photos, and more.
6. Recover Lost Files with WinfrGUI
If System Restore failed or caused unexpected data loss, don’t panic — WinfrGUI can help you get your files back quickly and safely. WinfrGUI is a 100% free, user-friendly file recovery tool designed for Windows. Unlike complex command-line tools, it offers a clean graphical interface — perfect for beginners.
Key features:
- Deep and quick scan modes to find lost or deleted files
- File preview before recovery, so you only restore what you need
- No command-line knowledge required — just point, click, and recover
Whether files disappeared during a failed restore or were accidentally deleted, WinfrGUI gives you a second chance to retrieve them with ease.
FAQ: System Restore in Windows 10 & 11
❓1. Does System Restore delete my personal files?
No. System Restore only affects system files, settings, installed programs, and drivers. Your personal files—like documents, photos, and videos—will remain untouched.
❓2. How often does Windows create restore points automatically?
Windows creates restore points automatically before major updates, software installations, or system changes—usually once per week. You can also create them manually anytime.
❓3. What should I do if no restore points are available?
If no restore points are listed, System Protection may be turned off. Go to System Properties > System Protection and make sure protection is enabled for your C: drive.
❓4. Can I use System Restore from Safe Mode or boot menu?
Yes. If your system won’t boot normally, you can access System Restore from Advanced Startup Options. Here’s a full guide: How to Perform System Restore Windows 10 from Boot.
❓5. What if System Restore fails or causes issues?
If System Restore doesn’t fix the issue—or makes things worse—you can try uninstalling recent updates, scanning with SFC/DISM, or using a recovery tool like WinfrGUI to recover lost files.
Conclusion
Now that you understand how to do System Restore on Windows 10 and 11, you have a reliable first line of defense against system errors and software mishaps. It’s a simple yet powerful way to revert your system to a previous working state without losing personal files. Whether you’re facing issues after a failed update, driver installation, or app conflict, restoring to a known-good configuration can often solve the problem in minutes. Just remember — while System Restore is incredibly useful, it’s not a complete backup solution. It won’t recover deleted files or protect documents stored outside of system snapshots. That’s why combining System Restore with a regular backup routine is the smartest way to ensure your data stays safe. If System Restore doesn’t work or leads to missing files, you can turn to recovery tools like WinfrGUI to retrieve lost data. With the right tools and steps, system recovery doesn’t have to be stressful.
🔗 Also Read: How To Boot Into Windows Recovery [Windows]