How to Fix A Corrupted External Hard Drive and Recover Your Data
That heart-sinking moment when your external hard drive fails to respond is a unique kind of digital dread. A sudden, unsettling clicking sound, a frustrating “Access Denied” message, or files that simply vanish into thin air can make you feel like your precious memories and critical work are gone forever. But take a deep breath; a corrupted hard drive isn’t always a death sentence for your data. This comprehensive guide is your lifeline, designed to cut through the confusion and fear. We’ll provide a clear, step-by-step path to diagnose the specific problem, navigate the complexities of data recovery with confidence, and, if possible, fix a corrupted external hard drive. We’ll show you exactly how to secure your most valuable files before attempting any risky repairs, arming you with the knowledge to reclaim your digital life.
Phase 1: The Most Important Step – Data Recovery
Before you attempt to fix a corrupted external hard drive, your top priority must be to recover any vital data from the drive. Trying to fix the drive can, in some cases, make the corruption worse and lead to permanent data loss. Only proceed with repairs after you have secured your files.
Step 1: Check if Your Drive is Detectable
The first step in data recovery is ensuring your computer can “see” the corrupted drive.
- Press Windows Key + R to open the Run dialog box.
- Type
diskmgmt.mscand press Enter.
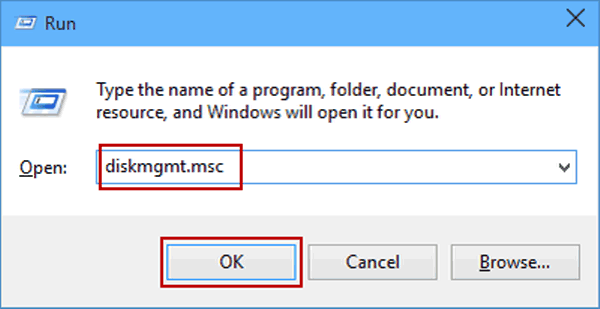
- The Disk Management window will open. Look for your external drive in the list.
- If the drive is listed (even if it shows up as “RAW” or has no assigned letter), you can likely proceed with software-based data recovery.
- If the drive is not listed or appears as “No Media,” it likely has a severe physical or logical failure. In this situation, your only option is to seek professional data recovery services. Do not attempt further steps, as this could cause irreversible damage.
Step 2: Use a Data Recovery Program
An efficient data recovery program is necessary to retrieve files from a corrupted drive. These tools work by scanning the drive’s file system and recovering data that is no longer accessible through standard means.A critical feature to look for in a data recovery program is disk imaging. Disk imaging is a process that creates a sector-by-sector, bit-for-bit copy of your entire hard drive and saves it as a single file (a disk image). By creating a disk image, you can safely work on a virtual copy of the corrupted drive. This prevents further strain on the failing hardware, which could lead to more data loss.
A reliable and user-friendly tool that offers a disk imaging feature is WinfrGUI. Designed for Windows 10 and 11, it simplifies the file recovery process with its easy-to-use interface. WinfrGUI can be used to create a disk image, which you can then scan to recover files from the corrupted external hard drive. This is especially helpful for users who may not have extensive technical knowledge.
Phase 2: Fixing the Corrupted Hard Drive
Once you have successfully recovered your data, you can proceed with attempting to fix a corrupted external hard drive. The following methods range from simple, built-in solutions to more advanced command-line tools.
Method 1: Physical Diagnosis and Cable Check
Start with the simplest solution: a physical check.
- Listen for Sounds: Plug in the drive and listen carefully. Clicking, grinding, or loud spinning sounds are indicators of a mechanical hardware failure. If you hear these, stop and consider the drive unfixable without professional help.
- Check Cables: A simple bad cable can make a drive appear corrupted. Try a new USB cable to connect the drive to your computer.
Method 2: Use Built-in Windows Tools (CHKDSK)
Windows has a powerful, built-in command-line tool called CHKDSK (Check Disk) that can scan for and fix file system errors.
Step 1: Press Windows Key + S to open Windows Search.
Step 2: Type cmd, right-click Command Prompt, and select Run as administrator.
Step 3: In the Command Prompt window, type chkdsk X: /f and press Enter.
chkdsk X: /f
- Replace
Xwith the drive letter of your corrupted external hard drive. - The
/fparameter tells CHKDSK to fix any errors it finds.
Method 3: Repairing Corrupted Partitions with TestDisk
If a simple CHKDSK scan doesn’t work and the drive’s partitions appear as “RAW” or are inaccessible, the partition table itself may be corrupted. A powerful, free, open-source tool called TestDisk can help.
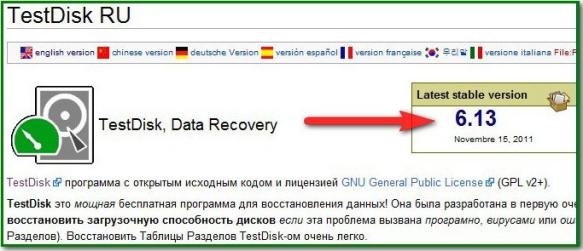
TestDisk is a command-line tool with no graphical user interface. It is extremely powerful but requires careful execution.
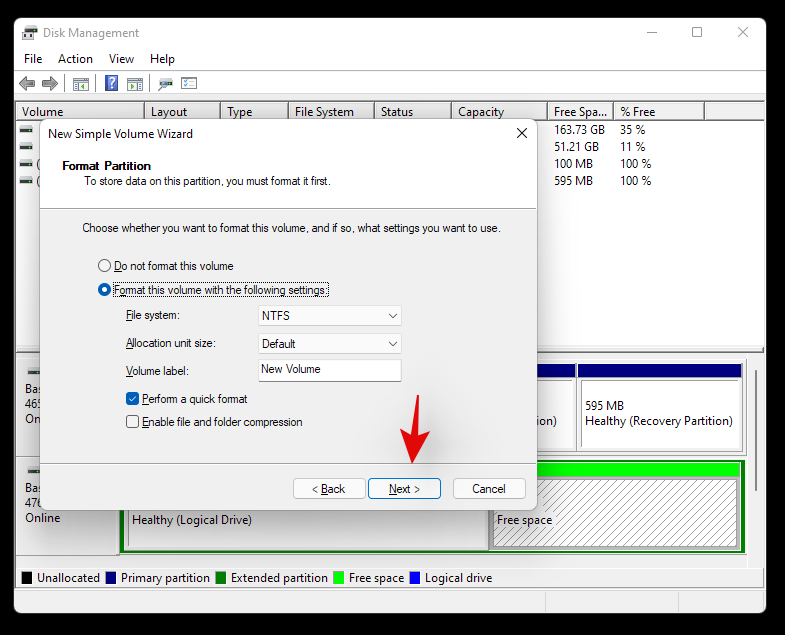
Method 4: The Last Resort – Full Format
If all other repair methods fail, and you have successfully recovered your data, the final option is a full format. A full format erases all data and scans the entire drive for bad sectors, marking them so they are no longer used.
Warning: This will erase everything on the drive. Do not proceed unless you have a backup of your data.
Step 1: Press Windows Key + R and type diskmgmt.msc.
Step 2: Right-click on your external hard drive and select Format….
Step 3: In the Format dialog box, give the volume a new name and select a file system (like NTFS).
Troubleshooting FAQ
Q1: How can I prevent my external hard drive from corrupting in the future?
The best defense against future corruption is proactive maintenance. Get into the habit of maintaining regular backups of your important data, ideally in multiple locations—such as on a second physical drive and a cloud storage service. This ensures that even if one drive fails, your data is safe.
Q2: Is it okay to just unplug my external hard drive when I’m done using it?
No, you should never just unplug your drive. Always use the “Safely Remove Hardware” option in Windows or the Eject command on your operating system. This ensures that all read and write processes are fully completed and the file system is properly dismounted, which is a key step in preventing file system corruption.
Q3: How can I tell if my hard drive is about to fail?
You can check the health of your drive using S.M.A.R.T. (Self-Monitoring, Analysis, and Reporting Technology). Many free third-party tools can provide a S.M.A.R.T. report, which gives early warnings about potential hardware failures by monitoring metrics like temperature, spin-up time, and reallocated sectors.
Q4: My data is extremely important. Should I try to fix the drive myself?
If the data on your external hard drive is vital and irreplaceable, it is strongly recommended that you do not attempt to repair it yourself. Any failed attempt could cause irreversible damage. In these cases, your best and safest option is to seek a professional data recovery service.
Q5: What is the “golden rule” of handling a corrupted hard drive?
The absolute golden rule is to always prioritize data recovery over repair. Before attempting any troubleshooting steps, you must first secure a backup or use a data recovery program to retrieve your important files. This ensures that even if a repair attempt fails, your data remains safe.
Conclusion
Successfully navigating the challenge of a corrupted hard drive is a powerful skill. Remember the golden rule that underlies every step in this guide: always prioritize data recovery first. By using a reliable tool to create a disk image, you’ve ensured your most valuable files are safe before even attempting a repair. Whether you managed to fix the issue using a built-in Windows tool like CHKDSK or you had to resort to a full format, you’ve taken back control. The journey doesn’t end here, though. By practicing a few simple digital habits—like maintaining regular, multiple backups and always properly ejecting your drives—you can safeguard your data against future disasters. Knowing how to fix a corrupted external hard drive is a valuable skill, but prevention is key. Your files are too important to leave to chance; be proactive and stay prepared for anything.
🔗 More Tutorials: