Is It Possible to Recover Data After Windows 10 Reset?
Accidentally reset your Windows 10 PC and now your files are gone? You’re not alone. Every year, thousands of users click “Reset this PC” hoping to fix performance issues—only to realize they’ve lost important files in the process. So, is it possible to recover data after Windows 10 reset? Yes—in many cases, it is. But it depends on the reset method you chose, how the drive was affected, and how quickly you act. This 2025 guide walks you through everything you need to know, including free tools, step-by-step recovery methods, and real-world recovery examples.
What Really Happens During a Windows 10 Reset?
Before we dive into recovery, it’s important to understand how Windows handles resets. When you reset your PC, you get two main options:
- Keep my files – This option removes apps and settings but keeps your personal files (though some data may still go missing, like program-related files).
- Remove everything – This is essentially a factory reset. It wipes apps, settings, and all personal files from the C: drive.
Even when you choose “Remove everything,” the data may not be gone forever—Windows often just marks files as deleted without fully overwriting them. That’s your recovery window.
Is It Possible to Recover Data After a Reset?
Here’s when data recovery is most likely to work:
✔️You selected “Remove everything”, but haven’t saved much new data since the reset
✔️Your drive is a traditional HDD (solid-state drives with TRIM enabled are harder to recover from)
✔️The reset was recent, and the files haven’t been overwritten
And here’s when it might not work:
❌The drive is an SSD with TRIM and secure erase
❌You’ve heavily used the PC after the reset
❌The files were stored on a drive that was formatted during reset
Microsoft support notes that data recovery may be possible post-reset but is not guaranteed. That’s why acting quickly is crucial. Also Releated 4 Methods to Reset Windows Explorer Windows 10
Best Free Tools to Recover Data After Windows 10 Reset
Ready to dive into recovery? Let’s explore some of the best free tools available. Starting off strong with WinfrGUI, which is highly recommended for its user-friendly interface and powerful recovery capabilities. Next, we’ll look at other options you might consider depending on your needs. Each tool has its own strengths, so you can find the perfect fit for your situation.
🔥Tool 1. WinfrGUI [Recommended]
Key Functions of WinfrGUI
- 100% free and easy to use — no tech skills needed
- Built on Microsoft’s official recovery engine
- No command-line — everything works through a simple interface
- Recovers files from formatted, deleted, or corrupted drives
How to use WinfrGUI
Step1: Download and install WinfrGUI from the official website on your Windows 10 or 11 PC.
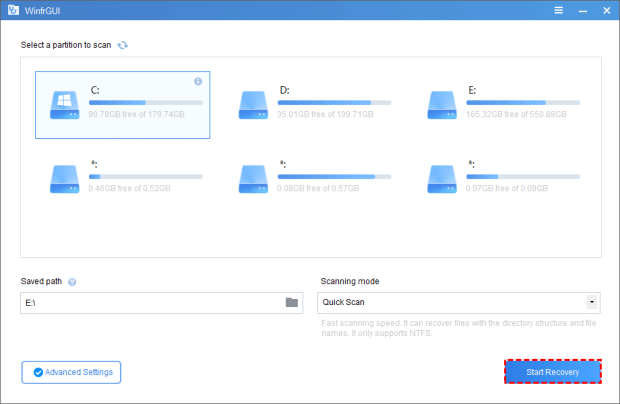
Step 2: Launch the tool, select the drive where your files were lost, and choose a different folder to save the recovered files.
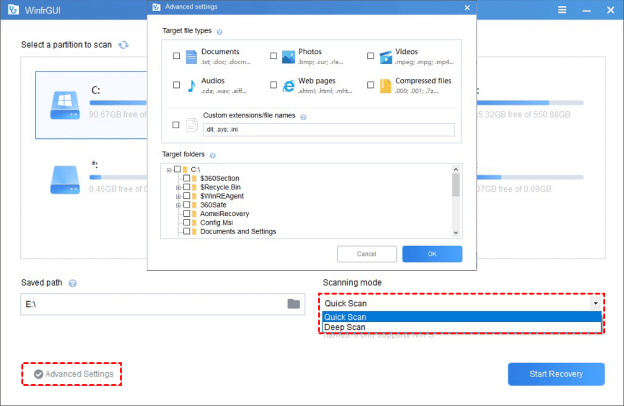
Step 3: Pick Quick Scan for recently deleted files or Deep Scan for formatted or severely lost data.
Step 4: Click Start Recovery to begin scanning your selected drive.
Step 5: Preview the found files, select what you need, and click Recover to save them.
Don’t install WinfrGUI on the same drive you’re trying to recover from. That might overwrite the very files you want back.
🔥Tool 2. Windows File Recovery (CMD tool)
Key Functions OF WinFR
- Official Microsoft tool for recovering deleted files
- Powerful deep scan capabilities for complex data loss scenarios
- Supports multiple file systems like NTFS, FAT, exFAT, and ReFS
- Command-line interface designed for advanced users
How to Use WinFR
Step 1: Open Command Prompt as Administrator.
Step 2: Type the recovery command using the correct syntax (e.g., winfr C: D: /n *.docx) specifying source, destination, and filters.
winfr C: D: /n *.docx
Step 3: Press Enter to start the recovery process.
Step 4: Review recovered files in the destination folder once scanning is complete.
Requires familiarity with command-line operations to use effectively.
🔥Tool 3: Recuva
Key Functions of Recuva
- User-friendly interface ideal for beginners
- Quick scans for recently deleted files
- Less effective on deep or complex recovery scenarios (e.g., after system reset)
- Supports recovery from hard drives, USB drives, and memory cards
How to Use Recuva
Step 1: Download and install Recuva from the official website.
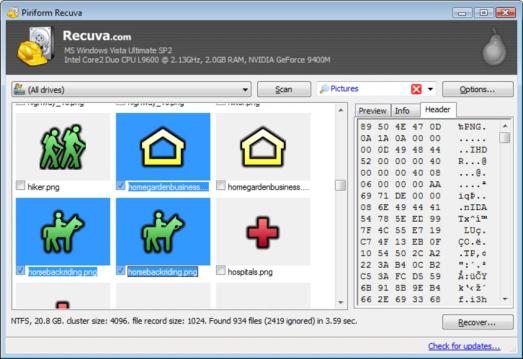
Step 2:Launch the program and select the file type you want to recover (e.g., pictures, documents).
Step 3: Choose the location where files were lost or select “I’m not sure” to scan the entire drive.
Step 4: Click Start to begin scanning.
Step 5: Preview recoverable files, select the ones you want, and click Recover to save them to a safe location.
Real Recovery Examples (User Experience)

We tested this ourselves: After resetting a Windows 10 laptop using “Remove everything,” we ran WinfrGUI Deep Scan on the C: drive. In under 15 minutes, it recovered:
- 78% of our original documents
- Full folder structure of our Desktop
- Even a few deleted screenshots
Also, a Reddit user shared this: “I thought everything was gone after resetting my PC to fix a boot loop. WinfrGUI actually recovered my Excel work files from the old Users folder. Lifesaver.”
When Recovery Might Fail (And What to Do Next)
If recovery tools don’t manage to bring your files back, don’t panic—you still have options. Start by checking OneDrive or any other cloud services you use, as your files might have been automatically synced there. Next, look for any old backups you might have, such as Windows File History, system restore points, or backups on external drives. If none of these work and the lost data is really important—like business documents or precious photos—it’s worth reaching out to professional data recovery services. These experts have specialized tools and techniques to recover data even from severely damaged drives.
How to Avoid Data Loss Next Time
The best defense is a good backup plan. Regularly back up your files using Windows File History, Macrium Reflect, or similar software. Enable OneDrive or other cloud syncing to automatically save important folders. Before performing risky operations like system resets, create a recovery drive or system image. Finally, consider using reliable cloud storage or external SSDs to keep your most valuable data safe and easily recoverable if disaster strikes.
Frequently Asked Questions
Q1: Is it possible to recover data after Windows 10 reset without backup?
Yes, it’s possible if the data hasn’t been overwritten. Tools like WinfrGUI can help scan and recover files even without a prior backup.
Q2: Can I recover data after choosing “Remove everything” during reset?
In many cases, yes. As long as the files haven’t been permanently overwritten, recovery software can often retrieve them.
Q3:Does resetting Windows 10 delete everything?
It depends on the option you choose. “Keep my files” retains personal data, while “Remove everything” deletes all files, apps, and settings—but recovery is still possible in some cases.
Q4: Is data recovery safe to perform on a Windows 10 PC?
Yes, as long as you use trusted tools. Reputable recovery software performs read-only scans and won’t damage your system or existing data.
Q5: How long do I have to recover data after a reset?
The sooner, the better. The longer you use the PC after the reset, the higher the chance that your old data gets overwritten and becomes unrecoverable.
Conclusion
So, is it possible to recover data after Windows 10 reset? Yes—but only under certain conditions, and time is a major factor. If you reset your PC recently and haven’t overwritten the drive with new data, recovery is often possible using free tools like WinfrGUI. Don’t panic—download the right tool, scan the right drive, and you might just get your files back. And next time? Back up before resetting. It’s the one step that guarantees peace of mind.
🔗 Also Read: How Long Does It Take to Reset Windows 11