How To Remove Write Protection on Micro SD Card on Windows

Is your microSD card refusing to let you copy, delete, or edit files? You’re likely facing the common but frustrating issue of write protection. This built-in safeguard is designed to prevent accidental data loss—but when you need to use the card, it can feel like a roadblock. The good news? You’re not out of options. In this guide, we’ll show you exactly how to remove write protection on micro SD card—with clear, step-by-step methods that address both physical lock switches and software-related problems. Whether the issue is due to a locked adapter, corrupted file system, registry settings, or malware, we’ll help you get to the root of it.
Before diving into the fixes, it’s important to understand what causes write protection and how it works. Once you know why your microSD card is locked, you’ll be better prepared to unlock it—and start using your storage again without limits.
Why Is My MicroSD Card Write-protected?
Write protection prevents any changes from being made to your microSD card—it blocks you from adding, editing, or deleting files. This feature is often useful for safeguarding important data, but it can become a hassle when you need to make updates or transfer new files.
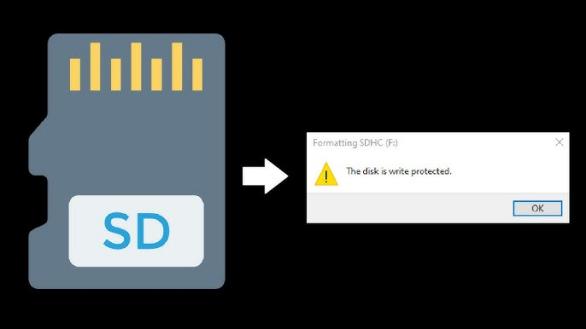
Most SD and microSD cards come with a physical lock switch—usually located on the side of the SD card adapter. If this switch is flipped to the “Lock” position, it enables write protection and you may see error messages like “Memory card locked” or “Cannot write to SD card.”
Even though microSD cards themselves don’t have a switch, they are typically used with an adapter that does. If you’re using one, eject the card and check the adapter’s lock switch first.
If you’re not using an adapter—or if the switch is already off—then the issue likely lies within the microSD card itself, caused by:
- Malware or virus infection
- Corrupted files from third-party apps
- Physical damage
- The card being set to read-only mode
A write-protected microSD card won’t allow you to add, delete, or modify files. While it protects data, it can be frustrating—especially if you’re relying on the card in a critical situation.
8 Methods to Remove Write Protection From a MicroSD Card
Now, let’s explore the common causes and signs of a microSD card being write-protected—and guide you on how to remove write protection on micro SD card. For a quick fix, you can watch our step-by-step video tutorial, or follow the detailed instructions below to regain full access to your card.
Method 1: Check the Physical Lock Switch on the Card or Adapter
Many microSD cards come with an adapter that includes a small lock switch on the side. If that switch is turned on, your card will be write-protected.
Here’s how to check and fix it:
Step 1: Remove the microSD card from your device or card reader.
Step 2: Inspect the adapter (or the card itself if it has a switch): Look for a small plastic switch on the side. It’s usually labeled “Lock” and might be white, gray, or black.
Step 3: Slide the switch upward (toward the connectors): This position typically turns off write protection. Be gentle when moving it—if it feels stuck, don’t force it.
Step 4: Reinsert the card into your computer and try copying or deleting a file to test if the issue is resolved.
Note: If you’re not using an adapter and your card has no switch, skip this method and move on to the next one.
Method 2: Make Sure the Card Isn’t Full
Sometimes, a full microSD card can throw off errors that look like write protection. Windows might prevent new files from being added or stop formatting entirely.
To check available space:
Step 1: Insert the microSD card into your computer.
Step 2: Open File Explorer and click on “This PC” or “My Computer.”
Step 3: Find your microSD card under the “Devices and Drives” section.
Step 4: Look at the storage bar just beneath the drive icon. If the bar is red or nearly full, your card may simply not have enough space.
Step 5: Right-click the card and choose “Properties” to view exact details about used and available space.
Note: If space is low, try deleting unwanted files or move them to your PC or another storage device. After freeing up space, try copying or formatting files again.
Method 3: Format MicroSD card using formatting tool
Formatting a microSD card restores factory settings, fixes file system issues, and removes write protection software. Formatting erases all card data. After formatting, WinfrGUI can retrieve your data. For Windows microSD card formatting, follow these instructions:
- A card reader connects a microSD card to your computer.
- Launch “This PC” on your desktop.
- Look for microSD. Select “Formats” from right-click.
- Choose exFAT for cards above 64 GB, FAT32 or NTFS for cards under 32 GB.
- Click “Start” to format.
WinfrGUI can restore data from formatted microSD cards. A reliable data recovery solution for memory cards, WinfrGUI supports several brands. It recovers data after deletion, formatting, card damage, malware assaults, and more.
To use WinfrGUI for data recovery:
Step 1: Download WinfrGUI and complete the installation on your PC.
Step 2: Connect a microSD card to your PC using a memory slot or an external card reader.
Step 3: Open WinfrGUI and go to “Hard Drive and Location” and then select your microSD card.
Step 4: The program scans the formatted microSD card and displays the received files.
Step 5: Select and view the file you want to recover, then click “Start Recover”.
By following these steps, you can formatt your microSD card efficiently and recover important data using WinfrGUI.
Method 4: Use DiskPart to Remove Write Protection
DiskPart is a powerful command-line tool in Windows that lets you manage disks, partitions, and volumes—including microSD cards. If your card is stuck in read-only mode, this tool can help remove write protection on a micro sd card.
Here’s how to do it:
Step 1: Press Win + S, type cmd, right-click Command Prompt, and choose Run as administrator.
Step 2: In the Command Prompt window, type the following command and press Enter: diskpart
Step 3: After DiskPart launches, type: list disk This will show all storage devices connected to your PC.
Step 4: Identify your microSD card based on its size. Then type: select disk X Replace X with the number of your microSD card.
Step 5: Now type: attributes disk clear readonly This command removes the write protection attribute.
Once done, type exit to close DiskPart.
Note: Be very careful to select the correct disk. Using DiskPart incorrectly can affect other drives.
Method 5: Use the Registry Editor (Regedit)
If DiskPart didn’t work, you can try editing the Windows registry to disable write protection at the system level.
Important: Editing the registry can affect system stability. Be sure to back up the registry before making changes.
Steps:
Step 1: Press Win + R, type regedit, and hit Enter to open the Registry Editor.
Step 2: Find the following path: HKEY_LOCAL_MACHINE\SYSTEM\CurrentControlSet\Control
Step 3: Look for a folder named StorageDevicePolicies. If it doesn’t exist, right-click Control > New > Key, and name it StorageDevicePolicies.
Step 4: Inside that folder, double-click the entry named WriteProtect.
- If you don’t see one, right-click and select New > DWORD (32-bit) Value, and name it
WriteProtect.
Step 5: Set the Value data to 0 and click OK.
Step 6: Close the Registry Editor and restart your PC.
Method 6: Use CHKDSK to Repair a Corrupted microSD Card
Sometimes, the write protection message appears because your microSD card is damaged or has file system errors. The CHKDSK tool can scan and repair these errors.
How to run CHKDSK:
Step 1: Press Win + S, type cmd, right-click Command Prompt, and choose Run as administrator.
Step 2: In the window, type: chkdsk H: /f /r Replace H: with the correct drive letter of your microSD card.
Step 3: Press Enter and let Windows scan and fix the card. This may take several minutes.
Note: Don’t interrupt the process. Once complete, recheck if the write protection is removed.
Method 7: Use Decryption Software (For Encrypted Cards)
If your microSD card is encrypted—intentionally or through corporate policies—it may appear write-protected. You’ll need to decrypt it using the same software that was used for encryption.
Steps:
Step 1: Insert the encrypted card into the device or card reader.
Step 2: Open the encryption software (such as BitLocker, VeraCrypt, or a phone’s native tool).
Step 3: Enter the correct password or key to decrypt the card.
Step 4: Once decrypted, eject and reinsert the card. Check if write protection is removed.
If your SD card is encrypted or locked, you can use encryption software to remove writing protection. This method is ideal for cards that have been encrypsed or blocked due to security measures.
Method 8: Scan and Remove Malware or Viruses
In rare cases, malware can modify system settings or write attributes on storage devices, effectively locking them.
Here’s what you can do:
Step 1: Run a full system scan using Windows Defender or trusted antivirus software.
Step 2: Specifically scan your microSD card after inserting it.
Step 3: Quarantine or remove any detected threats.
Step 4: After the scan, safely eject and reinsert the card. Try formatting or copying files again.
What If You Still Can’t Remove Write Protection?
If you’ve tried all the methods above and your microSD card is still write-protected, it’s possible the card itself is permanently damaged. This can happen if:
- The card has reached its read/write lifespan (common with older or low-quality cards).
- There’s a hardware failure triggering automatic write protection as a failsafe.
- The file system is irreparably corrupted.
In such cases, the card enters permanent write-protection mode, which unfortunately cannot be reversed. Your best move is to back up any accessible data immediately and replace the card with a new one.
Special Case: Card Locked by Device Settings
Some devices—like Android phones—may lock the microSD card when it’s configured as internal storage. This can make it unreadable or unmodifiable on other devices.
To resolve this:
- Insert the card back into the original device where it was set as internal storage.
- Use that device to format the card, which may remove the write protection.
- Don’t forget to back up your data first, as formatting will erase everything.
Alternatively, try formatting the card with a non-PC device such as a digital camera or action cam. These devices sometimes succeed in formatting cards that Windows cannot.
Final Thoughts
Dealing with a write-protected microSD card can be frustrating, but it’s not always permanent. From checking the physical lock switch and available storage to using tools like DiskPart, Regedit, or CHKDSK, there are several effective ways to regain full access to your card. This guide has walked you through every major method on how to remove write protection on micro SD card—whether caused by hardware switches, software settings, encryption, or file system errors.
However, if none of the solutions work, your card may be damaged or has entered permanent write-protection mode due to wear and tear. In that case, back up any accessible data immediately and consider replacing the card.
Understanding the root cause is key to fixing the issue. With a little patience and the right method, you can usually restore your microSD card to full functionality and take back control of your data.
🔗 Also Read: How to Restore Data from SD Card: A Step-by-Step Guide